
High Dynamic Range (HDR) photography is a system for recording more detail in shadows and highlights than standard 24-bit photography is designed to handle. The greater the range between the brightest and darkest points in a photo, the more it can benefit from HDR.

Not all versions of HDR produce equally good results, and not every iPhone, iPad, or iPod touch supports HDR. Fortunately, Apple does an above average job applying HDR, so if your device supports it, you’ll probably be very happy with the results.
The Problem with Standard Digital Images
The human eye can accommodate a great range of illumination, from 1000:1 to 15,000:1. Color negative film can handle a range of about 8000:1. High-end digital cameras can cover a huge range up to 28,500:1. But your standard 24-bit image sensor only covers a range of 256:1. Because of this, highlights can be washed out and dark areas show little or no detail.
Even if the image sensor has a greater dynamic range – perhaps 1024:1 or over 4096:1 – it reduces the image to 24-bit color when saving a JPEG. The only way it can save images with greater dynamic range is by saving “raw” image files with 10, 12, 14, or even 16 bits per color channel. Then it’s up to you how you will process the image in Photoshop or some other app.
How HDR Works
Unless your camera has a sensor that support more than 8 bits per color channel, it will have to record multiple images – one with normal 24-bit color, one specifically for highlights, and another for shadows and other dark areas (sometimes five or more images!). The more quickly it can do this, the less problems you may have with moving objects in your HDR photos.
Whether combining multiple exposures or working with a sensor that supports more than 8 bits per color channel, the important step is tone mapping – deciding how to display the extended dynamic range as a 24-bit color image. For instance, if the HDR function takes three pictures at 2 stops overexposed, 2 stops underexposed, and normal exposure, it may be working with 12 bits of data per color channel, but the final JPEG image must use only 8 bits per color channel.
An Example
I have a phone holder on the dashboard of my car, one I bought at Aldi. I love the way it extends beyond the dash, making it easier to reach my iPhone.
I have customized it as parts have failed. First it was the plastic disk on the dash that the suction cup attached to. Then the suction cup developed a leak, so I dug out some heavy duty Velcro, removed the suction cup and plastic disk, and used the Velcro to attach the device to my dash. It hasn’t moved since.
That’s what’s in my sample photos, along with a Hawaiian girl air freshener my wife gave me years ago. The image on the left is standard, on the right is HDR shot on my iPhone 4S.
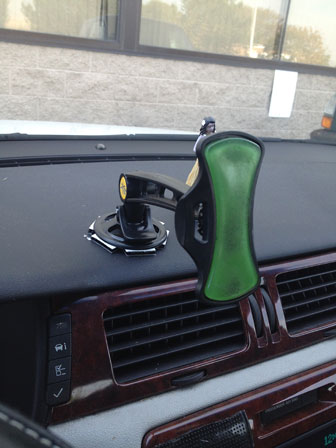
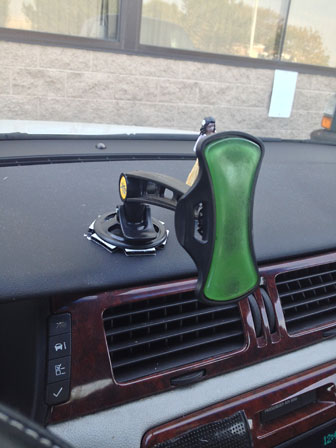
Note how much more detail the photo on the right has – around the vents, the trees and sky reflected in the window, and so on. It looks perfectly natural, thanks to Apple’s tone mapping technique, while the standard photo seems contrasty and lacking in highlight and shadow detail by comparison.
Almost every time I shoot both standard and HDR photos, it is the HDR image that I keep. Not always, but far more often than not.
Using HDR on Your iDevice
HDR does not work with flash, panoramas, or video. It is only available for standard photography, and in some cases it will create a worse image than standard photography.
Models released prior to the iPhone 4S do not have built-in HDR support, but some third party apps can give your older iDevice HDR. (HDR came to the iPad with the iPad mini 2 and iPad Air. The 5G iPod touch was the first iPod touch with HDR.) Some are even free. Go to the App Store, type HDR into the search field, and give it a try.


The iPhone 4S was the first iPhone to offer HDR, and by default it is not enabled. You can turn it on in the Camera app by touching the area marked HDR at the top of the screen (image above left). When the strikethrough text goes away (above right), you’re ready to go. The iPhone 4S, 5, and 5C will save two images – standard and HDR. It is up to you to go through your photo library and delete the one you don’t want to keep.
The iPad 2 and 4G iPod touch also give you the option of shooting HDR photos.
With iOS 7.1 or later, the iPhone 5S defaults to automatically choosing between HDR on and off for each photo. This also applies to the iPhone 6 family.
If you have an iPhone 4S, 5, or 5C, you owe it to yourself to check out the HDR option. I think you’ll find yourself turning it on whenever possible after using it a few times.
Keywords: #hdr #highdynamicrange #hdriphone
Short link: http://goo.gl/o8vIgQ
searchword: iphonehdr
