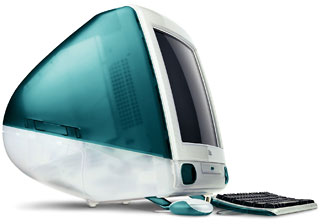
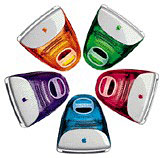
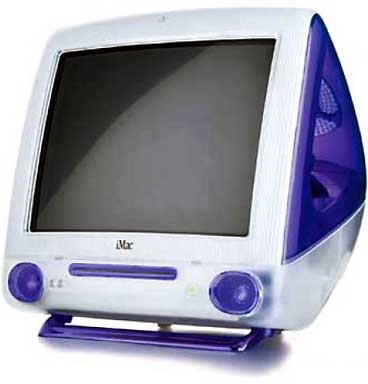
I’ve been carrying on an extended email conversation with Bill Brown for months. Bill is more-or-less the IT guy for an intense volunteer Mac program at a senior center. Certainly a confirmed Mac lover, he has made some interesting discoveries and developed some interesting techniques for refurbishing, repairing, and updating older Macs, particularly G3 iMacs.
With Tiger and a partial load of iLife, these early iMacs make decent trainer iMacs for bringing seniors into a totally Mac online experience
Partition the Hard Drive?
 The tray-loading iMacs shipped with 4-6 GB hard drives – slow, low-cost hard drives that have many years on them by now. Hard drives that may not be big enough for Mac OS X 10.4 Tiger. Drives that you may want to replace “just because”, even if they still work.
 G3 Macs can support drives as big as 128 GB with no trouble, but unless that Mac has PCI expansion slots, there’s no practical way to overcome this 128 GB limit (the Intech SpeedTools mentioned in our article on big hard drives in older Macs costs $60, more than these old iMacs are worth). What Bill likes to do is scrounge up smaller, generally faster replacement hard drives, usually in the 10-15 GB range, and put those in the old tray-loading iMacs.
A Glitch with OS 9 and OS X
One issue the tray-loading iMacs, Beige G3 Power Macs, WallStreet PowerBooks, and Clamshell iBooks share is a transitional hardware architecture that runs into problems with IDE/UltraATA drives on the built-in drive bus under Mac OS 9 and OS X. If the hard drive is larger than 8 GB and not partitioned, you may never be able to boot into OS X and may also have problems with the classic Mac OS. Also, if the hard drive is partitioned and the first partition is bigger than 8 GB, same deal.
Mac OS X must be installed on an IDE drive smaller than 8 GB or on the first partition of an IDE drive larger than 8 GB – and that partition must be smaller than 8 GB. (Mac OS 9 needn’t be on the first partition, but it must be within the first 8 GB of drive space.) Because a gigabyte is sometimes one billion bytes and sometimes 2^30 bytes (that’s 1,073,741,824 for the binary challenged), we’ve recommended that the partition be no larger than 7.45 GB to play it safe. Bill has found that our number is too high: Partitioning at 7.45 GB or even 7.38 GB results in unbootable OS X installations. I’ve found the same thing when working with a Beige G3. (This applies only to IDE drives on the built-in bus. It’s not an issue for SCSI drives or IDE drives connected to a PCI controller card – neither of which is an option for the iMac.)
Bill’s solution, which I wholeheartedly support, is to dispense with trying to create the largest possible boot partition and just make it 7 GB (or perhaps a tiny bit larger). Even if you’re not running OS X yet, it’s a good idea to partition the drive so that if/when you make the move, you’ll be able to install OS X without repartitioning the drive and wiping out all of its contents.
Bill’s solution to downsize the hard drive is driven by a desire to show only one hard drive on the desktop. You can partition the hard drive into two (or more) partitions to get the use of all the hard drive you have. Just make sure the first partition is partitioned at 7 GB so the transitional architecture of these iMacs will accept it as a startup partition.
Installing Mac OS X
You can install the classic Mac OS and Mac OS X through version 10.3 from CD, which is the only kind of optical drive Apple ever built into tray-loading iMacs and the 350 MHz slot-loading iMac. Mac OS X 10.4 Tiger usually ships on DVD, although it was possible to order it from Apple on CD.
One of Bill’s tricks is to do the entire Mac OS installation on another computer, one that supports two internal hard drives. You can use a Blue & White Power Mac G3 or any Power Mac G4, as the drop down door makes access to drives fast and easy. Here are the steps:
- Create a master disk with the Classic Mac OS and whatever version of OS X you’ll be putting on the iMac, Beige G3, etc. Run all available updates. Install any software you’ll want on all of your Macs (iTunes, Firefox or Camino, Adium X, etc.). Use Delocalizer to remove languages you’ll never use and free up some disk space.
- Make a read-only disk image from this drive on your setup Mac. It doesn’t have to be any larger than the amount of space usedon your master disk.
- Turn off the computer, remove the master disk, install the drive you’ll be putting in your iMac, Beige G3, or whatever. If the receiver drive is bigger than 8 GB and may be used in a tray-loading iMac or beige G3, use Disk Utility to create two partitions with the first one about 7.0 GB in size. (Or, to avoid confusing new users with multiple drive icons, just make a single 7 GB partition.)
- Use Disk Utility, Carbon Copy Cloner, or SuperDuper (SuperDuper isn’t fully compatible with Leopard at present, but Bill reports that it works just fine for making disk copies) to copy the contents of your disk image to the receiver drive. (Bill prefers to work drive-to-drive rather than using a disk image. I like using a read-only disk image because it prevents anyone from making changes to your master. Whatever works for you is fine.)
- Shut down your Mac, remove the receive drive, and put it in the iMac (or whatever) you want to use it in. Assuming your firmware is up to date (covered below), it should boot just fine.
Another option is to use an external FireWire enclosure for formatting/partitioning the receiver drive and cloning your disk or disk image to it.
Using this process, you can create a bootable OS X drive for a tray-loading iMac, Beige G3, or WallStreet PowerBook without ever touching XPostFacto. If you support a lot of Macs or do a lot of refurb work, as Bill does, it’s worth setting up a “cloning mule” to facilitate the process.
Update the Firmware
 The most important step in upgrading tray-loading iMacs, Blue & White G3 Power Macs (especially the Blue & White G3), and a few other Macs of that period is making sure you update the firmware before you install any software updates or new versions of the Mac OS.
You can determine what version of firmware is installed by choosing About This Mac under the Apple menu in OS X and then clicking the More Info button.
You have to be running the Classic Mac OS – version 8.5 through 9.2.2 depending on the update – to update firmware, so be sure to read the Read Me before you try to boot into a version of the Mac OS that isn’t supported by the currently installed firmware. Bill keeps a hard drive with Mac OS 8.6 handy for this.
You can’t do a firmware update from OS X, which is one more reason to install the Classic Mac OS even if you don’t plan to use it for anything but firmware updates. (You can’t boot from a CD to do a firmware update; you have to boot from a hard drive.)
Firmware Versions and Links
- Tray-loading iMacs: iMac Firmware Update 1.2
- Slot-loading iMacs: iMac Firmware Update 4.1.9 (required for Mac OS X 10.2 or later)
- Clamshell iBooks: iBook Firmware Update 4.1.7
- Pismo PowerBook: PowerBook Firmware Update 4.1.8
- Blue & White Power Mac G3: Firmware Update 1.1
- Blue & White Power Mac G3 with Ultra SCSI: Firmware Update 1.2
Be sure the firmware update is correctly installed before upgrading your Mac OS installation, as you can otherwise end up with a Mac that won’t boot with the OS you’ve just installed.
Another tip from Bill: If you do end up with an unbootable tray-loading iMac and have access to another iMac that’s working just fine with the version of the Mac OS you installed, swap out the little daughter card CPU modules. That’s where the CPU, memory, and that pesky firmware are stored.
You will still need to update the firmware on the module you just removed….
Thanks for the Memory
I’ve learned a lot from Bill. For instance, some tray-loading iMacs think they have 32 MB memory modules installed when running Mac OS 9, but when booted into any version of OS X, the recognize them for what they are: 64 MB modules. So any time he sees a Rev. A-D iMac reporting 32 MB modules, he boots into OS X to see if they’re real 32 MB cards or misreported 64 MB ones.
He’s also the only person I’ve ever heard from who has managed to get 512 MB RAM cards working in tray-loading iMacs. He writes, “We have found two of these early iMacs, likely 333s, that would accept and report a 512 MB card. We don’t hold our breath looking for these rarities. We have no idea if these two iMacs will accept two 512s.” Bill isn’t 100% certain, but he’s pretty sure that the successful 512 MB modules were “CL2” memory; when he tried with “CL3” RAM, it didn’t work. He says, “Being marked as PC-100 vs PC-133, or 222, 322, or 333 was no issue. CL2 or CL3 was.”
Bill also reports almost universal success with 256 MB modules in tray-loading iMacs. I’ve been one-for-two with a pair of 333 MHz iMacs, and many others have less luck than Bill. He says it may be due to memory issues, such as the 256 MB CL3 module that every iMac sees as having only 128 MB. But if the memory is marked CL2, it will work. If you’ve installed the latest firmware update, you may have as much luck as he does. If not, you should be able to get 256 MB working in the larger RAM slot, 128 MB in the smaller one for a total of 384 MB. Bill reports 100% success with 256 MB CL2 memory.
Because Bill has had so many iMacs with psuedo-32 MB modules that turned out to be 64 MB, his typical setup is 320 MB – 64 MB in the small slot, 256 MB in the big one. You can pick up 256 MB modules for under $32 nowadays, 128 MB for under $15, and 64 MB for as little as $9, so memory upgrades are pretty cheap.
While we suggest at least 512 MB for good Tiger performance, Bill says that an old iMac with 320 MB of RAM works decently with Tiger.
Bill says, “We successfully run Tiger on as little as 160 MB of real memory. However, you are very deep into virtual memory. The performance hit is enormous. At 320 MB of real memory, performance is quite reasonable for our users. Even online performance is reasonable.”
Remember that a tray-loader G3 iMac cannot only run older versions of Garage Band, iMovie, and iChat. Newer versions require a G4. Bill’s Tiger software load for tray-loaders uses iTunes and iPhoto from the iLife ’05 suite. The very latest iTunes will still work here. iPhoto from the iLife ’06 suite will not; it requires a G4. If you want iMovie, you may want to try an older version from the Panther or Jaguar era.
Affordable Fast WiFi for Older Macs
Finally, you’ll want to network your old iMacs, iBooks, G3 PowerBooks, etc. Bill just loved the since-discontinued Edimax EW-7718Un 802.11n USB Adapter, and OWC sells its replacement, the EW-711Un, for just $12.99 [April 2014]. (You may save a few bucks by shopping around – Amazon.com has it for $9.99 – but why not support a company that loves old Macs as much as you do? And used AirPort cards often sell for more than this dongle does!)
These older Macs have no built-in AirPort support, but the Edimax adapter gives you better WiFi than Apple had in the old days. It’s the same 802.11n found in today’s Macs, which means great throughput and more tenacious, longer reaching connections to 802.11g and 802.11n routers. And Bill reports that it works just fine in the Apple USB keyboard’s USB port, which is nice since the tray-loading iMacs only have two USB 1.1 ports. (For the beige G3, pick up an inexpensive 4- or 5-port USB 2.0 PCI card with Mac support. You’ll use it for the WiFi dongle, modern printers and scanners, current iPods, and who knows what else.)
Sure, you won’t get full 802.11n throughput using a USB 1.1 port, but you will get the maximum possible throughput your USB port is capable of supporting.
I hope these tips will help you bring some older Macs into the Tiger Age. And if you have an early iMac or a 256 MB CL2 SoDIMM memory card to spare, Bill could put it to good use in his senior center Mac program.
Keywords: #osxtiger #g3macs
Short link: http://goo.gl/1MwdYj
searchword: g3inthetigerage

