
It’s been almost two years since I last wrote for Low End Mac, but my love of all things Apple hasn’t waned. Most recently, I’ve become the proud owner of an iPhone 3G, which may finally stop me hunting for an elusive MessagePad 2100 on eBay.
What did interrupt my Classic Mac activities was a number of hard drive issues that required multiple reinstalls of various versions of the Mac OS on different machines. It was more of a hassle than a problem, but it became a serious sticking point once I upgraded to Leopard.
Making Boot Disks
 In order to keep our classic Macs alive, we need ready access to boot disks and install disks so that when the need arises they can be recovered. Apple very kindly makes various versions available for free – most notably System 6.0.8 and 7.5.3. You can also find useful items in their archive, such as the 7.5 Network access disk, which allows you to boot into System 7 from a floppy.
Depending on the file format, preparing these boot disk follows various routes, but most of them rely heavily on one of the following three items:
- Disk Copy 6 or Disk Copy 4
- .sea self extracting archives
- .smi self mounting images – often split across multiple files
And herein lies the problem: Multiple .smi files need to be copied to one location – in other words, you should be able to boot the Mac you want to install them on. So before installing the Mac OS from .smi files, you need to make a boot disk using one of the other two methods.
But both Disk Copy and .sea files require the Classic Mac OS. Earlier this year, I found myself with three old Macs, none of which would boot, and a G5 with Mac OS X 10.5 Leopard installed that was seemingly useless for this task without the Classic environment.
Making Boot Disks Using dd
All was not lost due to one simple fact – Mac OS X is a Unix variant, and therefore it has all of the standard Unix tools available. One of these can be used to make boot disks. The dd command can be used to duplicate any disk, and it can be used to take a disk image file and write it to a floppy disk byte by byte. The format of the command’s usage is fairly straightforward:
dd if=INPUTFILE of=OUTPUTFILE
Where you would replace INPUTFILE with the filename (and path) of the disk image and OUTPUTFILE needs to point to the destination (a floppy disk in our case). At least, it should be that simple, but it isn’t quite. Some extra parameters are needed when dealing with Mac Disk Copy images, because there is some extra information in the header of these files that we want to strip out. The command for creating a Mac boot disk is:
dd if=INPUTFILE of=OUTPUTFILE bs=84 skip=1
Complications of OS X
This seems simple enough, but you need to know a bit of Unix to get the paths correct. For example, if the image is system7.img and it’s in your home folder, you need to replace INPUTFILE with ~/system7.img. But how do you point OUTPUTFILE to the floppy disk? When Mac OS X mounts a floppy disk called DISKNAME, it creates a location for it at /Volumes/DISKNAME, but if you try to use this with the dd command, you will get an error.
If you have a floppy disk mounted, go to Terminal and type the command df -h. You’ll see your disk listed, but the field of interest is the first column – it will probably say something like /dev/disk1 – and that is the correct value for OUTPUTFILE.
But you’ll hit problems again. If you try to run this, you’ll be told that the device is busy. The trick is to unmount the contents of the floppy disk whilst you still have the disk itself mounted. Sounds confusing? It is – but this is the magic step which seems to be missed from many discussions about using dd.
A Step by Step Guide
After that little tour of the dd command on OS X, here are the step by step instructions for creating a bootable floppy disk from OS X. As ever when using the command line, be careful what you type – it’s all too easy to make mistakes via a typo!
- First up, you need to locate a disk image. If it’s compressed within a .bin or a .hqx file, you’ll need to expand it first (just double click in the Finder). If it’s inside a .smi, you’ll need to mount that disk image first and then work with the actual .img file inside. If it’s in a .sea file, you’ll have to expand it using Stuffit, because Leopard will not open .sea files.
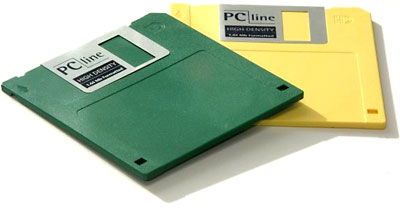
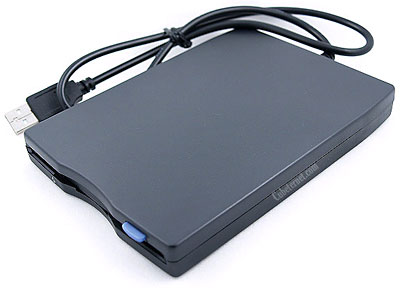
 Next, connect up your USB floppy drive and insert the high density floppy disk you are going to turn into a boot disk (none of the USB floppy drives support the Mac’s old 400K and 800K formats, only the 1.4 MB one). This process will erase anything that is already on the floppy, so be warned!
- Open Disk Utility (it’s in the Utilities folder, which is in the Applications folder). You’ll see the floppy drive on the left hand pane in Disk Utility. Click on the lower level (the piece whose name matches the icon mounted on the desktop) of the floppy and choose Unmount from the toolbar. Once this is done, the name of the volume will be greyed out.
- Select the top level of the floppy disk and click the Info button on the toolbar. Make a note of the ‘disk identifier’, which will be something like ‘disk1’. This determines what you will enter for OUTPUTFILE (if it says disk2, you’ll enter /dev/disk2).
- Quit Disk Utility and launch Terminal.
- At the command line, enter dd if=INPUTFILE of=OUTPUTFILE bs=84 skip=1 and hit Enter. If you are using a file called system7.img and it’s in a folder called Classic within your home folder, and your disk identifier from step 4 was ‘disk2’, then you’ll enter dd if=~/Classic/system7.img of=/dev/disk2 bs=84 skip=1
- Wait for the process to complete in Terminal, then eject the floppy disk and use it to start your old Mac.
The process is a bit fiddly, but you soon get used to it. What it means is that Mac users are no longer reliant on having two working classic Macs at home (so one can be used to help recover the other) – any OS X machine with a USB floppy drive should be up to the task. I’ve managed to Boot Macs into System 6 and 7 this way – and I’ve even made an A/UX boot disk . . . but that’s another article for another day.
Keywords: #macbootfloppies #macfloppiesinosx #classicmacos
Short link: http://goo.gl/EAnufG
searchword: macbootfloppies
