Publisher’s note: This article, originally written by Ed Eubanks Jr and published on 2007.03.12, has been the most popular article in the history of Low End Mac with well over 2 million hits. It was written toward the end of the Mac OS X 10.4 Tiger era and has been updated since its first publication. Most of these tips apply to Intel-based Macs running Tiger, but we specifically address G3, G4, and G5 PowerPC Macs, since Intel Mac users really should be using something newer than Tiger by now (we love OS X 10.6 Snow Leopard, the last version before OS X became heavily influenced by iOS). We hope to add similar articles covering later versions of OS X.
- Follow Ed Eubanks Jr on Twitter.
- If you find Ed’s articles helpful, please consider making a donation to his tip jar.
Every now and then, my Macs begin to feel a little sluggish. There are many potential reasons why: I tend to run 8 to 10 applications all the time – and sometimes push 15 or more. This alone will bog down any Mac.
At other times, I realize that it’s been weeks since I restarted the computer, and a simple restart will solve a lot of these woes.
When those don’t speed things up, I’ve found a number of things I can do to encourage my Macs back to their youthful snappiness. Here are a few tips I’ve found for restoring my Macs to full speed without spending a penny.
Publisher’s note: None of these tips will improve your Mac’s performance as much as more system memory (RAM), a faster hard drive, or a CPU upgrade, which isn’t always possible. They mostly have to do with reducing memory use by limiting the number of active processes and freeing up drive space, since a too full drive (especially past the 90% mark) can slow down your Mac. These are tips for getting the most out of the Mac you currently have without investing in hardware upgrades. dk
1. Clean Out Startup Items
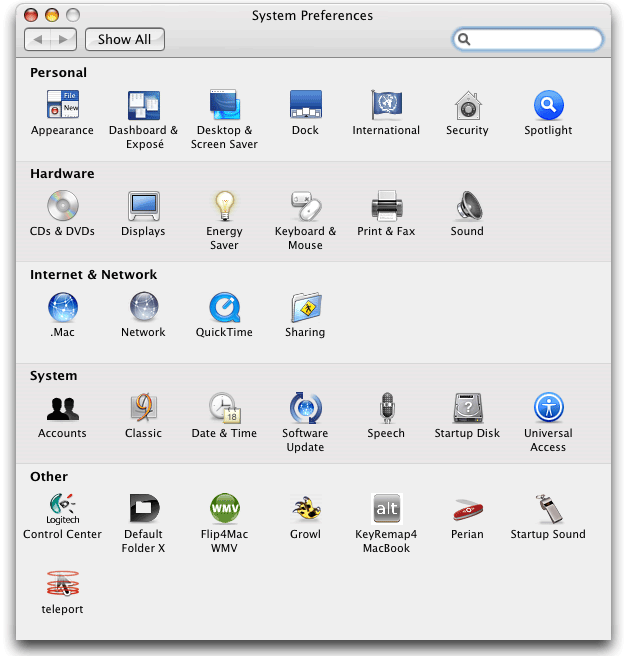
Some applications automatically (or when asked) set themselves as a Login Item, which causes them to open at every restart or login. You can find out what is in your startup items list by navigating to Apple Menu > System Preferences > Accounts > Login Items. You may be surprised at how many there are.
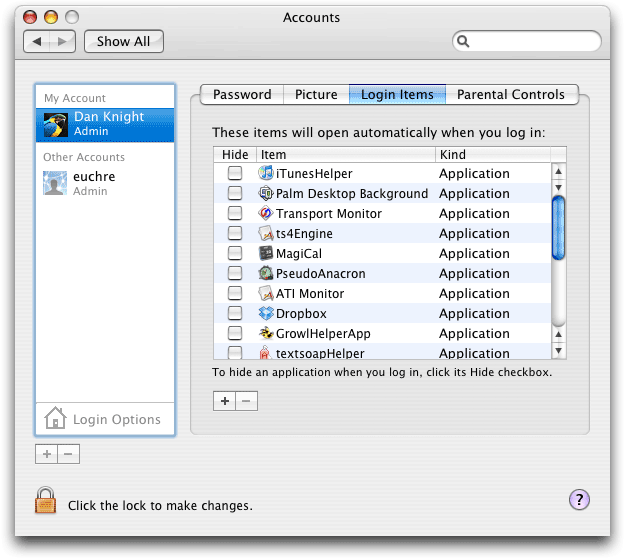
To remove them, simply select the item by clicking on its name and then hit the “minus” button at the bottom of the list. However, be sure that you know what you’re removing; otherwise you may kill some critical function for the next time you restart.
2. Turn Off Universal Access, Bluetooth, Speech Recognition, and Internet Sharing if You Don’t Use Them
While System Preferences is open, take a look at a few other things. Apple has generously included a number of very useful features as preferences. Some, however, may not be useful to you, such as Universal Access (which offers help for visually and hearing impaired users) or Bluetooth (which allows certain devices to be used wirelessly). If you don’t use these features, verify that they are turned off. This will save you some valuable RAM and processor resources. If you’re using a PowerBook or iBook, this may also improve battery life.
3. Clean Out ‘Other’ System Preferences
Don’t close System Preferences yet! Take a peek in the bottom section of your System Preferences window, labeled Other. How many items are down there? Do you know what they do? Do you use what they do?
If there is a Preference Pane that you don’t use or that you use only occasionally, disable it (either turn it “off” within the Preference Pane itself or remove it from the folder “~/Library/PreferencePanes”).
4. Check Out What ‘Build’ Your Software Is
If you’re running an Intel Mac, some of your software may be running under the Rosetta PowerPC translator, which allows software programs built for a PowerPC processor to run on an Intel Mac. Rosetta is surprisingly efficient, but don’t use it if you don’t have to! There may be a patch for your favorite application that will upgrade it to a “universal build”. By making sure you’re running the latest version, you can be confident you’re not using Rosetta in vain (a utility like the App Update widget will help with this).
5. Clean Out Unnecessary Code
Your Mac is either running a PowerPC or Intel processor. You don’t have to understand what this means, but you should know that, with both being options, most recent software comes programmed for both. But you don’t need optimization for both – you only need optimization for your computer. Fortunately, there are utilities like XSlimmer (and Monolingual – more on this in a minute) that will strip out unnecessary code in your software. This not only helps the applications run faster; it also saves hard drive space (sometimes a lot of it). Xslimmer maintains a downloadable list of software that should not be modified, and it’s only available for Intel Macs.
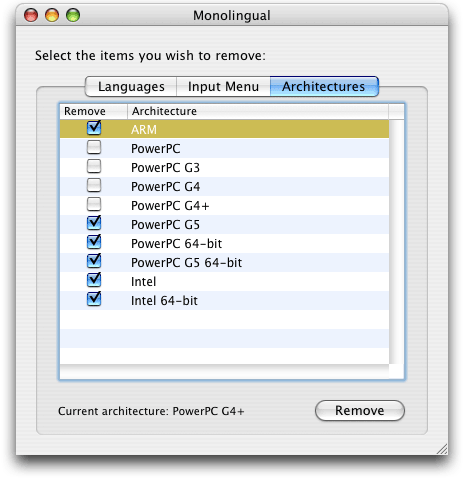
Monolingual lets you remove unwanted chip architectures.
Publisher’s note: If you’re using a PowerPC Mac and anticipate migrating to Intel, you might want to defer “slimming” your programs until after you’ve made the switch. Otherwise all the programs you’ve slimmed for PowerPC will be running under Rosetta on your Intel Mac – unless you take the time to do a fresh installation.
We’ve heard horror stories of early versions of XSlimmer eviscerating Rosetta, so if you use it on an Intel Mac, be sure you don’t strip the System frameworks.
6. Get Rid of Languages and Translations You Won’t Use
Apple is very considerate in providing localizations for many, many languages. But chances are you aren’t using the Catalan, Farsi, or Klingon language localizations on your Mac. And even if you are, you can strip out the other ones you aren’t using and gain more efficiency and drive space using a utility like Monolingual (version 1.3.9 is the last version to support OS X 10.4 Tiger).
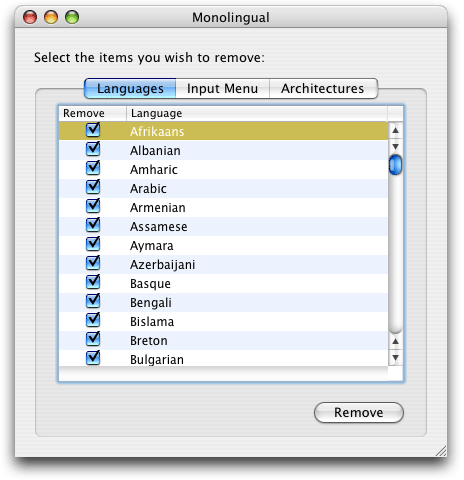
By the way, the latest version of Monolingual will also strip out unnecessary chip architectures from your system – but not your applications – so it also performs a function similar to XSlimmer, yet different.
7. Cool Off
The new MacBooks got a bad rap at first for running very hot; the truth is, every Mac will run more efficiently with a cooler processor. Even though Apple has largely fixed cooling issue in MacBooks, I use a utility called Fan Control on mine, which allows me to change the threshold for when my MacBook’s fan turns on and off. This allows me to keep my ‘Book running cooler, which maximizes performance (though it does shorten battery life a little bit).
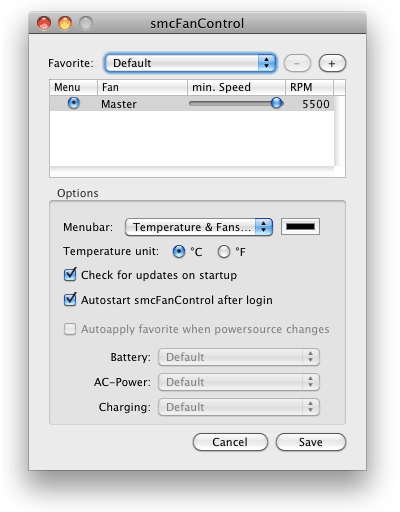
Publisher’s note: We use smcFanControl on the Mac mini running OS X 10.6 Snow Leopard at Low End Mac headquarters. Modern desktops can also run hot and thus will benefit from fan control software as well. dk
8. Evaluate Your Widgets
If you’re using Mac OS X 10.4.x Tiger, you have probably played around with the Dashboard. There are hundreds of useful widgets available, most for free – but there are many that you won’t use, even if they are very helpful to others. This includes some that came with Tiger.
It takes RAM and processor power to keep these widgets running, even when the Dashboard is hidden, so a judicious evaluation of what widgets you do use can boost computing efficiency nicely. Do you really need that Ski Conditions widget or neeed to have the Clock widget running? If not, disable them to conserve RAM and processor use. This article explains how to use the Widget Manager to remove widgets you don’t want or need.
If you don’t want to use Dashboard at all, you can disable it with free apps such as ‘Disable & Enable Dashboard’ Utility, TinkerTool, and Bye Bye Dashboard.
9. Keep an Eye on Activity Monitor

There may be other things hogging your processor’s attention or sucking up RAM. How will you know about them? By using Apple’s Activity Monitor, which comes with OS X. Activity Monitor will tell you about CPU usage, RAM requirements, virtual memory usage, and whether a given application is a PowerPC or Intel (Universal) build. Check it occasionally to see if there are any red flags – or keep it running for a few days (with one of the useful Dock icons or floating windows enabled) to keep an eye on when things are spiking.
10. Clean Off Your Hard Drive
It doesn’t matter how large your hard drive is – eventually it will begin to fill up. Whether it is a huge iPhoto library, some videos you’re editing, or simply accumulation of lots of “stuff”, a full hard drive can cause problems. (One colleague couldn’t figure out why her drive was so full – until she realized that she hadn’t emptied her Trash in almost four years!)
You may not realize that Mac OS X (and the Classic Mac OS, too) uses the free space on your hard drive as “virtual memory”, and it depends heavily on that virtual memory to run efficiently. If your Mac is starting to feel sluggish, it may be because your drive is too full. There are lots of ways to clean it off, but sometimes a little more free space is all you need to be a peak performance again.
11. Run OnyX
Whenever things get slow on my Mac, one of the “go to” solutions is to run a utility like OnyX. (There are several, many of them free; I’ve found Cocktail and TinkerTool to be other good and popular options. If you choose OnyX, be sure to download version 1.8.6 for Tiger. There are separate versions for each edition of OS X from 10.2 through 10.8.)
These utilities offer a variety of “jobs” and “repairs” to the system, and while some are skeptical about how much this is necessary, my experience has been that they do bring a good level of optimization back to my Macs. I tend to run the whole battery of tools – both the maintenance and the cleaning options in OnyX – at the same time, but you may prefer to set them to run as scheduled routines in a certain order.
By the way, check out fellow Low End Mac writer Charles W Moore’s words about the value of these routines in his recent article on Applelinks, Yes, Running System Maintenance Routines Really Can Help.
It’s not quite like getting a brand-new Mac – after all, the “next new thing” will always be faster than the current offerings, and no one can keep up all the time. But giving some attention to these optimization tasks won’t take long – probably 2-3 hours for all of these, if you did them at the same time – and it will pay big dividends in speed.
You might even put aside those thoughts of upgrading – at least for a few days!
Keywords: #osxtiger
Short link: http://goo.gl/uZKXcA
searchword: optimizetiger


AWESOME THANK YOU SO MUCH
Dear Editor, I have read all your optimization tips and I am glad that I am already implementing many of them. The one which I don’t knew until now will surely be acted upon. Also, optimization includes checking & repairing corrupt Mac disk which is why I am using Stellar Volume Optimizer to repair logical corruption on my Mac disk. You might also try & evaluate this tool – http://www.stellarinfo.com/mac-software/mac-volume-optimizer.php