The development of MacPaint 2.0 changed the way the average computer user used his or her machine for all time. Instead of just having a typewriter or number crunching machine, the Macintosh could do work in the visual area as well
In spite of the ground broken by MacPaint, there were some significant problems with the program. Those problems include:
- No alignment rulers
- No advance drawing tools like Bezier Curves
- No multiple layering effects (a prerequisite for many pamphlets)
- No large format printouts beyond the 8.5″ by 11″ size
- Most important: no color. If the MacPaint user wants a color image, the user would have to resort to colored pencils or markers.
To the lay person using a Mac, the lack of color was the most obvious problem. The crude 6502-based computers like the Commodore 64 and the Apple IIe had basic color capability. To the more sophisticated graphics designer or layout artist, the lack of rulers and Bezier Curves made the Mac a mere toy.
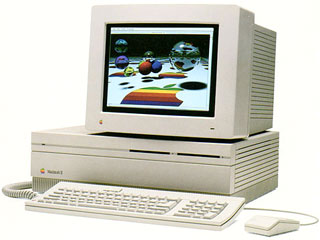
 To solve these problems, Apple introduced the first full color screen capable computer in 1987, the Mac II. Mac users could now view their screens in 4-bit (16 color) or even 8-bit (256 colors). Macs with the ability to display even more colors came shortly afterward.
To support these color Macs, a myriad of new graphical programs were created. Among them were Silicon Beach’s SuperPaint, Deneba’s Canvas, and Deneba’s masterpiece, UltraPaint (covered in the next article).
SuperPaint

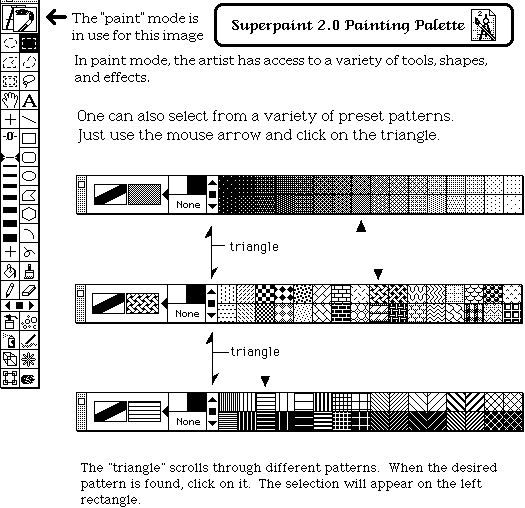
For those professional artists and graphics designers, the SuperPaint series of application software allowed for the effective retirement of the drafting board and “H” series of pencils. The software had items like rulers, grid alignments, and Bezier Curves. SuperPaint also had many more patterns to work with. See the graphic below for a better idea of SuperPaint’s features.

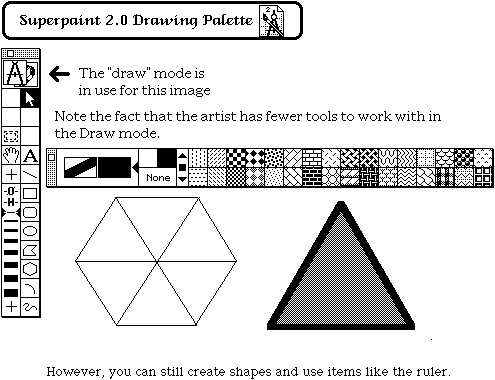
Note that the the graphic shows SuperPaint in paint mode. One also has the option to use the program in draw mode. This mode uses fewer tools than paint mode, but it allows the graphic artist to better manipulate portions of the drawing. See the graphic below for a view of SuperPaint in draw mode.

 For those artists with an interest in the abstract, SuperPaint includes features that gave them the option to create some nice abstracts with just a move of the mouse and a button click. The graphic to the right is one example.
The alignment tools and rulers allowed those without expensive plotter printers to print out large panels of a blueprint one section at a time without distortion or other sizing errors.
The Early Days of Printing in Color
In the early 1990s, color printing was largely the domain in of the high-end business user. An “inexpensive” HP water-based color inkjet printer was priced at about $6,000. A wax-based, poster/tabloid sized laser printer from Tektronix was priced at about $25,000! Good color was expensive.
Many computer users resorted to outside printing houses or outfits like Kinko’s to get their works off the computer screen and onto paper.
A low cost solution to this problem was to use an Apple ImageWriter II dot matrix printer with its four-color ribbon. The ribbon allowed for printing in the three primary printing colors (cyan, magenta, yellow) and also create secondary colors (red, green, blue) along with black. The eighth color, white, is created by leaving areas of a printout without any ink and thus preserving the color of the paper. The colors were not varied and the images were only at 72 dpi resolution, but at least you had an inexpensive color printout.
Deneba Canvas

 Canvas was very effective in using the layering tool. With layering, one can work on a project like a four-color pamphlet one layer at a time. Each layer represents a color.

As you can see from the graphic to the left, the tools palette for Canvas is very similar to its SuperPaint and MacPaint predecessors.
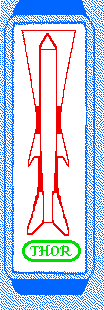
The Thor artwork to the right is a Canvas 3 layer graphic example.
Keywords: #macpaint #superpaint #canvas #denebacanvas
Short link: http://goo.gl/fFvx3t
searchwords: superpaint, denebacanvas

