Greetings Low End Mac friends! It’s been a while since I have written an article solely dedicated to Apple Tech and Gaming, but this one fits the bill perfectly. A while back I had gotten a hold of a Sony Trinitron KV-36HS420. I covered that TV in the article TV Technology: No ‘Catch-All’ Solution for Low End and High End Gaming.
Now it’s time to take things to the next level and really push this TV to its boundaries courtesy of video scaling technology!
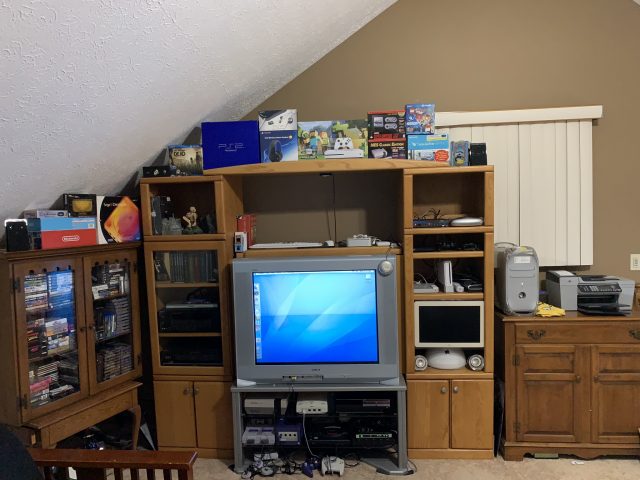
This setup includes my 235 lb. behemoth CRT: a Sony 36″ KV-36HS420. It’s superb for retro gaming and OS 9 with its classic 4:3 aspect ratio and has a wide variety of I/O, support for 4:3 SD (Standard Definition) resolutions of 640 x 480i, ED (Enhanced Definition) 4:3 at 640 x 480p as well as support for both ED widescreen 720 x 480p and HD (High Definition) widescreen at 1280 x 720p and 1920 x 1080i over both Component (Pb/Pr/Y) and HDMI inputs.
Some Limitations Discovered
This TV seemingly does it all except being able to handle the video signal from a Mac. There is no VGA input, and after much experimentation, a wide variety of passive adapters just do not fit the bill or work at all due to sync/timing and a number of other factors with the HDMI input.
This TV just wasn’t meant to handle computer resolutions over HDMI, and S-Video is also hit-or-miss on older Macs with TV-out video cards or just looks poor/muddy when it does work. Overall, there just was no ideal solution for Mac gaming on this beauty until the video can be properly processed and then sent to it.
Before that whole experiment was brewing though, some other easier to deal with limitations had to be overcome. This included the lack of ARC (Audio Return Channel) over HDMI and the number of inputs (only one HDMI input available on this TV). There was just so much more potential you could get out of this great CRT’s single HDMI input by expanding its potential, and I knew it.
Overcoming the Limitations
HDMI Matrix (at Least 2 Outputs Needed)
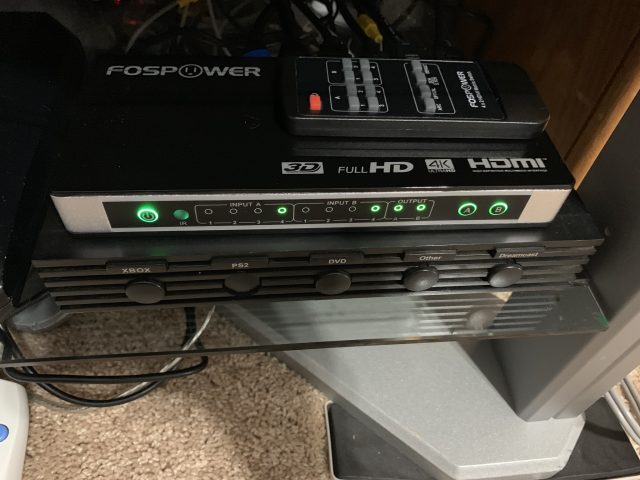
Using a FosPower 4×2 HDMI Matrix here (4 input, 2 output) – currently trending around $49.99 on eBay new (pictured to the right above a manual S-Video switch box), I was able to gain switching of inputs and have a way to send video to one source and audio to another or both video and audio to 2 different sources simultaneously!
Video Scaler, the Main Purpose of This Article
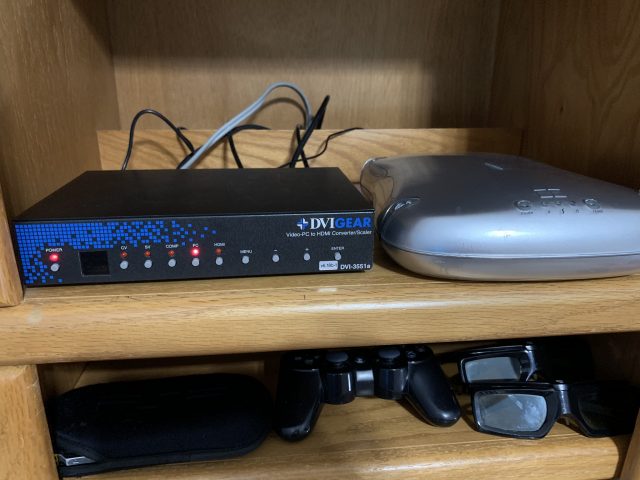
The DVIGear 3551a pictured next to a Formac Studio TVR.
Using the DVI-3551 converter/scaler by DVIGear, I was able to get a clean video signal to the 4:3 HD CRT Trinitron. That is the primary device I am covering though this article and really unleashes the full potential of the single HDMI input on Sony Trinitrons (like my 36″ monster) and other high-end CRT HDTVs
This device is absolutely incredible in so many ways, and I’ll begin to tell you a few reasons why (let’s say compared to a $350 to $400 xRGB Mini Framemeister).
Several Key Advantages:
- You can typically get this device used for $100-200 (roughly half the cost of an xRGB Mini Framemeister, which sells for around $300 to $400 used and $400 to $500 new currently), despite an original retail of $699 new.
-
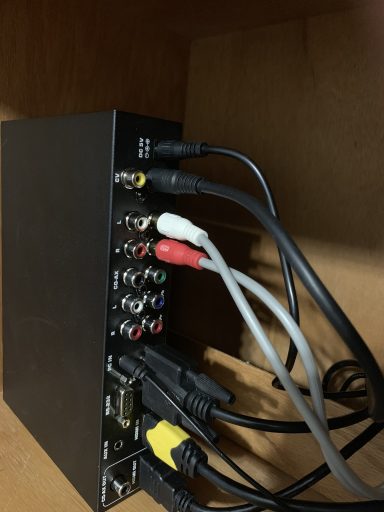
Rear of the DVIGear 3551a populated with VGA, S-Video and HDMI inputs currently.
It has no noticeable input lag, so it performs just as well as the xRGB Mini.
- The overall quality when scaled to 720p or 1080i is outstanding for older devices (I have not yet tested 1080p to the 3D capable 50″ KDL-50W800B across the room).
- The xRGB Mini is limited to fewer I/O options compared to the DVI-3551a.
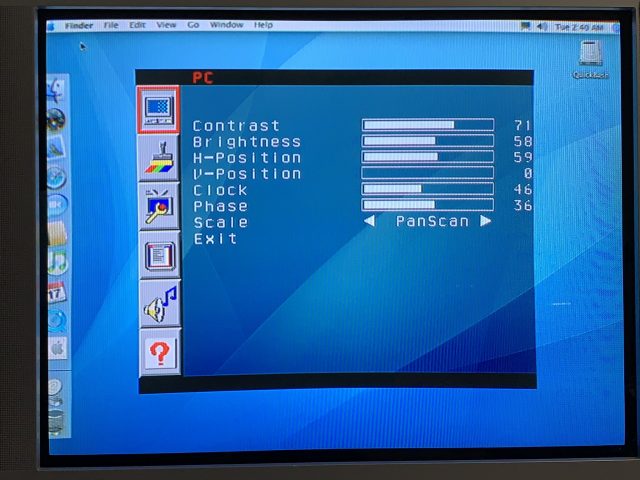
- The PanScan option allows the scaler to pre-process the video and center it on a widescreen setting such as 720p/1080i and TVs with a Zoom feature (such as these Trinitron HD CRTs) can then have a full-screen, high-resolution 4:3 image displayed and properly scaled.
One Small Disadvantage
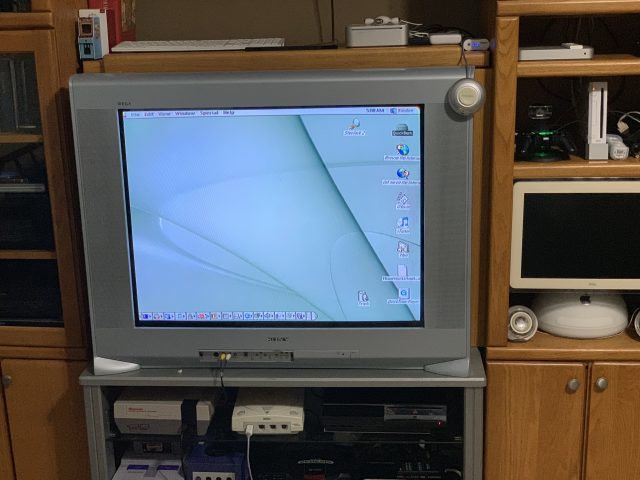
You must use the PC input (VGA) to get the full benefit of the advanced scaling options to really dial the picture to be as centered as possible (example below with the Trinitron – source ATI Radeon 9000 from a Power Mac G4 933 MHz Quicksilver – OS X Tiger (left) and Mac OS 9.2.2 (right).
Applications and Uses of a Setup Like This
Mac Gaming
Virtually all Mac OS 9 era games are rendered in 4:3. There were no large LCD panel 4:3 displays commonly made (typical sizes ranged from 15″ to 21″) since LCD panels were relatively expensive to make in the late 1990s and early 2000s compared to CRT monitors, so a nice large HD CRT provides you with unprecedented beauty and near zero lag (thanks to CRT technology)
Improved Audio Potential/Options and Audio Mixing
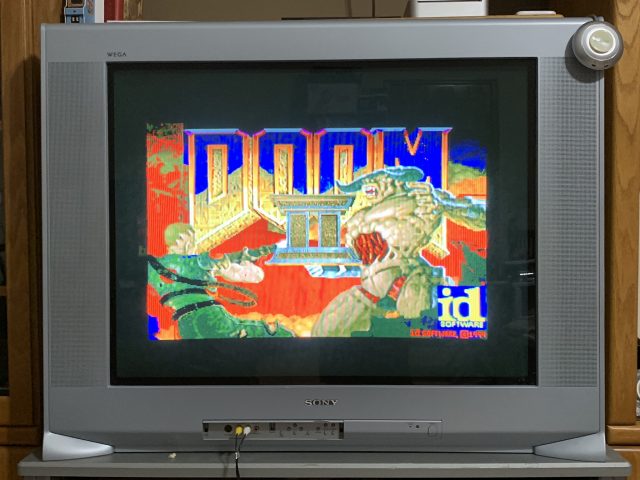
Example: Doom 2 looks great (video set to just a tick under full size and detail set to high).
Since I have the stereo audio mixed with the VGA video and being sent as one stream over HDMI with the DVIGear 3551a, the Trinitron KV-36HS420 can handle the audio, or I can send the stereo audio over HDMI to my Sony receiver across the room (currently a STR-DH810), thanks to the 4×2 HDMI matrix and let the receiver process the stereo and simulate 5.1 audio.
Many Mac games are given a whole new feel thanks to the simulated 5.1 sound and immersive 36″ display here! The same goes for the HDMI input on the DVIGear 3551a – there is an aux 3.5mm mini-jack, so you can send either pre-mixed audio via HDMI or go with a DVI video only source and let the scaler mix the audio into a single stream. There are no audio syncing issues that I have noticed yet either, so yet another bonus!
Video Editing/Capture
Thanks to the combination of the scaler and dual output I have here with the HDMI matrix, I could put an HDMI capture card running on modern hardware and capture OS 9 gaming, up-scale family video footage and more using the secondary output from the HDMI matrix. I could also send the S-Video Monitor out from one source to something like the Formac Studio TVR and capture the raw analog video in front of the scaler and view it on the TV’s S-Video input and go back to the same content that is being scaled and view it over HDMI to begin to get a true side by side comparison or just have options for how I want to view or capture content in general.
Console Gaming
Game consoles like the Super NES can use S-Video, which greatly improves the signal quality over composite video. Scalers like the xRGBMini Framemeister and the DVIGear 3551a can then take that input and really clean it up and provide an astounding result with a larger image size. You can modify many older game consoles to get full RGB output and take it even a step further, but the results here are pretty terrific and to me are about as good as it gets.
Summary: Was It Worth It?
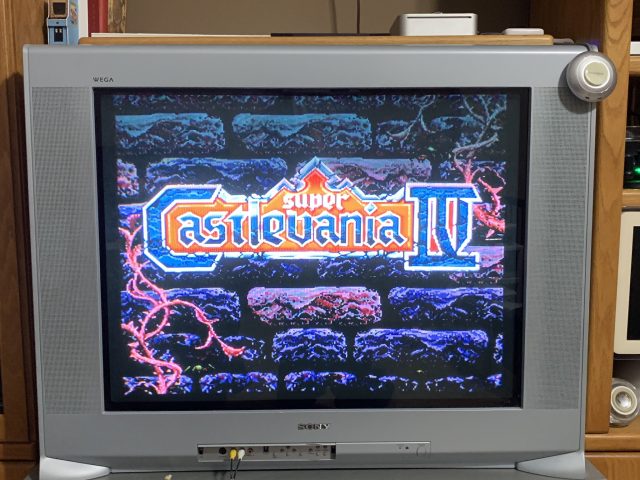
Example: Super Castlevania IV on the Super NES is being scaled to 1920 x 1080i, and with the Pan and Scan feature of the scaler and Zoom functionality of the Trinitron, you get a perfect, crystal clear, upscaled full screen 4:3 image with amazing smoothness and razor-sharp picture quality I’ve never seen an image so crystal clear from an analog source. This scaler was well worth the price of admission!!
I love my Macs. I love gaming (especially retro gaming) and I really love tech gadgets. That’s one of the key reasons I write this column. It was a heck of a lot of fun getting this setup put together. Was it worth it financially? Let’s just say that most of this hardware was assembled over a long period of time, piece by piece (over the span of several years in fact), scouring the web and stores for deals on each item so I did not over-spend.
The most important pieces are obviously the TV, the scaler and a something like that matrix or an AV receiver (you don’t necessarily need both unless you want surround sound too). All told though, I spent less than $500 on all key components over the years (including the receiver and surround speakers). It was absolutely worth it. The resulting images above to me speak volumes. There are no scanlines (if you prefer that look), but to me, the smoothest, sharpest images are where it’s at. It’s all about your own personal preference though. Enjoy and have fun! DB
Keywords: #gaming #appletechandgaming #dviscaler
Short link: https://wp.me/p51SSp-dqC

