
Happy 2025 Low End Mac friends and welcome as always! I’m back after a long hiatus and plan to be writing more frequently again.
That said – for this article, I’m going to keep it short and sweet as I swing back into things and will be highlighting a particular Low End Mac that was once about as high-end of a portable Mac that one could hope for when it arrived.. my trusty early 2011 17″ MacBook Pro. I happen to own the 2.3 GHz variant with the matte screen.
The Sad Demise of a Fantastic Beast..
As our Intel Macs age, some get lucky and some don’t. This 2011 17″ early 2011 MacBook Pro happens to be my favorite portable Mac that I’ve ever owned (close behind it is the 1.67 GHz Hi-Res A1138 15″ PowerBook G4 and 1.5 GHz 12″ PowerBook G4), but last year this unit was one of the unlucky ones to an extent and finally succumbed to the dreaded failed AMD GPU like many other 2011 15″ and 17″ MacBook Pros in the wild. I knew some workarounds existed, but like many other things – the project of getting this machine had to go on the back-burner as the Bashur family got through another holiday season.
Resurrection Time!
So there I was a couple weeks ago running through the process laid out by our very own Collin Mistr to disable the AMD GPU on a 15″ or 17″ 2011 MacBook Pro and no matter what I could not get back into every partition of my Samsung 850 EVO (now maybe 8-10 years old) that I had split into 3 partitions (Snow Leopard, Mavericks, Sierra). I had luck getting back into the Sierra partition, but the others were a no-go, no matter what I tried. I began to run through potential troubleshooting scenarios. Perhaps having multiple partitions causes some weird issues when running the commands to disable the AMD graphics. Maybe the SMC reset command wasn’t working (I resorted to taking the bottom pan off and disconnecting the battery). I tested the SMC theory out first and no change after disconnecting the battery and then I swapped out the drive to a spare small capacity SSD I had sitting around (a cheap 128 GB unit I maybe paid $15 for on Amazon within the last few years) and decided to give it another go. I started from scratch with a fresh install of the special 10.6.7 version of Snow Leopard build for this machine, ran the commands, used Collin’s utility and this time.. BINGO! My 2011 17″ MacBook Pro was back. I was greeted with the wonderful Snow Leopard intro video (miss those so much) and didn’t really notice any glaring problem at all.
Next was another test.. I partitioned this 128 GB drive into equal halves to see what happened. This time I went with High Sierra on the other partition. While I had to seemingly reboot a couple times after getting High Sierra installed on another partition, it too was eventually coaxed back to existence. While High Sierra is a bit older version of MacOS itself, it’s still recent enough to handle the modern web, so I’m plenty satisfied to say the very least to have a nice legacy partition with Snow Leopard and an operating system for somewhat modern use.
Why Resurrect a 2011 MacBook Pro in 2025?
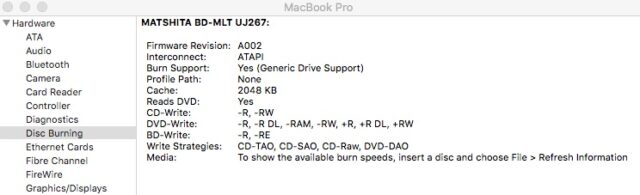
For me, it’s somewhat sentimental as this was the first and only Intel Mac I ever got new. Back in early 2012 when it was purchased on clearance from the new defunct MacMall (as the new 2012 models had arrived), I knew these 2011 models were special as they were the last 17″ MacBook Pros to ship, the last with ExpressCard, and the last with the ability to run Snow Leopard, while also being among the first with SATA III and Thunderbolt. I even upgraded it with one of the first Blu-ray drives that fit this machine (a Matshita UJ-267). See my article on this – Blu-Ray No Longer a ‘Bag of Hurt’ for Macs from 2012 and yes – the drive is still working fantastically after 13 years of use:
This Mac just kind of had this “best of both worlds” vibe and felt like this super awesome piece of tech that was the pinnacle of portables (as far as a transitional unit went) between the world of legacy Intel Mac computing and more up-to-date technologies. In short, this unit sort of did it all and also has a beautiful 1920×1200 17″ display – a size still not matched to date by Apple (although pixel density is much greater on modern units).
Limitations Running a Somewhat Crippled Machine
While many have done either the software workaround like I did or have gone through the full GPU Demux process Collin also offers to give the 2011 MacBook Pro a new lease on life, there are some limitations:
1. Graphics Heavy Applications:
Without a dedicated GPU, don’t expect to play higher demand games and such on the go and work with some of the more demanding applications that might have needed better 3D acceleration from the AMD discrete GPU. Apparently the HD3000 isn’t too terrible as an integrated solution and is significantly faster than the Geforce 320M from the 2010 13″ MacBook Pro and MacBook models, but is slightly slower than the discrete Geforce 330M found in the 2010 15″ and 17″ MacBook Pro. The Intel HD3000 is not a Metal enabled GPU unfortunately and thus there is no 3D acceleration beyond High Sierra without an eGPU setup of some kind.
2. Lack of Ambient Brightness and keyboard Brightness Controls (software mod)
Automatic brightness and keyboard brightness controls don’t work with the software mod. This is unfortunate, but you can simply change the brightness still in the Display preferences. A small price to pay to get these amazing machines back in service!
3. With GPU Demux Only – No Snow Leopard/no external video (hardware mod)
While GPU Demux can make operating a 2011 MacBook Pro with failed discrete AMD GPU even more seamless, going this route will also disable these machines from being able to boot into Snow Leopard at all, and you cannot use built-in external video any longer either with this method, as the ThunderBolt 1 port on these machines depends on external video transport over DisplayPort, which is wired to the discrete GPU. GPU Demux completely disables this path physically, although this opens up the options for a couple really amazing upgrades…
Potential Upgrades to consider with Failed AMD GPU and GPU Demux
With a failed AMD GPU, and GPU Demux you can decide to take things a step further with the iBoff’s upgrades, such as X-GPU (eGPU solution) and NevBolt-2 (replaces Thunderbolt 1 with NVMe storage). These upgrades require expert level soldering skills to install, but in the end you could have an even better piece of portable hardware that no one could possibly ask more of. Collin performs these iBoff upgrades here on his own 2011 MacBook Pro. iBoff is working on sourcing more of these upgrade kits as some parts have significantly increased in price, so watch iBoff’s Tindie page for updates on these kits and check out the step by step install process for these on his Modification Guide page. Again – only meant for experts to perform, so if you are interested plan to pay an electronics expert with BGA rework station a decent sum for this kind of effort.
In Closing…
The 2011 MacBook Pro (especially the 17″) was one of the most versatile machines Apple ever built. If not for the “Achilles” AMD GPU, these were right up there with the Pismo and Hi-Res PowerBook G4 as the finest portables Apple ever built. They’re still quite usable today, now 14 years after initial release. Even with the GPU shortcomings, a dedicated community of hardware modders has found ways to give these machines a new lease on life. With a Thunderbolt eGPU, OpenCore Legacy Patcher, and Kryptonite, one could run through MacOS Catalina on these machines. With the iBoff upgrades (X-GPU in particular), one could run even Sequoia with a proper eGPU set-up.
Enjoy pushing your old 2011 MacBook Pro to new limits that was once left for dead…
