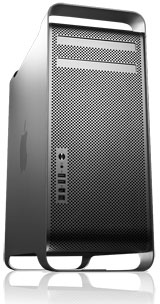
Hi, Low End Mac readers. My name is Robert Bryant, and I am a computer tech in Central California just south of San Jose. As a daily Mac Pro user, I wanted to provide the Low End Mac community with the necessary steps to take a base model 2006 Mac Pro 1,1 or 2007 2,1 (that can now be easily obtained for under $500) and show you how to make it as modern as any current Mac, while retaining all of the expansion that the older tower style Mac Pros provide.
Just like anyone else who frequents Low End Mac, I wanted to get more value out of my Apple hardware.
Before going further into detail, I would like to give special thanks to MacRumors forum user “Tiamo”. Tiamo is the original modifier of the “boot.efi” file (more on that later) that allows you to run modern versions of OS X on the Mac Pro 1,1 and 2,1 which would otherwise be limited to OS X Lion 10.7.5.
About the Project
Recently, I have been helping friends upgrade their Mac Pro 1,1 and 2,1 models with OS X 10.9.3 Mavericks (and more recently 10.9.4 and have also begun experimenting with 10.10 Yosemite with some success).
The whole idea of upgrading a Mac Pro 1,1 for me started out of a curiosity: I began researching how to use the nVidia 210 Silent video card (with no native Mac drivers) in my Mac Pro 1,1 and was disappointed after many dead-ends, finding no readily available answers, but I refused to give up.
Many who I chatted with and messaged during my search for answers claimed it just wasn’t possible to use the nVidia 210 in a Mac Pro 1,1 without running Chameleon or other hackintosh tools to get OS X 10.8 Mountain Lion or later installed (a necessity for using the nVidia 210 but not technically possible due to the 32-bit EFI issue), which I found disappointing to say the least. After all, this was a genuine Mac Pro and not a hackintosh build.
After a great deal of persistence, I was thrilled to eventually find a native upgrade path (again, many thanks to Tiamo at MacRumors) that is not that hard to accomplish. Follow the steps below and you too can enjoy the affordability and upgradeability that a Mac Pro 1,1 or 2,1 can provide.
Prep Work
What you need to get started:
- Obtain Mountain Lion (or later) installer: As you may have noticed, Apple’s App Store denies the installation of the unsupported versions of OS X because of a lack of hardware compatibility (this is typically pre-written into a bad machines list in the installer). Though all the Mac Pro hardware from the beginning has been fully 64-bit, early models that shipped between 2006 and early 2008 shipped solely with a 32-bit boot EFI and thus were artificially crippled when it came to full 64-bit operation. These models can’t run versions of OS X beyond Lion 10.7.5 without a modified boot efi.
- Another Mac capable of booting into Mountain Lion (or later) natively: This is essential to have during the installation process in order to read the modified bootable version of OS X for installing on the Mac Pro 1,1 or 2,1 hard drive (Mavericks used in this example)
Gathering the Necessary Files
Step 1: Obtain the OS X installer for Mountain Lion or Mavericks
This can’t be easily done on the Mac Pro you are modding (there are other methods, but you will need the other Mac in step 9 as well). To get around this problem, simply begin by downloading the installer on another Mac capable of running it natively. Regardless of what you do to accomplish this step, you will need a clean, unmodified installation package of Mountain Lion, or later before proceeding (we use Mavericks in this example).
Step 2: Download or install Xcode (from Apple or from a retail copy of Snow Leopard)
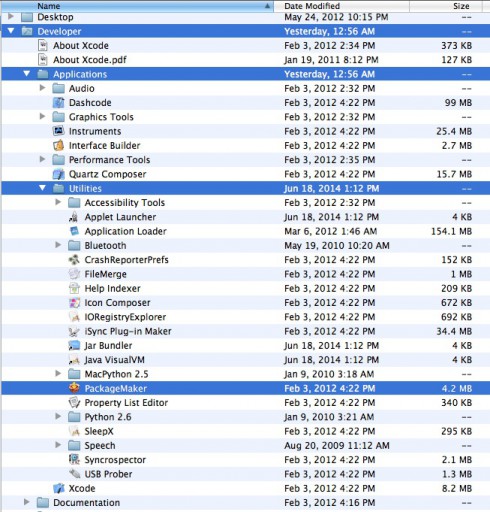
You will need access to the application called “Flat package editor”. This tool is part of a package called PackageMaker, which allows you to create custom installation packages. To navigate to it after installing XCode, simply go to the following path and launch the application:
/Developer/Applications/Utilities
NOTE: Specific facts regarding the use of PackageMaker are readily available online and within the documentation provided as part of the XCode installation.
Step 3: Download Tiamo’s boot.efi from within his MacRumors thread
Step 4: Prepare OS X Installer
- Step 4a: Move the OS X installer downloaded during step 1 to a simple location (such as the desktop). Inside the OSX installer contents is a folder called “Packages”. Copy the OSInstall.mpkg to your desktop. Note: Make sure you copy the .mpkg, not the .pkg
- Step 4b: Open OSInstall.mpkg with Flat package editor and drag the “Distribution” file to your desktop.
- Step 4c: Navigate the contents of the installer to System/Library/CoreServices/PlatformSupport.plist and copy that plist to the desktop.
Actual Modding
Step 5: Add Board ID to Supported Machines
- Step 5a: Open “Distribution” in TextEdit and scroll until you see a list of supported machines Board ID’s. Add your machine’s board ID to this list. Save and close this file. EXAMPLE: For the Mac Pro 1,1 add board ID (F4208DC8) to the list
- Step 5b: Next open the PlatformSupport.plist in TextEdit and perform the same process outlined in step 5a. Save and close this file.
Step 6: Replace boot.efi with Tiamo’s version
- Step 6a: Navigate to System/Library/CoreServices/boot.efi and replace the file with Tiamo’s version.
- Step 6b: Navigate to usr/standalone/i386/boot.efi and replace with Tiamo’s version.
Notes
- As you can see, all of this editing is being done to the installer, not to your system
- Many forums have long winded workarounds and have you editing your system; however, these methods are extremely inefficient and are unnecessarily complex.
- The way I have you doing it will be the quickest and work the most often without hassles.
Step 7: Move all items modified from the OS X installer back to their original locations.
Step 8: Create a Bootable Copy of the Modified OS X Installer
Create a Mavericks (or Mountain Lion/Yosemite) bootable USB drive using the modified installer we’ve just made. A good step-by-step account of this process for creating a Mavericks USB installer is outlined at techrepublic.com.
Note: There are other methods for accomplishing this and you could choose to make a bootable DVD if you wish using proven methods.
Step 9: Attach Bootable Media and Install
Insert the bootable OS X media into a computer already running at least the same version of the OS you just downloaded (Example: Mavericks 10.9.4) and then plug your Mac Pro’s hard drive into this computer externally (use Target Disk mode or put your Mac Pro hard drive in an external enclosure). Boot from the USB Flash Drive containing the modified OS installer created in step 8 above and select the 3.5” hard drive from your Mac Pro as the install destination.
Step 10: Wrap-Up
When the installer finishes, replace the 3.5” drive into your Mac Pro (if moved to an external enclosure) and boot normally. You will see a white screen with no apple logo for approx. 15 seconds, upon which the computer will go into verbose mode and you will see it dumping unused Kernel extensions.
Note:
You’ll know that you have succeeded when you see “DSMOS IS HERE”. At that point, the Mac Pro will then boot it’s GUI.
Afterthoughts
For all intents and purposes, your upgrade is complete, although there are other things to keep in mind:
- The 64-bit EFI loader is not optimized to work with graphics cards smaller than 512 MB. The catch-22 here is that if you run a larger PC card, you will not see the verbose screen upon start up. The card will not initialize until OSX’s GUI loads, so your Mac Pro will not send signal to the monitor until fully booted. Conversely, if you stick with the Geforce 7300GT or one of the other earlier GPUs under 512 MB designed for variants of the Mac Pro, OS X will read it as a 5 MB or 7 MB graphics card instead of the 256 MB that it is. Ideally, you’ll want to have a Mac compatible card that is at least 512 MB during upgrades such as the Geforce 8800 GT.
- Also remember that if you upgrade to the Xeon 5365 chipset like I did in order to run two quad-core CPUs instead of two dual-core CPUs, the System Report will show those processors as “2x 3ghz Unknown”. To change this natively and have the machine recognize the chips rather than fooling it by editing plists, you must find the Mac Pro 2,1 firmware update for the Mac Pro 1,1; Apple used to offer it, but has since taken it down (perhaps buried in the archives somewhere). Upon hours of searching the only place I’ve found it was forum.netkas.org and in order to download, you have to become a member. If you are interested in having me be your IT Consultant, Graphic Designer, or need help with Social Media Management or SEO visit my website http://www.provenexposure.com you may also email me directly at theapplesurgeon@gmail.com.
- To my knowledge, these steps will work on any Mac out there as long as you know your Board ID. This should also work fine with Yosemite in all scenarios. The best part is that once you have the upgrade applied with the modified boot efi, you can then begin upgrading natively from the app store and just replace the boot.efi on the hardrive in the System/Library/CoreServices folder by plugging the HDD into another Mac or by using Target Disk Mode.
- If you have any other questions about the SMC Firmware upgrade or the 64bit EFI Bootloader process feel free to post in the Low End Mac Facebook group, and I will answer. You can also email me at the email above.
- If you are interested in having this operation done for you, and a “Ready-to-Boot” hard drive sent to you please contact me at the email above. Yosemite is also now 100% possible, and stable!
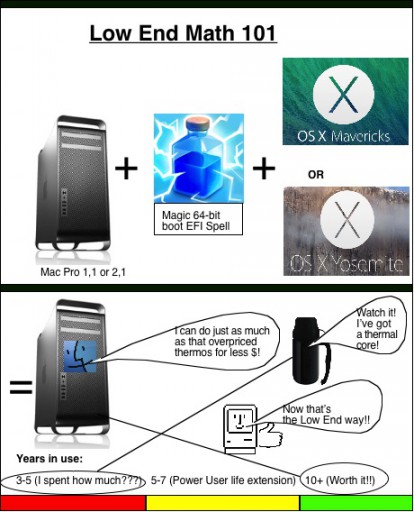
A Bit of Mac Pro Humor
Keywords: #2006macpro #2007macpro
Short link: http://goo.gl/LjZcmp
searchword: macproefiupdate


This is an outstanding guide, thanks a lot for putting it together. I have two questions (i) would this allow the creation of a FusionDrive? (ii) What happens if software updates are installed, e.g. from 10.9.3 to 10.9.4? Can they just be loaded and installed or do I have to run the entire installation process de novo?
Thanks again so much!
The boot.efi file isn’t something that really changes, so updates aren’t going to fool with it. It’s an EFI image required for the system firmware to then grab the bootx file and load the kernel. Monkeying around with it after the system is installed can render the disk unbootable, so understandably it wouldn’t get piddled with.
This isn’t to say that Apple won’t throw a curveball out there and update boot.efi at some point and blow everything to bits. It’s like running a Hackintosh setup, never assume it won’t break. Just for safety’s sake, keep a small partition with Snowy on it so that you can have a fallback in case crap goes up in smoke.
Yeah 10.9.5 was actually released in response to this article. DO NOT UPDATE without knowing what to do about boot.fi contact me or oemden.com for more info
I haven’t been able to find any evidence that boot.efi hacks have been successful at getting yosemite to work even with limited success?
I concur. A a member of macrumors and an avid follower of all things Mac, I and my Mac Pro 1,1 (flashed to 2,1 upgraded to 2×5355, 32gb ram, 256gb PCI SSD, and ATI HD 5870) are not able to use Tiamo’s brilliant boot.efi to work with Yosemite.
It is possible, I recently received a screenshot of a 1,1 running 10.10
This is just the turn of events I’ve been waiting for!
I have a rather newly-bought Late 2012 Mac mini… But I have a fortune in SATA hard drives and the such. This will let me pick up a cheapo used Mac Pro that I can then shove all my crud into and have one helluva beast of a box!
Don’t get me wrong, I love my Mac mini, it’s the most fun I’ve had with a computer since my iMac 500 (Indigo, CDRW) back in 2001, but would it be nice to have a giant box? Oh yes it would! I love having a ridiculous, super-powered box from years ago that I can cram full of goodies. I’m still finding new things I can do with my old sawtooth G4.
Thanks for the fantastic information. I dug through the macrumors forums and found that someone had automated this process so that we don’t have to download this and that and edit text files. Their project is called Sixty Four on Thirty Two and is available here: oemden.com.
I’ve talked to a lot of people that said this didn’t work.
Hi, so I used the SFOTT tool to get my macpro 1,1 up to 10.9.4 and now want to take it to Yosemite but haven’t figured out how yet :(
Can I use this method except instead of the other mac running a higher version, can I use my current macpro that’s running on a separate drive?
Macpro 1,1 upgraded to 2xQuad core 2.66 xeons, 8800GT, and 10GB of RAM.
Thanks for posting these instructions. Please help. I’m stuck on Step 4. I can’t view the package contents of the Mavericks pkg (OSXUpd10.9.5.) I’m using an iMac Mid 2011 2.7 GHz Intel i5 running Yosemite to create the bootable drive. Thanks
Please contact me direct for more info. theapplesurgeon@gmail.com
Hi there,
Thanks of a lifesaver solution. A question in mind I have though.
Will I be able to upgrade my graphics card if I upgrade my EFI file on mac Pro 1.1?
Let’s say I’m considering to upgrade to a Quadro 4000 or k5000.
Thanks in advance,
Erten
Yes, contact me direct for more info.