I think I’ve wanted to have a fisheye lens since I was in high school. A fisheye lens usually covers a 180° angle, although some are 150-170° and a couple very expensive Nikkors managed to cover 220°! To cover such a wide angle, these lenses introduced a curved distortion that is instantly recognizable.
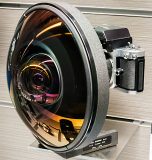
The 6mm f/2.8 Nikkor fisheye covers 220° and weighs 11 lb. ©Morio, Nikon Museum
I think it was Spring 1973 that I got hooked on photography. Marks Photo Shop sponsored a photo equipment show at the old Pantlind Hotel (now the Amway Grand Plaza) in downtown Grand Rapids, MI. I looked. I picked up brochures. I studied until it all began to make sense to me. I was hooked, and I spent months looking over every brand of camera, the lenses available for them, metering systems, prices, and more while trying to figure out which system I wanted to be part of.
My First Two Cameras
My first camera was a cheap point-and-shoot 35mm camera with zone focus – you set the lens for landscape, portrait/midrange, or kind of close (maybe 3-5′). It wasn’t what I wanted, and when Marks Photo has a used Leicaflex SL for sale, and Dad was ready to move on from his entry-level Miranda Sensomat SLR. He sold me his complete system, including a 105mm lens, a 3x teleconverter (not good quality), and a waist level viewfinder.
The Sensomat came with a three year warranty, and it seemed to be in for repair as often as it wasn’t. Dad was used to Konica quality, as they used Konica Autoreflex cameras at work. They were built like tanks.
My Minolta: The Keeper
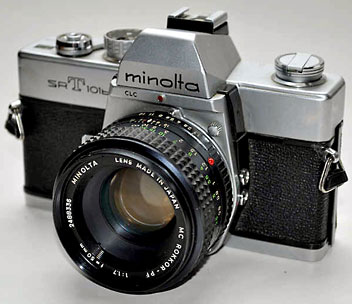 He got the Leicaflex, and I think the Miranda went in for two more warranty repairs while I had it. The last time it came back from service, I immediately traded in everything toward a Minolta SR-T 101. That was in 10th grade, and that camera saw me through the rest of high school and through most of college, before I succumbed to the lure of an Olympus OM-1, but that’s a different story.
The Minolta was just right. It was very comfortable in my hands, pretty easy to use, and had a great metering system designed not to be thrown of by right skies. Contrast Light Compensator (CLC) they called it, and it worked. This was the forerunner of the multi-area metering that was to come in the mid 1980s, but Minolta introduced its CLC system with the SR T-101 in 1966. Minolta also had a very nice 16mm f/2.8 fisheye I might be able to afford someday.
I kept my eye on the used case at Marks Photo and saved up money from my part-time after school job. They had a 100mm f/2.0 Auto Rokkor marked at $44.95, and I just hoped I would have the cash for it before someone else bought it. I loved that lens and kept it on my camera most of the time. The longer lens was great for portraits and candids (I was on yearbook staff), and the f/2.0 aperture plus ISO 400 Tri-X black-and-white film – pushed to ISO 600 – made it great for low light photography.
The only other lens I owned for my Minolta was a 35mm f/1.9 Vivitar wide-angle. The optics didn’t hold a candle to my 50mm and 100mm genuine Minolta Rokkor branded lenses. And I never did get a fisheye lens for the Minolta or any of the many SLR cameras I owned over the years. (After Olympus, I went back to Minolta until my eyes insisted I get an autofocus SLR. I used Nikon for quite a few years, sold it all to get a Canon Digital Rebel, and that was my last SLR. I got tired of the size and wieght of all that wonderful equipment.)
Fisheye On the Cheap
If you’ve ever looked through the peephole in a door, you know what a fisheye view is. And you know that some peephole lenses are of good quality, others very poor. The same goes for fisheye adapters you attach in front of with your smartphone or camera lens.
I was walking the periphery of our local Meijer store a couple months ago, because it’s a great way to get in extra steps – and that’s where Meijer puts most of its clearance items. I was a lens set with a wide-angle, macro, and fisheye lens marked down for $19.99 to $4.99. How could I resist trying at that price? I’ve wanted a fisheye for 40 years!
Well, it may not have been much of a bargain. As Consumer Reports shared recently, conversion lenses vary in quality. Some are great, some are okay, and some are atrocious. Not only that, but they will interact differently with different lenses. This Aduro 3 in 1 Lens Kit – well, take a look for yourself.
First, the view using the lens built into my iPhone 4S:

I was standing in the driveway, and this doesn’t say much about the house, let alone the neighborhood. To take in more, I used the fisheye lens. Note the obvious distortion toward the edges.
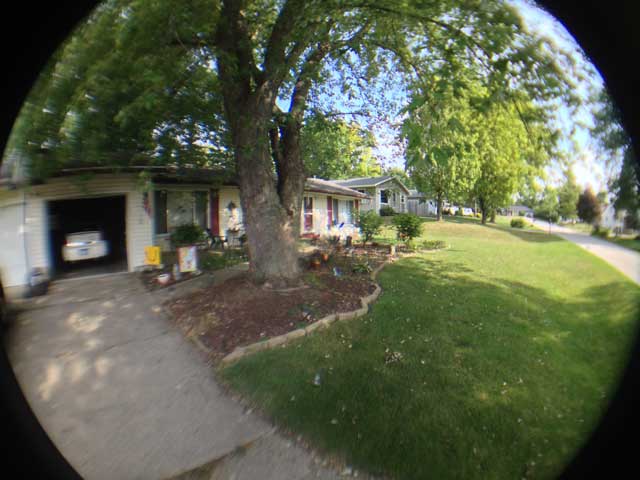
This isn’t quite a full-frame fisheye. They don’t have black corners. But this is much broader coverage than the iPhone’s stock lens. On the plus side, extremely wide coverage. On the minus side, the center of the photo isn’t really sharp, and things get worse toward the edges – far worse.
There is a third option, and it doesn’t require any additional lens. For years now, iPhones have been able to shoot panorama photos. You stand in one place and turn from left to right while holding the iPhone steady. iOS does a great job stitching the panorama together into one nice photo, like this one.
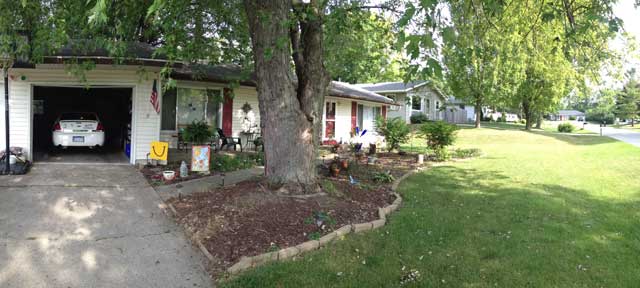
This image covers almost as wide an angle as the fisheye (I could have panned further), but it’s much sharper. There is some curvature of horizontal lines, which is true of any panorama. (In the olden days of film photography, people would use a special camera such as the Widelux to shoot panoramas. The camera stayed in place while the lens panned from left to right.)
One More Difference
Most smartphones these days let you shoot photos with High Dynamic Range (HDR), which will provide more shadow detail and more detail in very light areas. The normal lens and fisheye photos were taking using HDR.
iOS doesn’t support HDR photography when doing a panorama, so the grass and light areas are more washed out than in the other two photos.
Lesson Learned
I had a little fun with the fisheye adapter. The wide-angle adapter introduced fisheye-like distortion, which is not good. And the macro lens has such a limited range that you really can’t hold the camera steady enough to maintain focus.
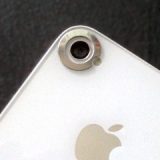 If you’re looking for a fisheye adapter, avoid this one. These lenses attach via a magnet and a metal ring that surrounds your smartphone’s lens, held in place by a sticky substance. There is a cutout for the iPhone’s LED flash, but the ring covers the rear microphone, so you may need to remove it to shoot videos with sound or use the lens on the back of the camera for FaceTime.
If you want a fisheye lens adapter – or any add-on lens – be sure you can either test it in the store or return it if you are not satisfied with the results. You can have a lot of fun, but if the quality is obviously poor, you won’t be happy with the pictures you take.
I’ll stick with panoramas.
Keywords: #fisheyelens #panorama
Short link:

