
2001 – iTunes is one of the best software solutions that Apple has released in a long time. Despite the fact that most Apple software is great with a nice touch of Mac-like behavior, iTunes is a home run – it is beyond great. Not only is it amazing Mac software; it is consumer-savvy and an overall hit for more than just the loyal Apple customers.
iTunes is an important Mac title, and here is how to demystify it.
For starters, iTunes will search your hard drive to find MP3 files. Let it do the job if you already have MP3 files. If that is the case, by the way, get this little software piece called iTunes Associator, which will change the file type and creator of all your MP3 files to iTunes instead of, say, SoundJam.
Encoding Your Music
Encoding music from CD is quite easy. Stick the CD in your CD-ROM drive and wait for it to appear. You will normally see the CD information loaded in the source pane of the main window, and the songs will appear in the right part where you see the title, album, artist, and other information.
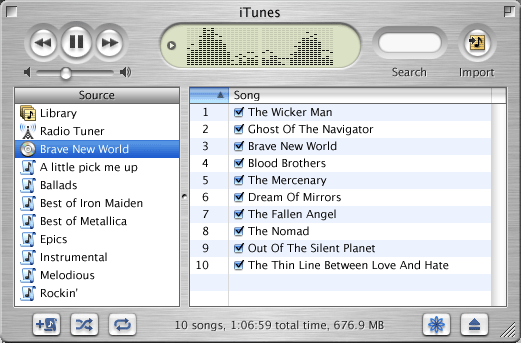
iTunes uses an Internet database and recognized this CD as Brave New World by Iron Maiden.
iTunes does a lookup in an Internet database to determine what CD you have, and it usually finds the correct data. If in doubt when it finds multiple results, it will ask you to specify the correct album. If it finds nothing, it will give you the option of providing the information to the database. Most of the time, though, everything is loaded automatically. The greatest thing of all is that iTunes will keep the CD information in its database and remember that CD when you put it in your Mac again.
Before you import your songs into iTunes, remember to do a few things. Firstly, you have to make sure that the encoding setting reflects the quality you wish to hear. Lots of different encoding configurations are available, each having their appeal and drawbacks. The lowest available is 128 Kbps. Without the technogeek explanation, let’s just say that the higher the number, the higher the quality. iTunes describes 128 as good quality – but I have my reservations. 128 is fine if your speakers are not too amazing. If you have a good pair of computer speakers, such as the Harman Kardon SoundSticks, go for something higher.
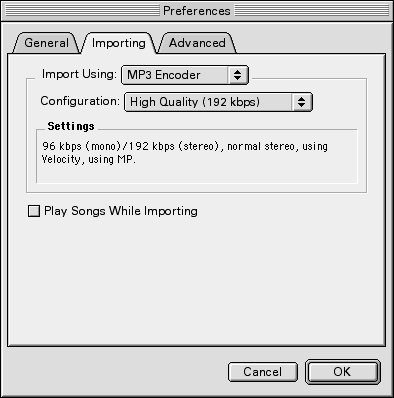
192 Kbps is the right choice for good speakers.
My personal recommendation is 192 Kbps, which iTunes tags as high quality. It takes a bit more disk space, but unless you are short on storage, this is the right option. If you want a compromise between quality and disk space, you can always opt for 160 Kbps.
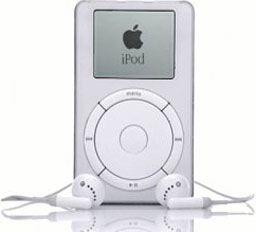 Publisher’s note: For better quality, import using the AAC Encoder, which gives you better sound quality at the same sampling rate as MP3 and more efficient compression. AAC files are compatible with iTunes, iPods (the first iPod arrived in October 2001, over six months after this article was first published – you can read the iPod story here), and iOS devices. That said, if you want to play your music on a non-Apple MP3 player, use the MP3 encoder.
If you ask me why, when you select Custom, you see settings such as 320 Kbps and Variable Bit Rate, come back next week. Higher than 192 Kbps won’t make much of a difference on even high-quality computer speakers. To set the importing preferences, go to the Edit menu and select Preferences, and hit the Importing pane.
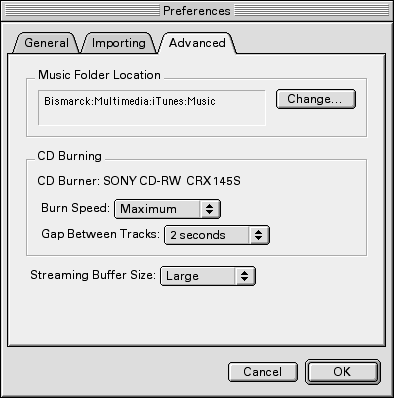
Also, you should set the folder where you store your music. In Preferences, click on the Advanced pane and click on Change to select the folder where you want iTunes to store all your MP3 files when it encodes them.
Then, just hit the Import button – the one with a musical notes in it – and allow iTunes to convert your music into MP3 files.

Remember that the encoding speed depends on your hardware, mostly your processor and CD-ROM speed. The 12.7x speed you see in the screen shot above is not representative of the typical iMac or G3 computer. It happened on a dual processor G4 with the full blast speed of the Velocity Engine, so please don’t be disappointed if your regular encoding speed is 5x.
One problem is that the online music database doesn’t provide everything, and sometimes it gets the genre wrong. I snickered when I saw some metal albums tagged with Pop or an Alanis Morissette album tagged with NewAge. I kid you not!
In any case, all you need to do to change the info on a bunch of songs is to select them and choose Get Info from the File menu. If you want to select them all, combine the Command key and the A key (Cmd-A). If you wish to add them to the selection one by one, hold down the Cmd key and click on each song individually.
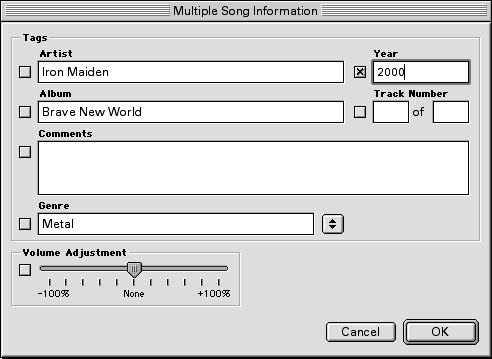
If you wish to add something, such as the year, just type it in the text field and iTunes will automatically check the checkbox used to say that changes will be made to the song files. If you wish to change the genre, just pull down the popup menu – see the icon with two opposite arrows – and select the appropriate option. Then click on OK to confirm.
Organizing Your Music
Navigation is easy to figure out. When you click on the Library icon, you’ll easily find out that you just need to click once on a genre, an artist, or an album to display the tracks and their information. What you want to do, however, is to create playlists and organize the view options to your liking.
Customizing the view options allows you to display nothing but the info you want to see about your songs. The greatest thing about it is that iTunes will remember your settings for each different window. You can set different view options for a CD, a library, a playlist, or anything else. Go to the Edit menu and choose View Options.
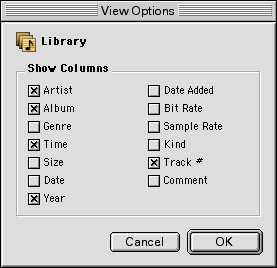
Once there, just check or uncheck the columns you want to display in your playlists and library. Remember, too, that you can adjust the size of the columns in your playlists by going to the top of the columns and pointing the mouse to the lines, clicking once and dragging them around.
![]() To create a playlist, just click on the button (displayed to the left) and name the playlist. Once done, find the songs you want to add to the playlist and drop them on the playlist’s name. iTunes will automatically add the information for you.
To create a playlist, just click on the button (displayed to the left) and name the playlist. Once done, find the songs you want to add to the playlist and drop them on the playlist’s name. iTunes will automatically add the information for you.
Radio
iTunes works with the Kerbango online service to offer lots of different types of music for Internet radio. Just click on the Radio Tuner, then click once on the small arrow of your preferred genre, and then double-click on the station that you want to listen to. iTunes will take care of buffering and streaming playback. Enjoy!
Conclusion
Before you start burning a CD, which we will explore next week, remember to learn how to use the minimized window. When you are listening to music and don’t need to adjust anything for a while, click on the button in the top-right corner of the main window, and you will get something similar to the following image. The smaller window is convenient and easy to drag anywhere on the screen.

Next week we will learn how to burn a CD with iTunes.
Keywords: #itunes #classicmacos #importtoitunes #encodemusic
Short link: http://goo.gl/DoKClw
