Although it has been a while in terms of the life span of the typical child growing up in the computer age, the year 1984 was a highlight. Besides the fact that 1984 was the year the first Macintosh was introduced, the year marked a change in the way computers were used.
 Prior to 1984, computers were still viewed as devices that processed numbers and words. The Macintosh changed this by introducing a program known as MacPaint, which came free with the computer. MacPaint 1.0 was created by Bill Atkinson.
In 1988, David Ramsey modified Atkinson’s original program by taking the tools and pattern palettes off the computer screen and made them mobile, giving the user the option to hide both of them. The modified program is known as MacPaint 2.0.
While it is an old program, it still is a good one for compact Macs and monochrome display PowerBooks. Its tools display has been the inspiration for tool palettes for just about all other current drawing, painting, and rendering programs, including Photoshop and Illustrator. MacPaint 2.0 is still “the powerful, free form graphics tool for anyone who sketches, designs, illustrates, or paints” (from the “About MacPaint” info box). If you can use MacPaint, you can learn the new drawing software packages with little difficulty.
Tool Palette in Detail
Row 1
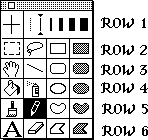 MacPaint 2.0 tool palette (right) is very basic to the contemporary computer artist or graphics designer. In spite of this, there are certain basics that all artists have to be able to do. One is to draw a line.
Along the top row of the palette, one has a series of line thicknesses to choose from. On the image presented, the thinnest of the lines that can be drawn (one pixel wide) is selected for both horizontal and vertical lines. One can move the arrows to different thicknesses for each dimension or even choose the “null” line option (that is the dashed line that is to the left of the selected line thickness).
Row 2
Row 2 has some of the most useful tools found in MacPaint. From the left, one has the select rectangle area and lasso tools. The former allows one to block out a rectangular section of the screen and either move that section around or change the characteristics of the area using commands from the Edit menu.
Most of the commands from the Edit menu only work when a rectangled-off area is selected for manipulation. These commands include flipping the selected area horizontally or vertically, rotating the image 90 degrees, and tracing over the lines.
The lasso tool allows one to pick out a specific shape on the screen and move it around. Unlike select square, you cannot use the edit commands on lassoed shapes. Both select rectangle and lasso allow one to cut and paste images onto other files.
To the right of the lasso tool, there is a white rectangle tool and a shaded rectangle tool. These allow one to draw that shape. The white rectangle tool will produce white rectangles according to how you point and click on the mouse. The shaded rectangle tool will produce rectangles with a pattern that is selected from the pattern palette (covered below).
Row 3
Row 3 has a hand tool to move your view of the 8.5″ by 11″ painting area around. This comes in handy if one has magnified the image resolution to the maximum of 800%. Resolution can be set as low as 50% in MacPaint. To the right of the hand is your line drawing tool. This tool allows you to draw straight lines whose thickness is based on the selections made back on Row 1.
To the right of the line tool are the white and shaded rounded corner rectangle tools. They work like the aforementioned rectangle tools but they leave the corners rounded. These tools are useful for making flowchart boxes and borders.
Row 4
The first two tools on Row 4 are the paint bucket and spray can tools. The paint bucket allows one to fill an enclosed area with a pattern. Caution should be used with this tool. If as much as one pixel in the enclosed area is open, the pattern will escape and fill the page. See the reduced example below.

The spray can tool works like its physical reality counterpart. See the example below.

To the right of the spray can tool, one will find the white oval/circle tool and the shaded oval/circle tool. They work like the aforementioned rectangular tools.
Row 5
The first 2 tools on Row 5 are the paint brush and the pencil. The paint brush allows one to draw a pattern who shape can be varied by making a section from the Goodies menu that is on the top bar. Shapes vary from a single 4 pixel dots to larger squares and lines.
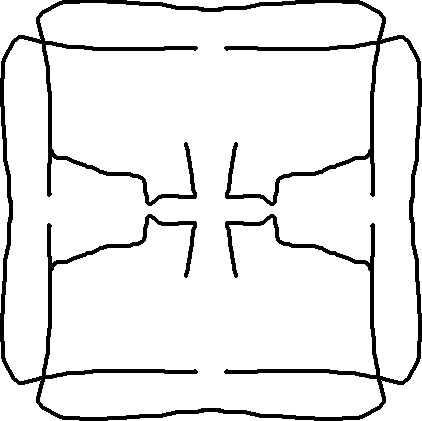 As an added feature, one can activate the brush mirrors feature and create mirror images of paintings. One simple example can be seen here.
Next to the paint brush is the pencil. It allows one to draw freehand, one pixel lines. It can also erase an image one pixel at a time by putting the pencil “tip” over a pattern area and clicking on the mouse.
The white heart shaped and the shaded heart shaped tools allow for free form, nonlinear drawing. Like the other shaded tools, the heart shaped one will fill in with a pattern after you have released the mouse button.
MacPaint Patterns Palette
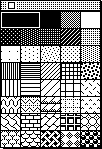 Having mentioned the word “pattern” so often, an explanation is due. Next to the Tools Palette is the Patterns Palette (right). Like the tools palette, it can be “torn out” and placed anywhere on the screen. The default pattern that the Mac selects is all black. However, one can click on a desired pattern like a background of gray or a pattern of dots. Once the pattern is selected, you can install it to a shape using the paint brush, paint bucket, or through drawing shaded rectangles, circles, and other shapes. The Goodies menu also allows one to alter the shape select to meet one’s tastes.
Row 6
 The bottom row of the tools palette has the Text Tool, the Eraser Tool, and another pair of shape forming tools. This last set of tools allows one to draw free form polygon shapes. To start a polygon shape, click once on the mouse and draw a line. When the line is done, click on the mouse and start drawing the second line. Repeat the process until the shape is complete then double click to compete the shape. This is how the hour glass shape shown to the right was formed.
The text tool does more than just allow one to type words on the page. Using fonts such as Cairo, Mobile, and Symbol, the MacPaint artist can type in a variety of animals, bullets, vehicles, and other objects in sizes that range from 9 point up to 48 point.
The Eraser tool is self-explanatory with one exception. If one presses the Apple button, it can unerase lines and shapes.
Example
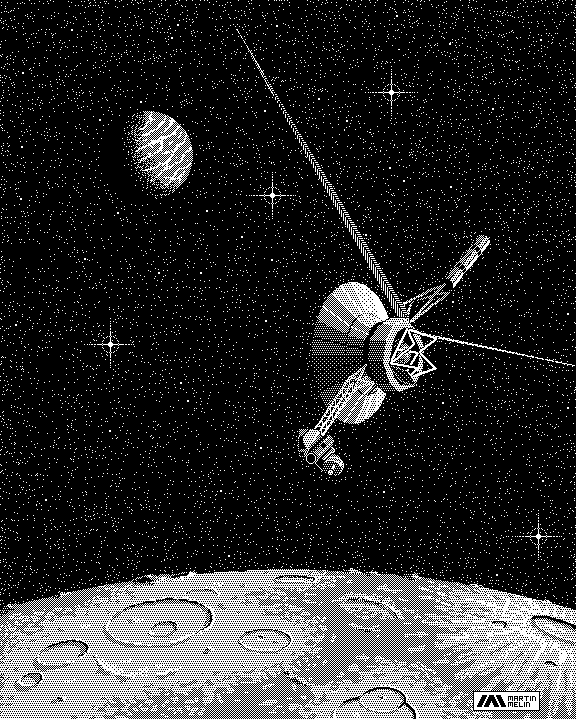
I found this MacPaint drawing of Voyager 2 on the Internet. It is a good example of a MacPaint drawing. Others can be found in placed like the University of North Carolina Sun Site and other places.

MacPaint 2.0 still does the job for me and many other Mac users. I will concede that it would be nice to add a dash of color, but if you are doing a flyer master that will be photocopied, black and white are the colors of choice. The same applies to the 8.5″ by 11″ size of the MacPaint page.
Those of you that have compact Macs, go rediscover your computer roots. 😉
This page was created using MacPaint 2.0, TeachText, MacWeb 1.1, and Photoshop 1.0. It was edited using Claris Home Page 3 and Photoshop 4. This article was first published in 2001.
Next time, SuperPaint and Canvas, two color painting programs.
Keywords: #macpaint
Short link: http://goo.gl/etjcN5
searchword: macpaint

