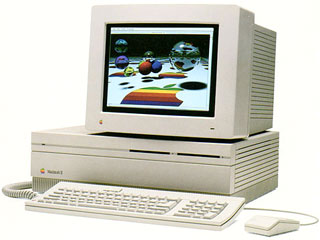
Apple broke the speed envelope with the Mac IIfx – the 40 MHz 68030 CPU on a 40 MHz data bus left everything else in the dust. Because it needed faster memory than any previous Mac, it used a special 64-pin dual-ported SIMM. It was the first Mac to ship with 4 MB of RAM.
 The greatest drawback in upgrading RAM in the IIfx is the location of the SIMM sockets. You need to remove the entire drive support assembly (it holds the floppy and hard drives) to access the memory sockets.
When upgrading, be careful not to damage the SIMM sockets, especially if you are removing memory. Although the IIfx shipped with 4 MB of memory, odds are pretty good that it’s already been upgraded beyond that point.

Mac IIfx page from Apple Memory Guide.
Looking at the motherboard with the connectors to the rear and power supply to the right, you will see eight SIMM sockets. The four nearest the rear of the board (further away from you) are Bank A. The four nearest the front (nearer to you) are Bank B. Memory must be installed in sets of four matching 64-pin SIMMs rated at 80ns or faster.
Although the IIfx uses the same type of 64-pin SIMMs as the LaserWriter IINTX, you cannot use memory from the printer in the IIfx – the printer memory is not fast enough for the Mac IIfx.
The IIfx supports 1 MB, 4 MB, 8 MB, and 16 MB SIMMs, allowing a wide range of memory configurations, although Apple does not officially support 8 MB or 16 MB SIMMs.
A 4 MB configuration has four 1 MB SIMMs in Bank A; an 8 MB configuration has 1 MB SIMMs in all eight sockets.
For 16 MB, install four 4 MB SIMMs in Bank A. To reach 20 MB, add four 1 MB SIMMs in Bank B.
For 32 MB, insert 4 MB SIMMs in all eight sockets.
Although the IIfx supports 8 MB and 16 MB SIMMs, the Apple Memory Guide gives no details on installing them. I suggest you install the first bank of 16 MB SIMMs in Bank A, since that follows the pattern established with other configurations. Bank B can then hold 1 MB, 4 MB, or 16 MB SIMMs.
After installing memory and reconnecting your drives, boot your Mac with extensions off (hold down the shift key) and check “About This Macintosh” under the Apple menu. If it doesn’t give the expected number, you should reseat your memory.
Once you know the upgrade is a success, bolt everything back in place, attach the cover, and enjoy the extra memory. I suggest you increase the size of the disk cache for better overall performance.
Keywords: #maciifx #macintoshiifx
Short link: http://goo.gl/nBElqq
searchword: maciifxmemoryupgrade

