Most PowerBook G3 owners I know of want to upgrade their internal
CD-ROM or DVD-ROM drive to something faster and more flexible. The
problem is that most new drives for sale around the Net are over
$100 and are simply not worth the investment.
In this article I'll show you how to swap your existing drive
for another one. These instructions should work for any PowerBook
with a removable optical drive, including the PowerBook 1400 and
the G3 models.
Things you need:
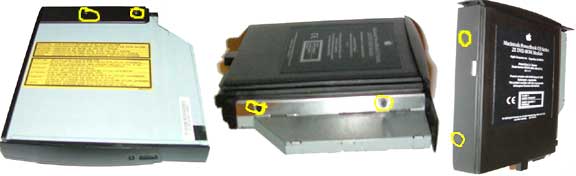
Your current CD-ROM or DVD-ROM drive
Any CD-ROM, CD-RW, DVD-ROM, etc. drive from a laptop that has
the ATAPI 50-pin interface
Small screwdrivers
Things to look for in a replacement drive:
Tray design that will fit
CD-RW, Combo, DVD-RW, or DVD±RW are a plus
Slot loading drives will work
The best place to get your "upgrade" drive is from a broken PC
laptop. Chances are it will work, because most laptops have used
the ATAPI 50-pin standard for over 10 years.
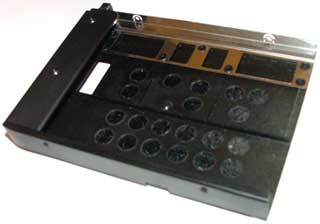
Follow these steps to do the switch:
Remove 6 screws from PB G3 tray (see photos above) or 4 from PB
1400 tray.
Pull out the original drive.
Place the new drive in the tray.
Replace the screws (only 4 are required on some drives).
After you install the new drive, it automatically works with
Toast. To
get your iApps working, download and run PatchBurn. PatchBurn
installs new drivers in Mac OS X so that it will support your
replacement drive.
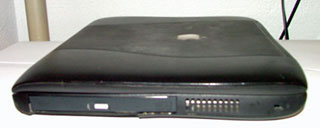
In most
cases the new drive will not have the same size and shape as your
original Apple drive. It's possible to switch the faceplate on some
drives, but those are rare, so you'll see a funky looking drive in
your PowerBook (see photo). But remember that now you can burn CDs
(and possibly DVDs), which you couldn't do with your original
drive.


 In most
cases the new drive will not have the same size and shape as your
original Apple drive. It's possible to switch the faceplate on some
drives, but those are rare, so you'll see a funky looking drive in
your PowerBook (see photo). But remember that now you can burn CDs
(and possibly DVDs), which you couldn't do with your original
drive.
In most
cases the new drive will not have the same size and shape as your
original Apple drive. It's possible to switch the faceplate on some
drives, but those are rare, so you'll see a funky looking drive in
your PowerBook (see photo). But remember that now you can burn CDs
(and possibly DVDs), which you couldn't do with your original
drive.