
There are several ways to attach a group of computers to the Internet. At work, we have a Cisco router, an ISDN connection, and a range of 128 IP addresses. At home, I’ve used IPNetRouter on my SuperMac J700/180, which also acts as a mail and list server. The $89 shareware program does a great job – most of the time.
I can’t fault Sustainable Softworks for a flawed product. Our internet access problems are never the fault of IPNetRouter. They may be due to dropped phone lines, a locked up computer, or problems on the ISP end of things, but never due to IPNetRouter locking, crashing, or bombing.
Still, that’s a solution that depends having on a computer running constantly, and it takes several minutes to shut down and restart, which is usually necessary to reestablish a dropped connection.
That’s why I was pretty excited when AT&T Cable offered cable modems and DealMac listed an incredible price on the Hawking 10/100 Broadband DSL/Cable Router. After a $50 rebate, my end cost for the router was under $100. To top it off, AT&T was offering free installation and $19.95/month @Home service for the first three months.
That will jump to $39.95 after three months, but I’m already paying over $50 a month for a pair of ISDN lines, so I’m going to come out way ahead on this one.
As for speed, I downloaded the latest QuickTime update in under 4 minutes. That was usually a 30-60 minute project with ISDN. And you can watch QuickTime movies as they load, not wait for them to load and then play them
In a word, it’s fast.
It was a bit of a trick getting the Hawking router set up, since the software and manual assume you are using Windows. Still, it wasn’t hard. Through persistent application of logic (trial and error), I got it up and running, although it’s not connected to my network quite yet.
The Right Cables
The Hawking router ships with a router, power supply, manual, and pair of disks. There are no ethernet cables – you will need them.
If you are connecting to the router through a hub, you’ll be able to use regular ethernet cables. Because my computer is temporarily off the network (my computer room is on the main floor, but the network is in the basement – the electrician should have things set up so I can connect to the network tonight or tomorrow), I had to use a crossover cable, something most people don’t have around the house.
Configuring Your Mac
Once the router is connected to your Mac or network, you need to open the TCP/IP control panel. I suggest you (1) write down your current settings on a piece of paper and (2) save them as a configuration (Cmd-K – or Configurations… under the File menu) before setting things up for the router. That way, if things don’t work out or you run out of time, you can easily revert to your old settings.
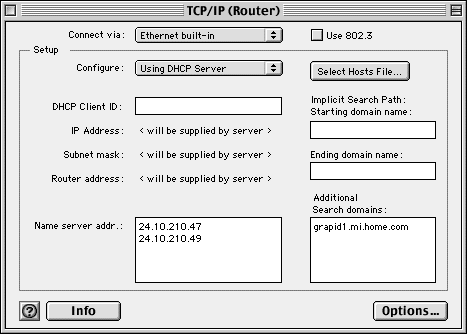
At this point, I like to set the user level to Advanced (Cmd-U), then click on the Options button and turn off open only when needed.
Now you’re ready to set up the router. (Unlike Windows users, we don’t have to restart our computers to change our TCP/IP settings.)
Configuring the Hawking Router
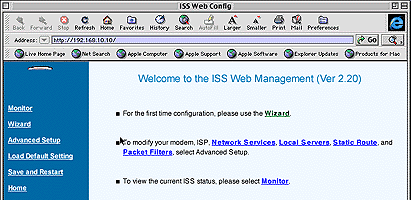
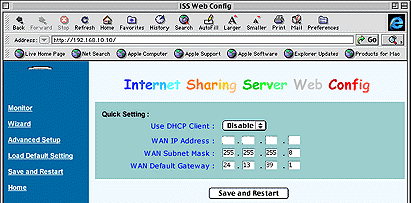
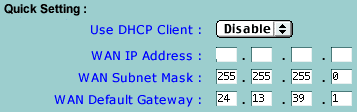
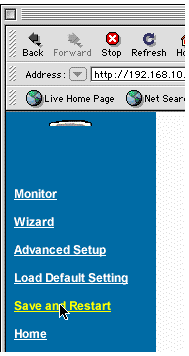
Open your browser and enter 192.168.10.10 into the address line. Your browser will open an HTML file on the router, showing a page like this:
 to the router using the ethernet cable that attached it to your computer – and start surfing.
Voila!
It may not work the first time. I think third time was the charm for me, which is also the time I decided to carefully write down each step and make screen snapshots along the way.
Now I’ll be able to connect my entire network to the Internet at cable modem speeds and give up the expensive ISDN connection, assuming the electrician finishes some wiring. My connection will no longer be at the mercy of Ameritech, Internet 2000, busy signals, and computer lockups.
However, that doesn’t mean I’m done with IPNetRouter. You see, I have this collection of old pre-ethernet Macs, and IPNetRouter can route IP over LocalTalk cabling, so I’m going to use that to put my Mac Plus, Portable, and Classic II, along with my wife’s PowerBook 150 and son’s accelerated Color Classic on the Net. It won’t be as fast as ethernet, but even LocalTalk outperforms the ISDN connection we’ve had since May 1999.
Now I’ll have a way to connect both my ethernet and pre-ethernet Macs to the Internet.
Update: March 23. We now have the router connected to our ethernet hub. All our Macs can access the Internet at cable modem speed – and we can print again.
Keywords: #cablemodem #router
Short link: https://goo.gl/F13gcM
