
If you are a novice Mac user, reading iBasics is a great idea! All kidding aside, if you are a novice user, file security and computer security is probably a weakness that you should address. In addition, you can take advantage of a few technologies that are embedded in the Mac OS.
- Description: Handling files and keeping your Mac secure
Difficulty level: Intermediate
System version: 9.x
Required: Mac OS 9 or later
Multiple Users
Your loved one accesses your Mac, and for some reason you don’t want her (or him) to access some of your files. There are two things that you can do in order to ensure the safety of your data. First, do not teach that person how to boot from a CD or an external drive. 🙂 Secondly, use the Multiple Users technology, introduced with Mac OS 9.
Go to the Apple menu, scroll to Control Panels and select Multiple Users. If, at the bottom of the window, the multiple user accounts are turned off, turn them on. The next time you restart, the Multiple Users feature will kick in.
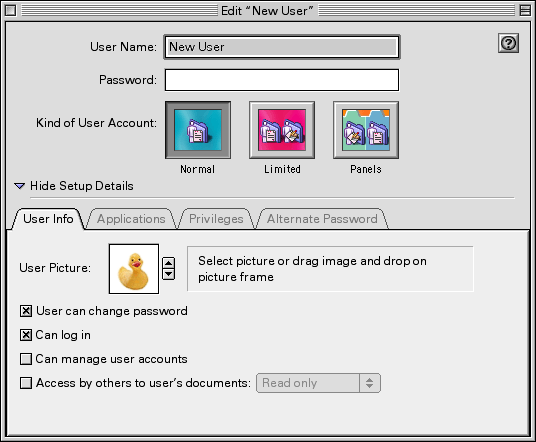
Name the user, allow the person to type a password, and then click on the Limited button. This will allow you to define the privileges for the user: which software and files will be accessible. The Panels accounts are mostly useful for kids or people who are not computer savvy. Click on the tabs to define the privileges.
In case you wonder how to do this, here are some tips:
- Make sure to select only the applications that the user will need to take use.
- Limit access to removable media, because it can be used to boot up the computer from a source other than the hard drive.
The user will have a profile and different settings in his/her own environment and will be able to have personal profiles when using the same software as you. This is especially nice when you are not ready to sacrifice the security of your email messages, even when your email software offers the ability to retrieve mail from multiple accounts.
Keychain
The Keychain is a great way to store your passwords for better security than little pieces of paper. It remembers your passwords and what you use them for. It asks you to unlock it whenever one of your passwords needs to be called up.
To set it up, open the Keychain Access control panel. The Default keychain should be more than enough to serve day-to-day needs. From there, you can create new keychains, manage them, and do a few other things. To add passwords to your keychain, make sure to take advantage of the option to add usernames and passwords to the keychain from inside your favorite applications. For example, the Transmit FTP software allows users to add FTP paths to a keychain so that you store your passwords there.
The most important aspect of using the keychain is to unlock it only when necessary – and lock it when you don’t use it. When it is open, anybody can use your passwords for authentication without even knowing what the login information is. Look for Default Settings in the Edit menu. You can easily make sure that your keychain becomes locked after a specific period of inactivity.
Whenever you need to view a password to remember what it is, open your keychain (remember, the Keychain Access control panel) and select the password you want to view. Then click on the Get Info button in the window. You will have to type your master password, and then Keychain Access will show you the specific password you need to view.
Learn to use the keychain functions from the Control Strip in the Finder for easy access to shortcuts and keychain features.
Encrypt Files
Now the fun begins. Let’s say that you have a confidential Word document to email to someone, and you want to make sure that no interception could allow another user to read in. Or that you want only the recipient to use the file. Since Mac OS 9, the Mac OS offers to take care of that for you with decent 128-bit encryption.
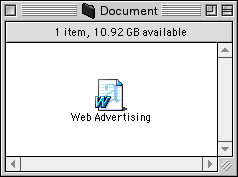
I need to encrypt this file…
Find the file and click on it once to select it. Go to the File menu and select Encrypt. Note that you can do the same with a contextual menu by control-clicking on the file and selecting Encrypt.
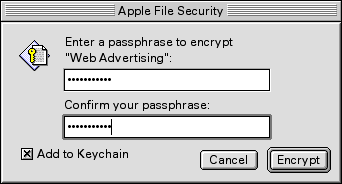
You can add it to the keychain!
Enter a password phrase that is least five characters long, and yes, spaces can be used. Make sure to enter a passphrase that (only!) your recipient will know about. The best is to give a clue or ask a question, so that the password or passphrase is the answer. Choose something original and confidential. For your old buddy from college, it can always be some old souvenir that he’ll remember instantly when facing the question that leads to the answer.
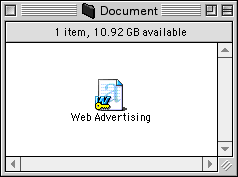
The yellow key in the icon indicates that the file is encrypted.
Network Protection
Network protection will be the topic of next week’s tutorial, but let me tell you why you need network protection. It is easy for hackers or snoops to sniff around and intrude, scanning your computer’s ports. Your best bet to stop intruders is a firewall. It blocks ports and detects intrusions.
Next week, I will show you how to use firewall software. We will see NetBarrier, and if I can try Norton’s firewall solution, I will include it in the tutorial.
Keywords: #macsecurity #security #encryption #keychain
Short link: http://goo.gl/TJOMwP
