
Mistakes, mistakes . . . we all seem to make them, and I’m no exception to the rule.
For those who haven’t been tuning into Welcome to Macintosh, the most recent article in the Keyboard Roundup was about the Apple Extended Keyboard II. I’ve received several emails informing me of things I failed to mention, so I felt I needed to revisit the Extended II by letting the emailers discuss what I didn’t address in their own words. I also wanted to take the time to share some stories from readers about their Extended IIs.
The first email is from Chris, who also provided a story about his Extended II. He had this to say on the complete disassembly of the Extended II:
It’s a bit more involved than with the Extended.
So, assuming that the top is off, you’ll see two clips holding the metal bracket in place. These clips can be seen above the Function Keys, between the F5 and F6 keys and the F12 and F13 keys.
Also, the ADB ports are a bit more difficult to remove.
With your fingers under the F1 through F4 keys and a few fingers under the F13, F14 and F15 keys, you’ll see that your thumbs are perfectly positioned to push the clips off the metal bracket. Do this and lift with your fingers. Now, the clips will hang up on the PC board as you lift. That’s fine.
Now it’s time to remove the ADB ports. You do this by sticking a small screwdriver or similar under the ribbon cable and levering the ADB port up and out of its slot. Do the same with the other ADB port.
You can now use your thumbs to move the clips away from the PC board.
Rotate the board slightly upward and towards you. Notice that there are five small plastic bits at the front of the keyboard. There are tabs on the keyboard that fit into the slots on these little plastic bits. Wiggling the keyboard will eventually get the tabs out of the slots. Mind your fingers if you grab the PC board. The solder holding the keyswitches in place can give you a bad scratch.
Reassembly is simply getting the tabs into the slots, pushing the keyboard down until the locking tabs slip over the metal bracket and carefully slipping the ADB ports back into place.
The tabs by the front of the keyboard are part of the polymer strip that is the front “foot” of the keyboard. If you’re planning to soak the bottom of the keyboard case, it’d be a good idea to remove this foot.
There is a black liner which is an RF shield. This can be removed and replaced with a little difficulty. It’s no big hassle, just a bit tedious. Remove it if you intend to soak the bottom of the case as part of the cleaning process.
The height adjustment can be left in place, just remove the spring. It’s obvious how to remove and replace the spring. I don’t recommend disassembling the height adjustment mechanism. It’s more trouble than it’s worth.
If you soak the bottom to clean it, it’ll take a while to dry completely. This is best done by letting the bottom drain bottom side up on some newspapers for a few days.
Once the case is dry, replace the front foot, the RF shield and the height adjustment spring. Then replace the keyboard as described above.
Chris had this to say on cleaning as well as what he thinks of feel of the Extended II vs. the Extended:
When I took apart my first Extended II to clean it (and yes, getting one apart is a bit of puzzle.), I had the hardest time figuring out how to get the height adjustment bits back together. After about five minutes of fiddling around with it, everything suddenly made sense, and it all went back together perfectly. I found that after a few days, the height adjustment seems to need readjusting. Fortunately, I find the angle of the Extended to be just about perfect.
As for removing the keys, if you have the right tool, it’s easy. It’s called, unsurprisingly, a keycap puller. Googling “keyboard keycap puller” will bring up many examples at many different prices.
The spacebar on both the Extended and Extended II is an oddball on the keyboard, as there is a “stabilizing bar” that clips to the internal metal framework that holds the actual keyboard printed circuit board. Getting that off is a bit complicated, as is getting it back in place. However, if one is comfortable with taking apart a keyboard and pulling keycaps, it’s no big hassle to remove and reinstall.
I pulled out one of my Extended IIs, and yes, there is a slight difference in the “feel” of the keys. It’s a very subjective thing, however, as to what is the better “feel”. I do prefer the Extended. It’s hard to quantify why I prefer the feel of the Extended keys. A bit stiffer, perhaps.
Still and all, they are both exceptionally good keyboards. I hope that your articles will rescue more than a few of them from thrift shops and get them hooked up to Macs, where they belong.
Thanks for the wonderfully detailed instructions and for your kind words Chris. 🙂
The next email comes from Ryan and he tells about a feature that I had no idea existed:
Regarding your roundup of retro Apple keyboards:
Somehow, you failed to mention the one feature which made the Extended II desirable, especially when compared to the Apple Extended Keyboard and its less-loved successor, the Apple Design Keyboard: n-key down.
This meant that the keyboard could send key codes for as many keys as you dared to hold down at once, in contrast to other keyboards that would only transmit key codes for, usually, three non-modifier keys at a time.
The feature was ideal for playing Marathon and some other games, of course.
Ah, the memories!
That’s definitely a feature I’ll have to try out on my Extended II! See, you learn something everyday! Thanks Ryan!
And now, on to the stories. The first one is from Herm, who first used an original Extended with his SE back in 1988:
I used the Extended that I purchased with my Mac SE in 1988 up until a couple years ago, when I finally moved to a non-ADB Mac. The Delete key started to stick a bit toward the end, but a shot of contact cleaner in the keyswitch would take care of it for a while.
I also picked up an Ext. II along with a free Mac somebody was giving away on Craigslist. It was also in very good shape, only in need of a thorough cleaning. The keyboard mechanism can be removed from the casing, it just takes a little coaxing since the lining between the case and the board has some sort of sticky substance that keeps it from budging. Sorry I don’t recall the exact details, but be assured that it can be separated with no damage. In addition, I pulled all the keycaps off the switches and put them in a container of soapy water to really get them clean.
Between the two, I found that the feel of the II was slightly different, but perhaps a tad better than that of the I. Although the I lacks the (somewhat crude feeling) height adjustment of the II, it makes up for that with a more solid-feeling case.
These keyboards were built to last and quite worthy of the code names they were given by Apple (IIRC, the II was named for the aircraft carrier Nimitz).
It’s a shame that neither Apple, nor any other company sees fit to offer a well-built, keyswitch-based keyboard today. Even if the price was great, I’d happily pay it if matched the standards set by the Extended keyboards.”
Herm, I couldn’t have said it better myself! Keep an eye out for an upcoming review I’ll be doing on a mechanical keyswitch keyboard that’s considered a legend in the computer industry.
The next story comes from Christopher in Germany, who uses his Extended II with his iBook. He was even kind enough to include pictures of his rig.
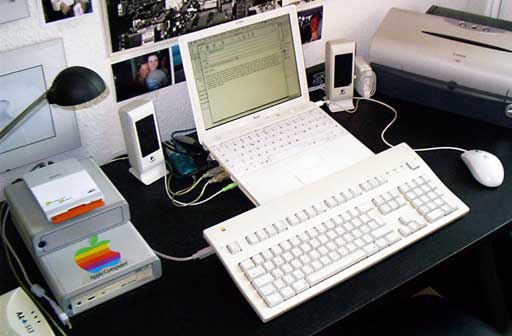
“Originally I used a stylish Apple Pro keyboard (the most recent one) with my iBook, but when my university closed down a computer pool with old (pre-G3) Power Macs half a year ago, they just threw away all the peripherals. This way, I literally fished my Extended II out of the junk! The thing had been heavily abused by students for more than 10 years, but after some cleaning, it now looks like new, and also types like new. This is unbelievable quality even by German standards.
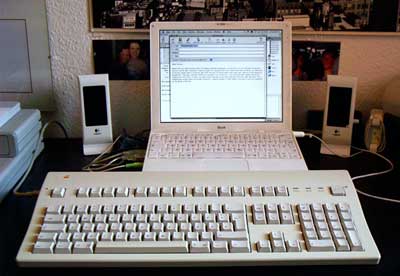
The device is heavy (but that’s the price for solidity), ugly, and wasting lots of space on my desk, but my fingers are in heaven. I happily bought an expensive Griffin iMate to be able to use this keyboard with the iBook’s USB port. I am very picky about keyboards, but now I think I found the ideal one. For me, that is – other people I talked to hated the clicking and like the soft keys of membrane keyboards much better. But I am, for the first time in my life, completely happy with a keyboard.
By the way: I also disassembled the Extended II for cleaning, and played around with the mechanics which raise the angle of the keyboard. I don’t recall what I actually did, but after reassembly, the bar that controls the height now slides easily, while at first it was so stuck it couldn’t be moved at all. Maybe one just needs to move the internal parts a little bit to bring them back to life.
Our last story comes from Rich who has 11 (count ’em!) Extended II’s:
This is my favorite keyboard (though a runner-up is the Digital Equipment Corp. VT220 keyboard). I have 11 (!) in either current use – thanks to iMates – or storage. I was lucky enough to get a few new-in-box, and the rest are “preowned” in various states. Most are functional, though I have a couple that I’m trying to resurrect. (They have been given the dishwasher treatment and are waiting for testing. If they don’t recover, they may become donors.) Of the current crop of keyboards, the only other type I like is the scissor-type on PowerBooks.
It’s amazing that Rich was able to find some new in the box! I’m not a laptop fan, but I’ve heard some people say some of the PowerBooks were good to type on.
If you have a story you’d like to share about a keyboard you like, drop me a line at thomas (at) lowendmac (dot) com. Who knows, your story may be included in a future Welcome to Macintosh article.
Go to the Keyboard Roundup index.
Keywords: #extendedkeyboardii
Short link: http://goo.gl/nLXBq4
serchword: extendedkeyboardii
