
On January 9, 2001, Steve Jobs famously introduced the idea that Apple’s Macintosh personal computers were ideal in the role of ‘digital hub’ – users would use their Mac to access, organize, and edit content created or stored on tools like digital cameras, personal music players, and camcorders.
These sorts of gadgets were just starting to become affordable, but widespread acceptance had been held back by the awkwardness of working with them and with their digital content. Jobs suggested that standard interfaces – USB and FireWire – and a standard easy-to-use software suite – Apple’s iMovie, iPhoto, and iTunes – would let a home user with a personal computer work and play with their digital gadgets.
And while Apple eventually produced a Windows version of iTunes, the other components of what became known as the iLife suite of applications remained Mac-only. Windows computer makers tried to counter the appeal of a Mac with iLife to home users by bundling a variety of third-party photo, music, and video applications, but these remained at best a more awkward alternative to Apple’s suite.
But a funny thing happened along the way – from simple, easy to use applications, Apple’s iLife programs grew bloated and awkward.
iTunes, for instance, started life as a straightforward music player, a digital jukebox – in fact, it was initially not an Apple product but an application named SoundJam developed by Cassady & Greene. SoundJam was purchased by Apple and re-released as iTunes 1.0 on the same day as Jobs’ ‘Digital Hub’ speech. Later that year, Apple released the iPod, and iTunes became its interface to the personal computer – first the Mac, and later Windows.
And along with the iPod and later the iPhone and iPad, iTunes gained features – video capabilities, podcasts, interface to the iTunes Music Store, and more. Want a music player on your computer? You get all the other stuff whether you need (or want) it or not.
I sometimes do a little bit with video. I play music with a couple of bands and sometimes like to post video clips from performances on YouTube. Or share a short video clip with family members. Import a video clip from the camera to my computer, trim the beginning and the end of the clip.
These ought to be simple and straightforward, but I’ve always found iMovie awkward to use. Importing even a relatively tiny file into iMovie seems to result in an iMovie Project that’s a couple of gigabytes in size – a problem on my storage-challenged MacBook Air. And iMovie’s tile-based interface is built on a grid of thumbnail images from the video – time-consuming to create and awkward to navigate. Trimming, say, the first 12 seconds off the beginning of the video clip is possible, but not as easily as I’d like.
Eventually Apple agreed with me. In 2007, Steve Jobs announced that iMovie ’08 was a complete redesign of a product that he claimed had become too difficult to use. I found the new version equally unusable. I have a copy of David Pogue’s reference iMovie & iDvd ’09 – the Missing Manual, but should I really need a 400+ page volume to do a few simple operations with video files?
I don’t think so. I mostly use a Kodak Zi8, a 2009-era pocket camcorder, for video. It saves files in standard QuickTime-friendly MOV format, letting me move them onto my Mac and open them in QuickTime. There I can quickly and simply trim the start and end of the clip, merge clips, and more – much quicker and easier than I could do in iMovie. No fancy transitions, no adding titles, no creating automated movie trailers, as I could do in iMovie (with help from the missing manual). But I don’t care.
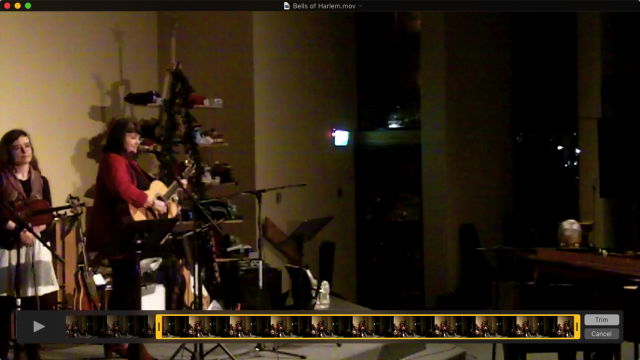
Trimming a video clip in Quicktime
Then there’s iPhoto – or the new replacement, Photos. Once again, what started life as a relatively straightforward application for managing a digital photo library grew and grew, adding editing features, face recognition, and more. You can send sets of photos off to be printed in cards, calendars, and photo books.
Again, my needs are simple, I think. My editing includes rotating photos and sometimes cropping an image. I sometimes need to create smaller versions of large images. I have made calendars with photos from trips and gift books with family photos. I’d like to be able to organize my photos into sets – photos from last spring’s trip, or from my grand-daughter’s 4th birthday party – and organize these sets into nested folders. I like being able to select a set of photos and display them as my computer’s screen saver images.
iPhoto and the new Photos stores an entire photo library as a single large database file – this confuses many users who too often end up with their photos stored in the iPhoto/Photos Library while also keeping copies of their photos as individual files – often scattered around their hard drive. And many never delete photos from their camera’s memory card(s) or smartphone’s storage, because they don’t quite understand where their photo is being stored.
iPhoto/Photos’ organization is equally confusing. There are events – created when you import photos into the program. User-created albums and folders. Is there a difference between an album and a folder. Probably, but the difference isn’t immediately apparent. Create a new folder, and it may spring into existance filled with photos – but what set of photos is added isn’t apparent.
Photos has a File/New Empty Album menu command, which is a help – but it ought to be unnecessary. At the same time, the new Photos has lost iPhoto’s ability, when exporting an image, to specify (at least roughly) the size of the exported photo.
My wife – who hand-crafts jewelry – frequently takes photos of her work, storing it in what used to be an iPhoto library, now updated to a Photos library. A few days ago, she wanted to send a dozen or so images to a gallery that might want to sell some of her work. They had file size limitations (1 megabyte) on the images she could send them.
Her first difficulty was getting the images she wanted into one place – it seemed frustrating trying to get them into a Photos album or folder. And even then, the new version lacks the ability to specify a smaller size for an exported photo.
The solution – export the images she wanted (full-sized) into a new folder (created during the export process) in her Pictures folder. Then open the images in the Mac’s standard Preview application – the default if she double-clicked on any of them in the Finder.
Who knew that the surprisingly capable Preview app has a Tools/Adjust Size option? It lets a user proportionally adjust the size – in pixels or inches – or resolution of a photo, and shows the resulting size of the resulting image (in megabytes). Just what Linda needed – and much more exact than the resizing available in older versions of iPhoto.
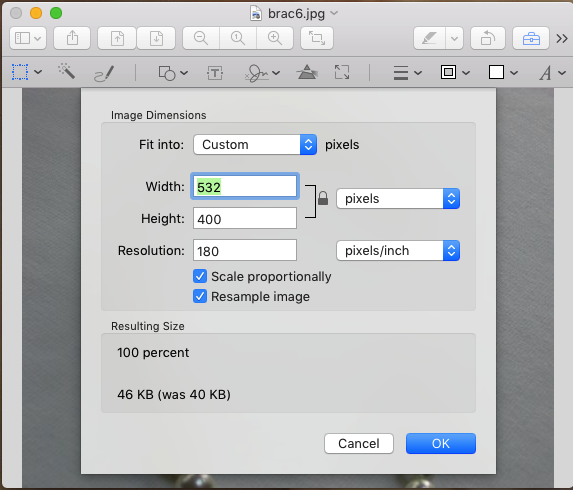
Using Preview to adjust image size
Right now, I’m leaning towards ‘setting the photos free’ – exporting everything from iPhoto/Photos to a series of folders within my existing Pictures folder. As I get each folder full of images created, delete them from my iPhoto/Photos library. Use Preview if I need to edit/crop/resize any of the photos.
Folders in the Finder, QuickTime, and Preview. Maybe all that I need for my late 2015-edition digital hub.
Keywords: #iphoto #photos #ilife #imovie
Short link: http://goo.gl/jfGGNL
searchword: ilife
