In late 2006, going right along their fall product cycle updates, Apple had introduced a 24″ iMac model for the first time. This was the largest ever produced of the “white” polycarbonate iMacs, sporting a 1920 x 1200 display, a 16:10 aspect ratio, and CCFL tubes to light up the screen. It’s a wonderful Mac to use, when it works. The primary issue with the 2006 24″ iMac is its GPU, which tends to fail. Most commonly, the NVIDIA GeForce 7300 GT is to blame. Not only this GPU is long in the tooth (not worth replacing), there are hardly any MXM 1.0 GPUs to replace it with, let alone ones which work. Unfortunately, testing reveals even 2007 era iMac MXM GPUs won’t work in this iMac, producing a blank screen. What are we to do, if we want to hang onto them?
In this article, I will show you precisely what I’ve done to my iMac, and how you may accomplish the same result for your own 24″ 2006 iMac. Note, we will be covering multiple hardware modifications. The purpose of these modifications are to take advantage of the original hardware, whilst simultaneously pushing the abilities of the configured hardware beyond Apple’s specified maximum OS limit, using hardware supported by a later version of macOS. The MacOS Yosemite portion of this project will be covered in a later article. This is less a tutorial, more a guideline on how this was done.
Motive behind the project
Here at Low End Mac, we believe in the long term value of Apple hardware. You should be able to use your Apple gear as long as it helps you remain productive and meets your needs, upgrading only as necessary. We want to help maximize the life of your Apple gear. Although this specific hardware configuration is an extreme example of pushing Apple hardware far beyond its originally intended configuration, it should at least promote the idea that our hardware is being depreciated faster than it should be. As the years wear on, our devices become increasingly challenging to repair, as components are more integrated, soldiered, non-replaceable. This entire project was possible only because the iMac’s components could be swapped out with newer ones.

Parts used
- Late 2006 A1200 24″ iMac, (MA456LL), EMC 2111
- 4 GB RAM upgrade
- 120GB PNY SSD (Any SSD will work)
- Mini PCIe to PCIe x16 adapter
- Female SATA to PCIe 6-Pin Power adapter
- Additional SATA power cable to splice off the original, for 2x outputs
- a Mac Radeon HD 2600 XT 256 MB
- A copy of Mac OS Yosemite 10.10.5 w/Piker Alpha mod
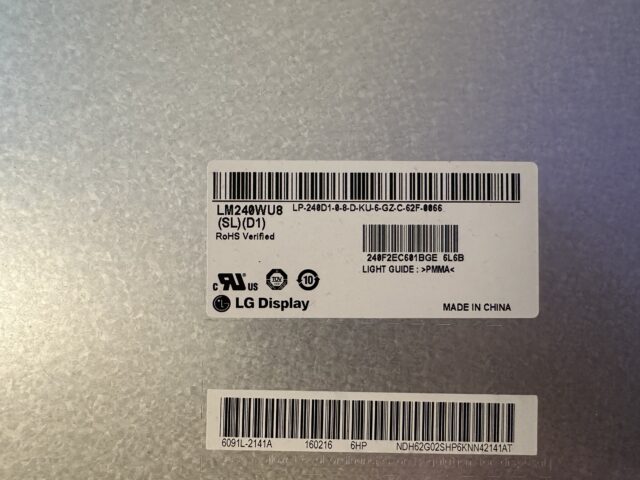
- A 24″ 16:10 Asus LED Backit Display (Display model listed below in project)
- Some additional power cables, tape, zip ties, superglue
Cloning MacOS Yosemite 10.10.5
If you already have a Mac with MacOS Yosemite, or, a bootable copy os OS X Yosemite, you may alternatively download the Boot.EFI files. Clone OS X Yosemite to your unsupported Mac from your supported Mac, then, drop the Boot.EFI files in the correct respective folders.
Path 1: System/Library/CoreServices
Path 2: usr/Standalone/i386
Mediafire link to Piker Alpha Boot.efi files: https://www.mediafire.com/file/fkwmc8xogtsfxp7/YosEFI.zip/file
Caveats
- It is quite difficult matching the right display, some display PSUs are larger and will have difficulty fitting internally.
- Optical drive has to be removed
- PCIe bridge doesn’t have to be external like on my project, it was just challenging to fit everything properly.
- Sitting in an enclosed space, there would be increased heat from the 2600 XT inside. A thinner, newer LED panel provides additional space inside.
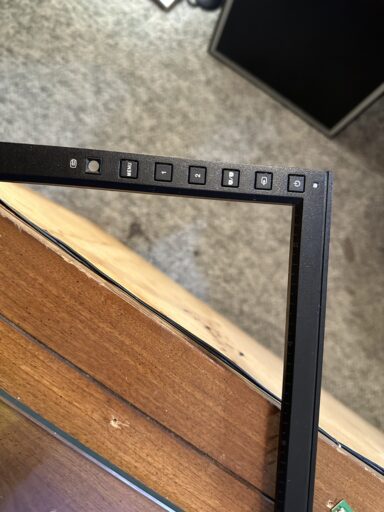
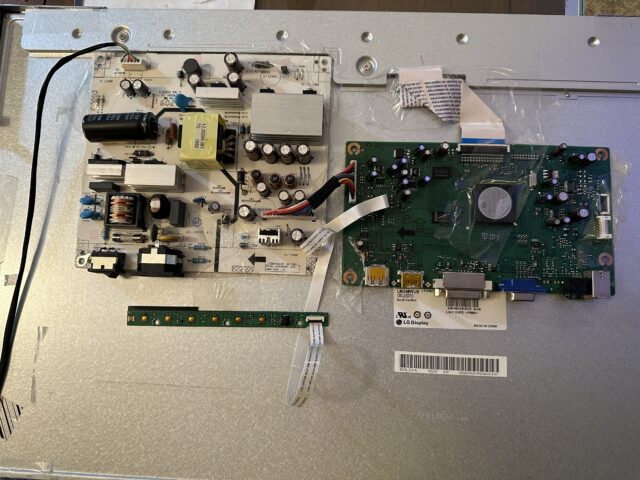
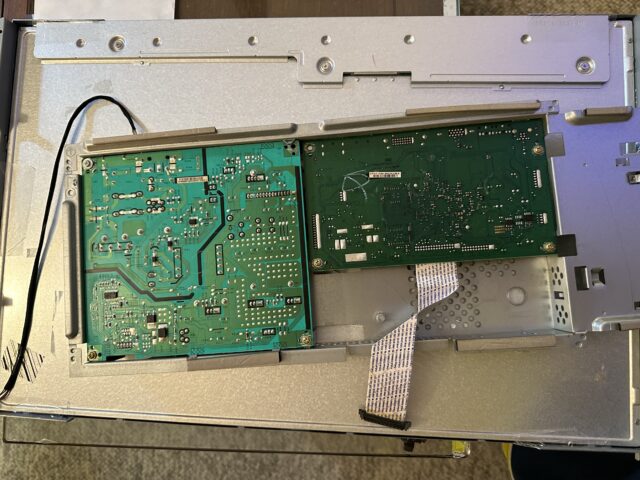
Disassembling the display panel
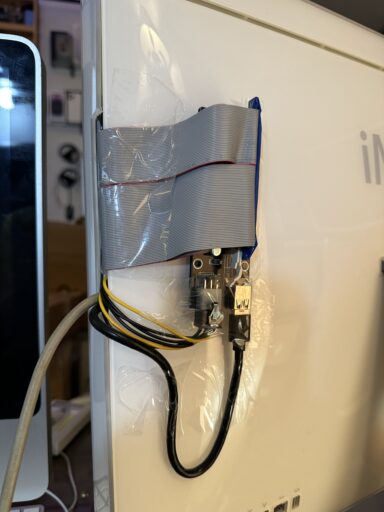
Basically, a regular ol’ Asus monitor was torn apart and stuck into the iMac. The original iMac internal LCD frame was superglued on and taped on carefully, providing a durable hold which can still be easily disassembled if needed. No screw holes line up with this modern panel, unfortunately. Since there is a 3-prong power plug for the panel, I could potentially just wire it to the inside of the iMac’s plug, so it reduces a wire which sticks out the side of the computer.

In hindsight, sticking the PSU on like this was a terrible idea. There needs to be more insulation!
I didn’t leave the power I/O switch connected, just the cable for it (just in case) and left the panel in a “standby” mode, so it’d just power on every time the iMac would. Why change that?
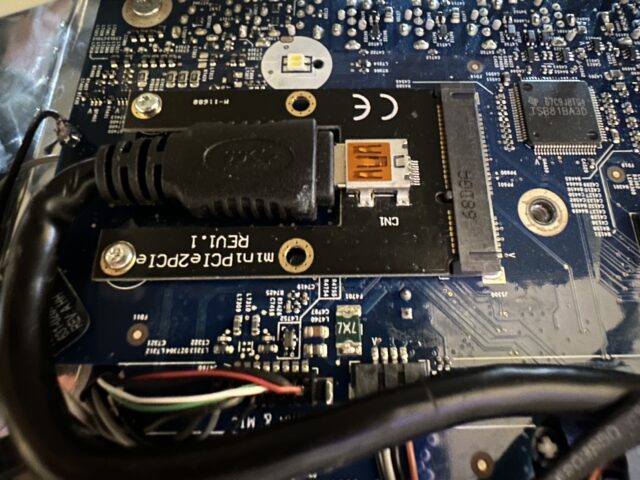
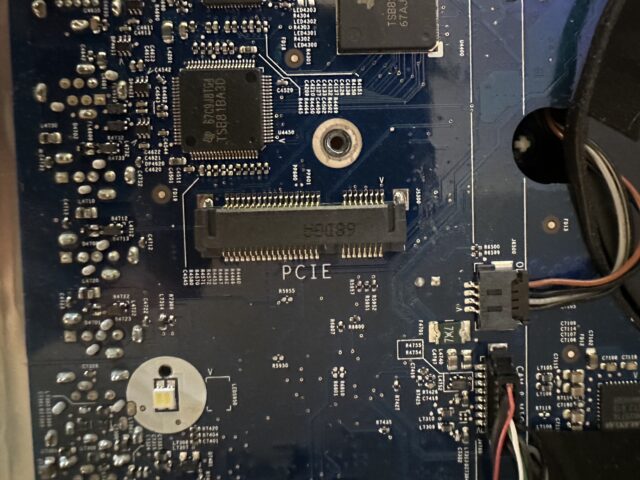
Testing an “eGPU”
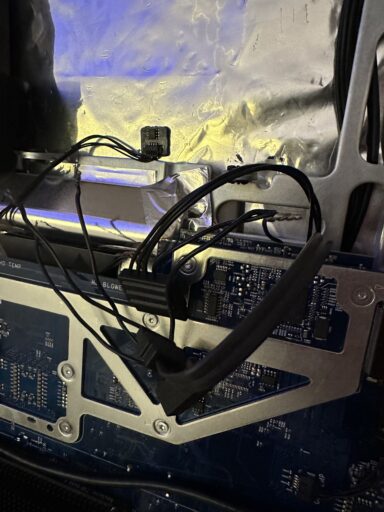
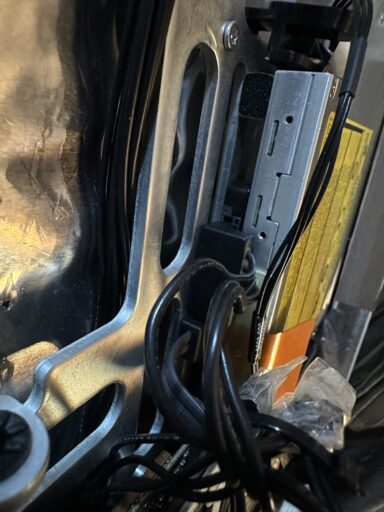
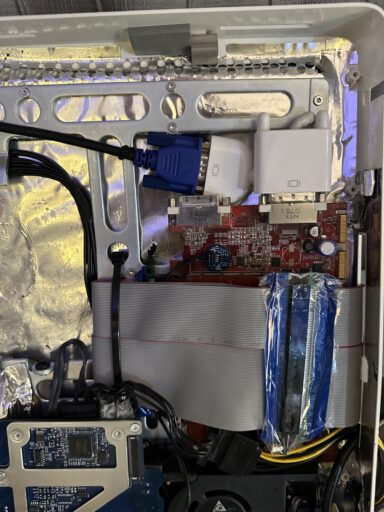
While technically an “eGPU”, since this will be entirely internalized, there is no sense in calling this an external graphics card. The original AirPort card was removed, a mini PCIe to PCIe adapter was put in it’s place, a PCIe x16 slot sticks out the side of the computer, it’s connected using a riser card to the 2600 XT. There just wasn’t enough space to cram everything inside, unfortunately. Otherwise, everything works.
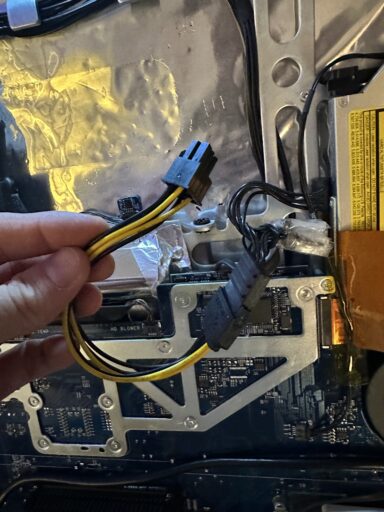
Splicing the SATA cable
The reality is, we need power for both the SSD and GPU. I’m banking the assumption of power delivery stability on the fact the iMac PSU isn’t at all driving multiple power hungry components any longer. The CCFL LCD is gone, the optical drive too, a power efficient SSD in place of the HDD, and that the PCIe x1 and would constrain the bandwidth so much, it couldn’t possibly overload the PSU since it can’t possibly saturate the GPU enough. Regardless, the aim isn’t raw performance, the goal is sincerely just graphical hardware acceleration, usability, reliability. So far, so good.
Below: Before I decided to remove the ODD, the SSD was tucked under the ODD.
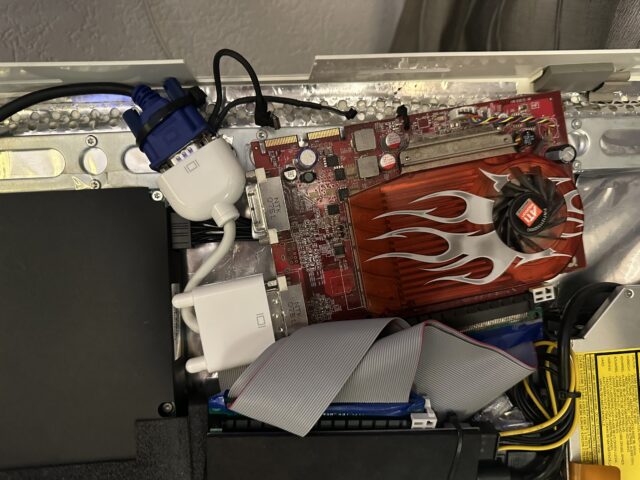
Installing the card/adapters
This part was sort-of challenging. The iMac has plenty of space on the inside, but I must contend with a metal frame, whilst also ensuring there are no spacial constraints against the LCD which would potentially occupy the same space. Fortunately, a newer LED panel provided the iMac with more room on the inside, but this was offset somewhat since the LCD PSU protruded into where the HDD used to be.
Below: Assembling it the first time, trying out a GT 710 (Can’t, it Kernel Panics)

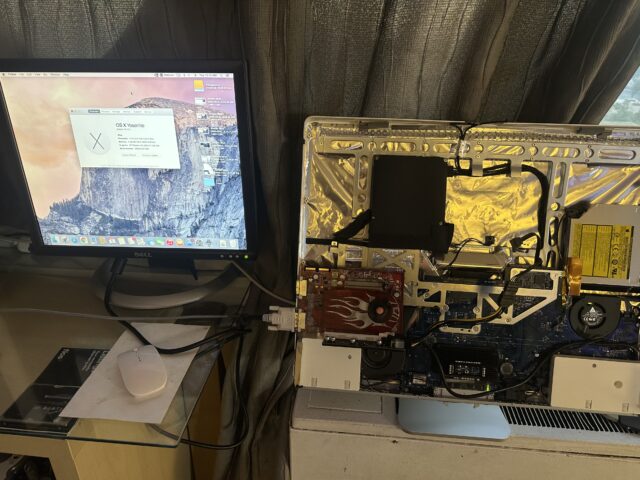
Below: Second Assembly, using the Radeon HD 2600 XT
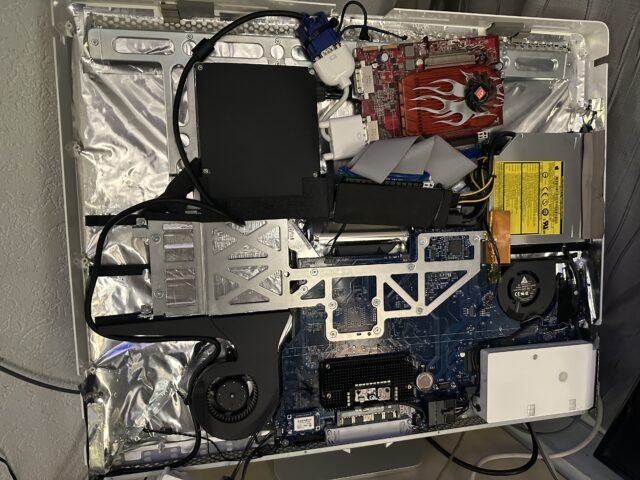
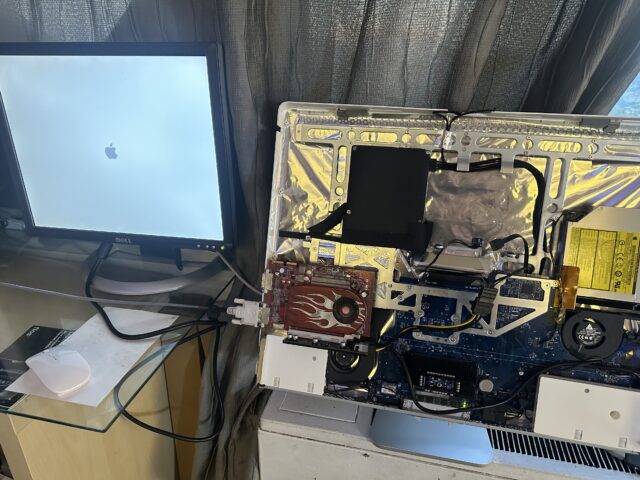
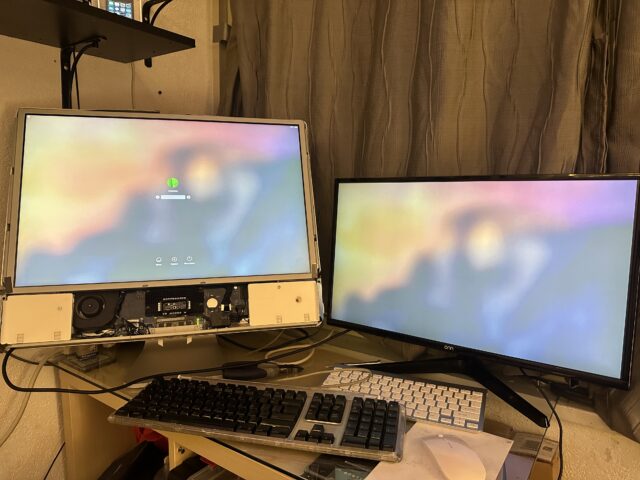
Below: Second assembly test, with both the 7300 GT inside (old LCD) and the 1080p (on the right) hooked up to the 2600 XT.
Final Assembly
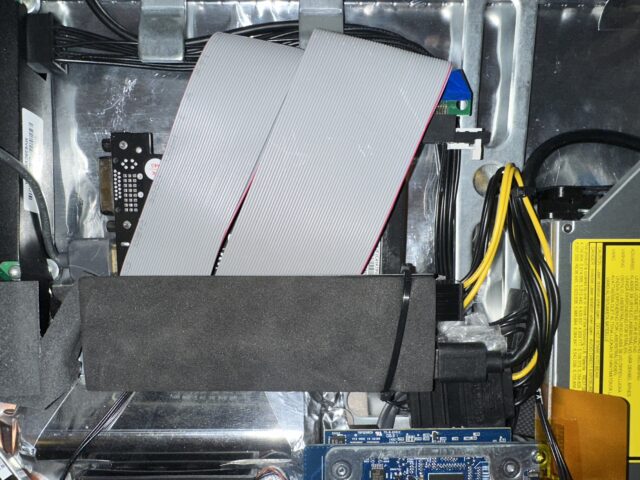
Much testing needed to be done to determine which GPUs I could use, location of components, wiring, zip ties, etc; in order to make it all work. The components had to be moved around on the inside once more.
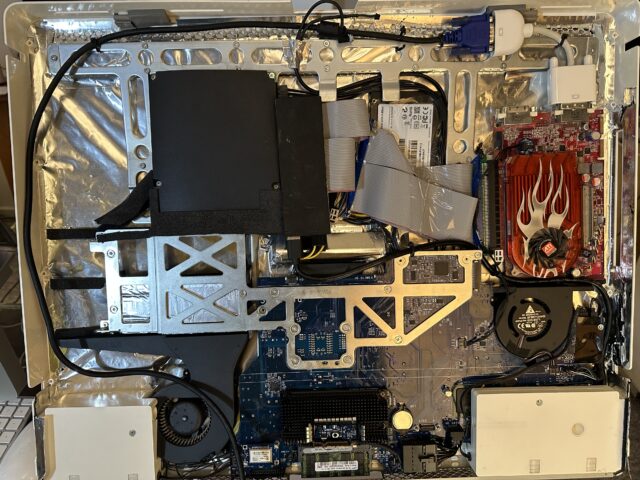
Pictured below: Third assembly configuration

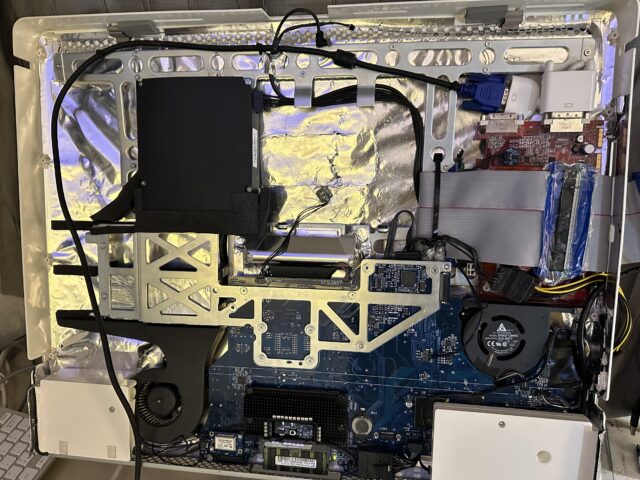
Pictured below: Fourth assembly configuration
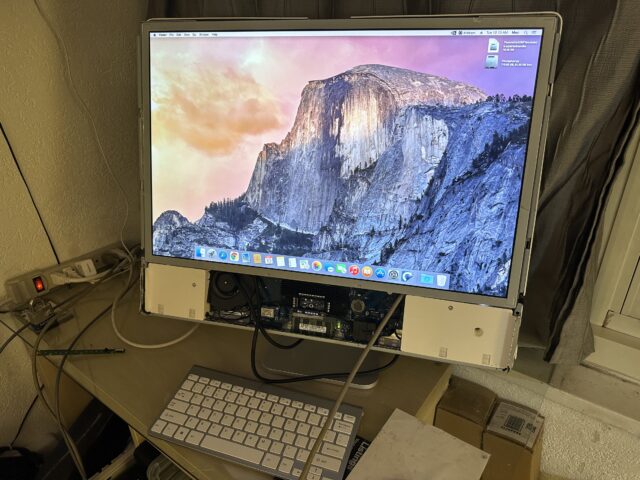
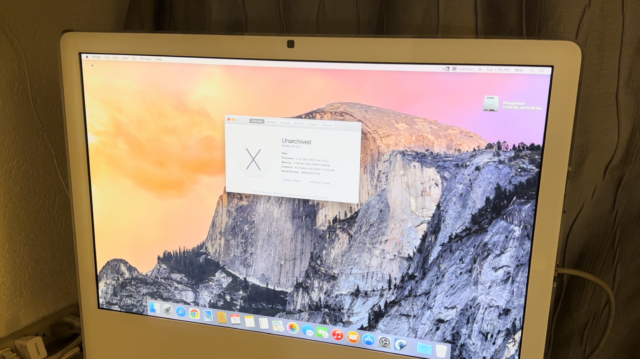
It works!
https://youtu.be/90Rmji2bb88
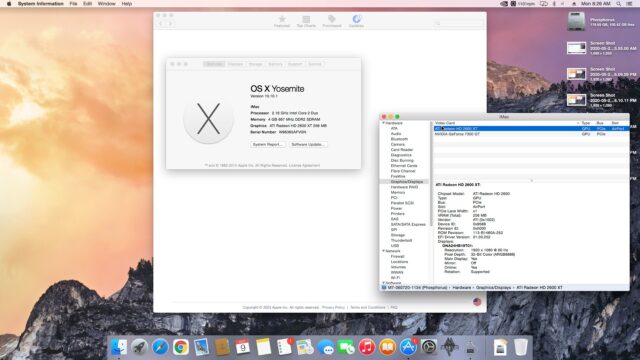
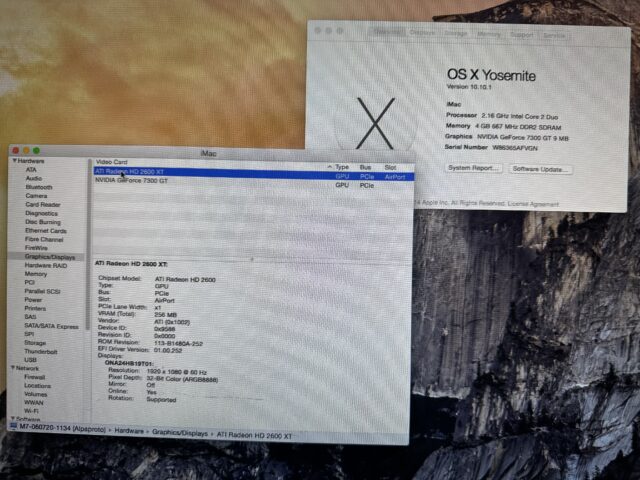
System Profiler