
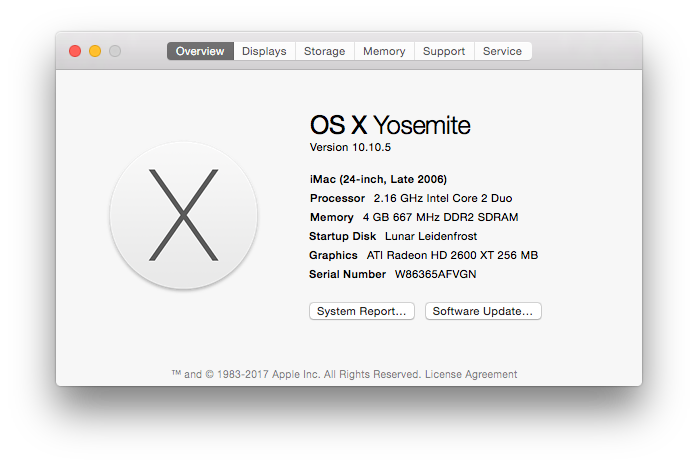
In Late 2023 I purchased and heavily modified a Late 2006 24-Inch iMac, outfitted with a PCIe eGPU, a modified display, some spliced cables along with cable additions, and a newer macOS to match.
Today, 2 years later, I decided to crack open the iMac to give the GPU some new thermal paste, now that the iMac survived a good amount of time configured as-is. In this article, I’ll share some updates, personal anecdotes, and lessons learned on how to make an even better version of what I made.
- See the original project: Maximizing your 24″ 2006 iMac – With an eGPU, Yosemite, and a replacement screen
Parts used (updated)
- Late 2006 A1200 24″ iMac, (MA456LL), EMC 2111
- 4 GB RAM upgrade
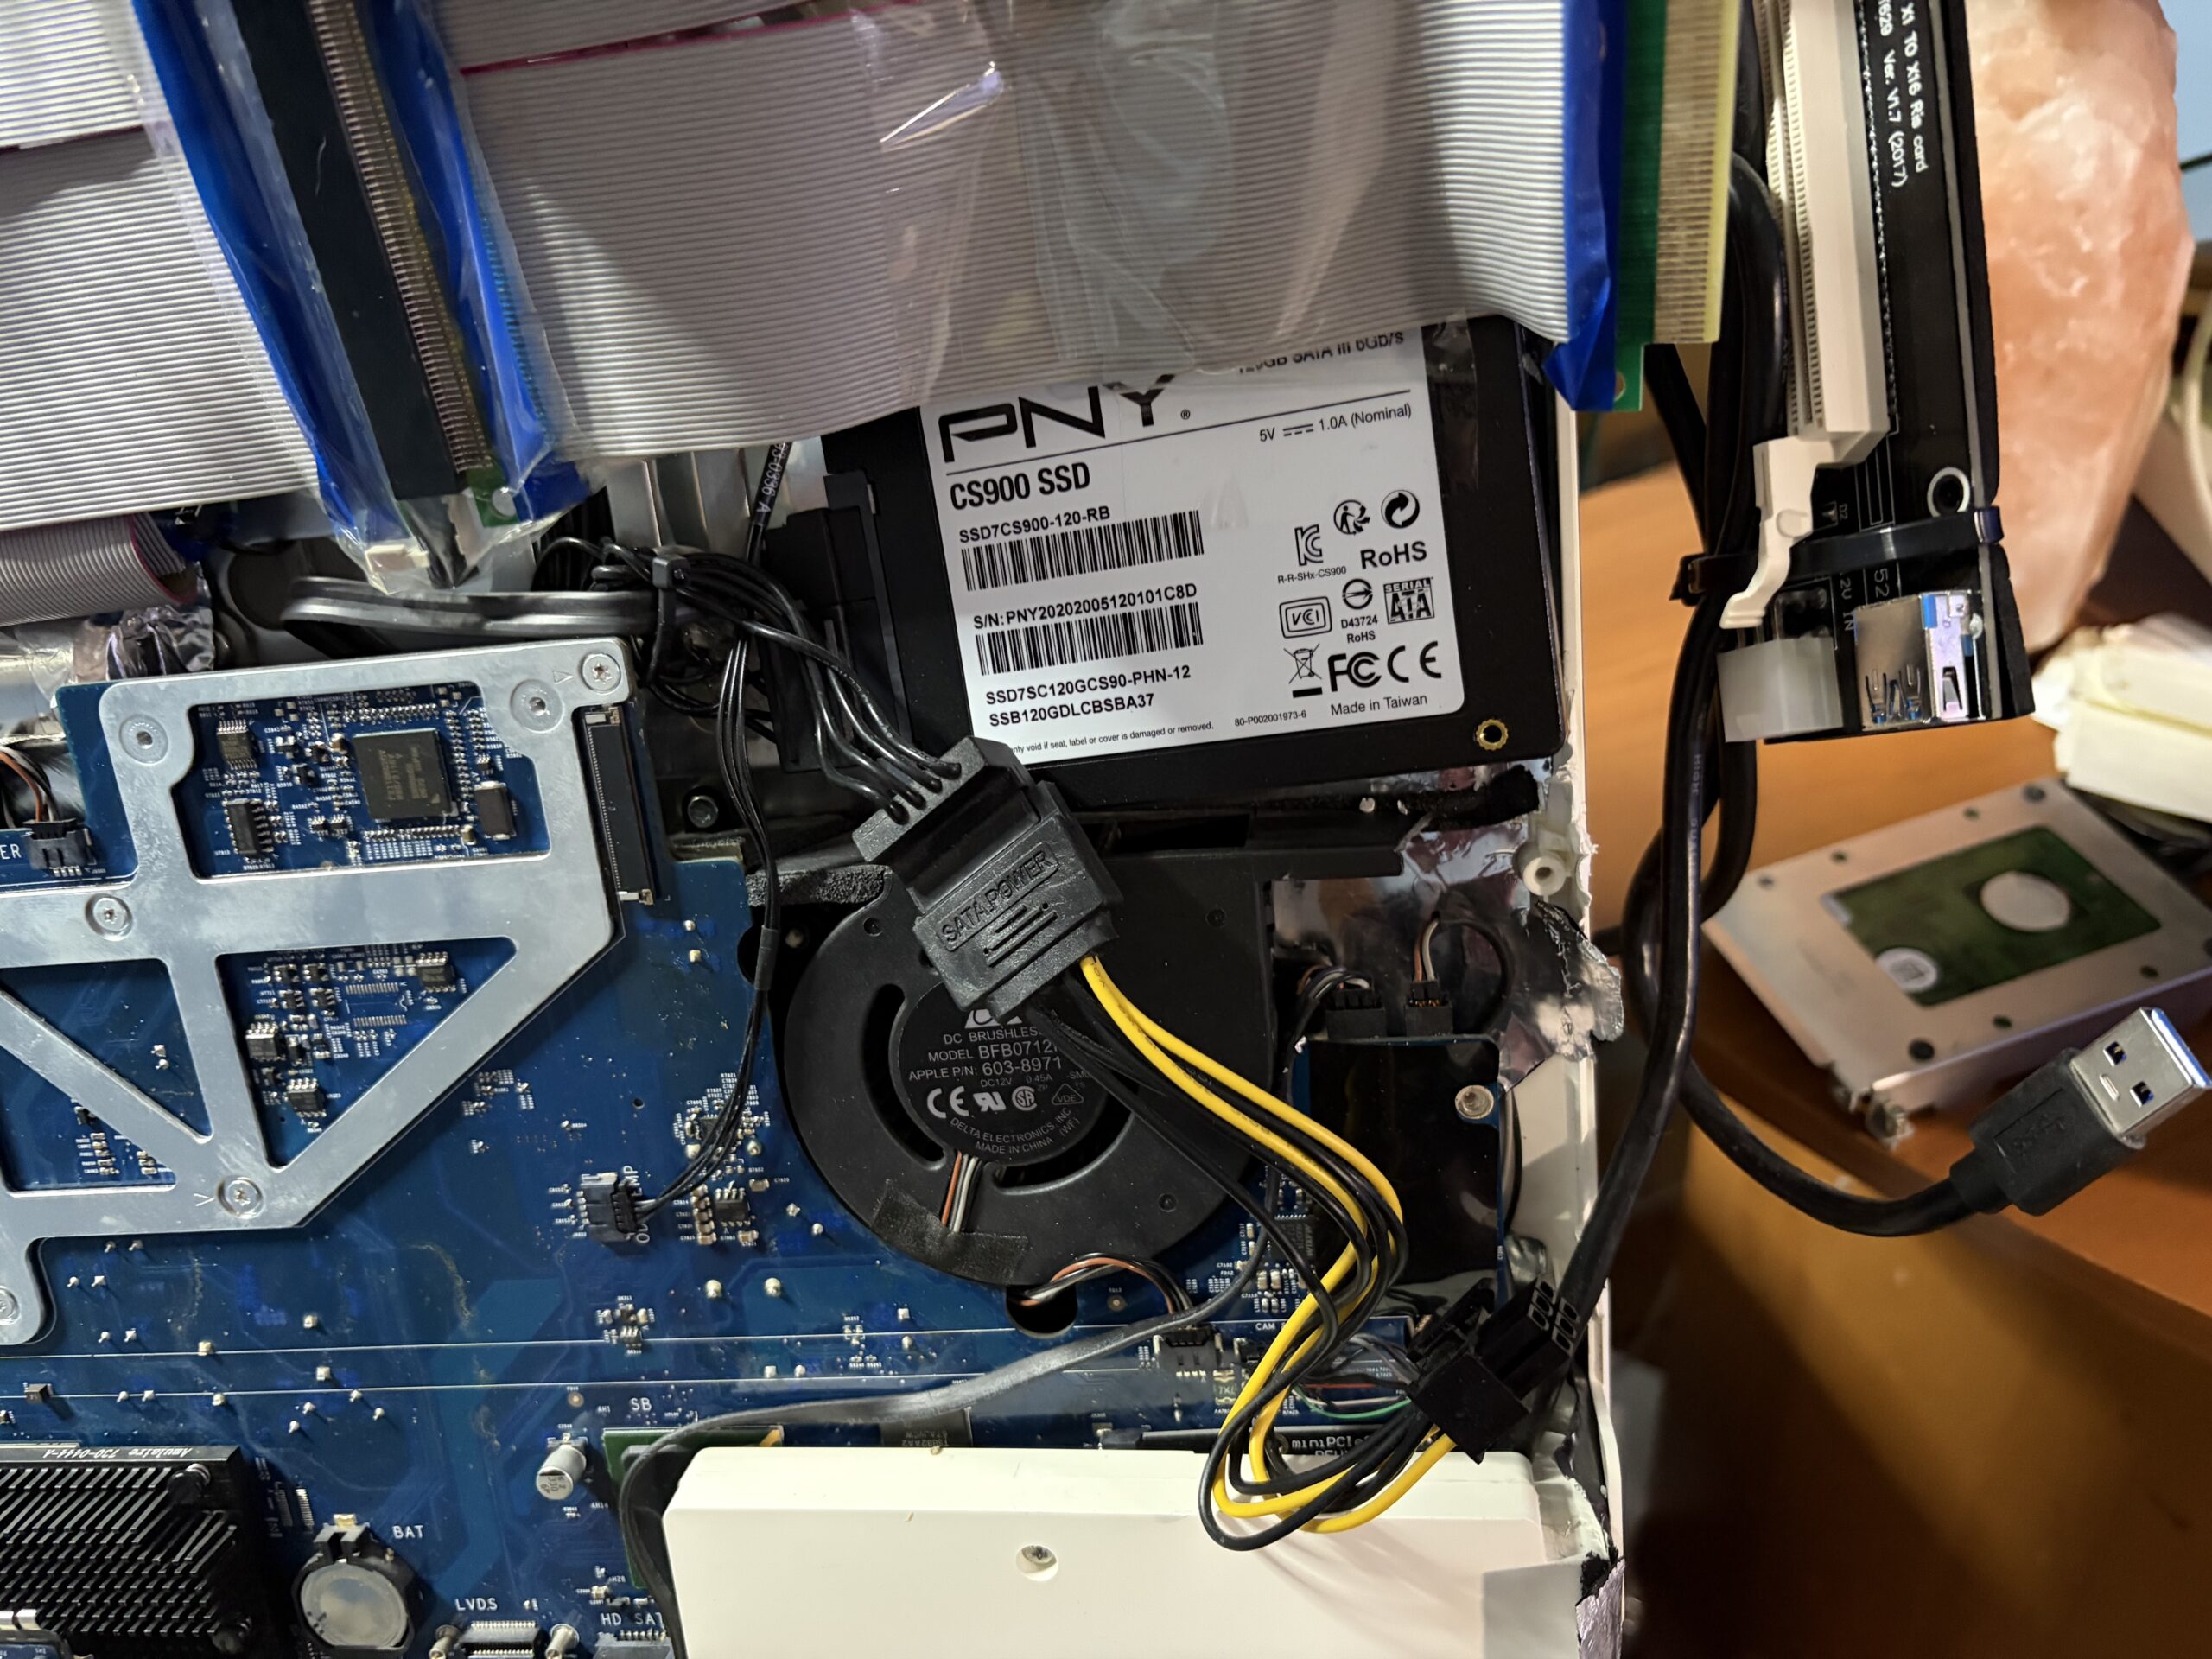
- 120GB PNY SSD (Thinking about upgrading it soon)
- Mini PCIe to PCIe x16 adapter
- Female SATA to PCIe 6-Pin Power adapter
- Additional SATA power cable to splice off the original, for 2x outputs
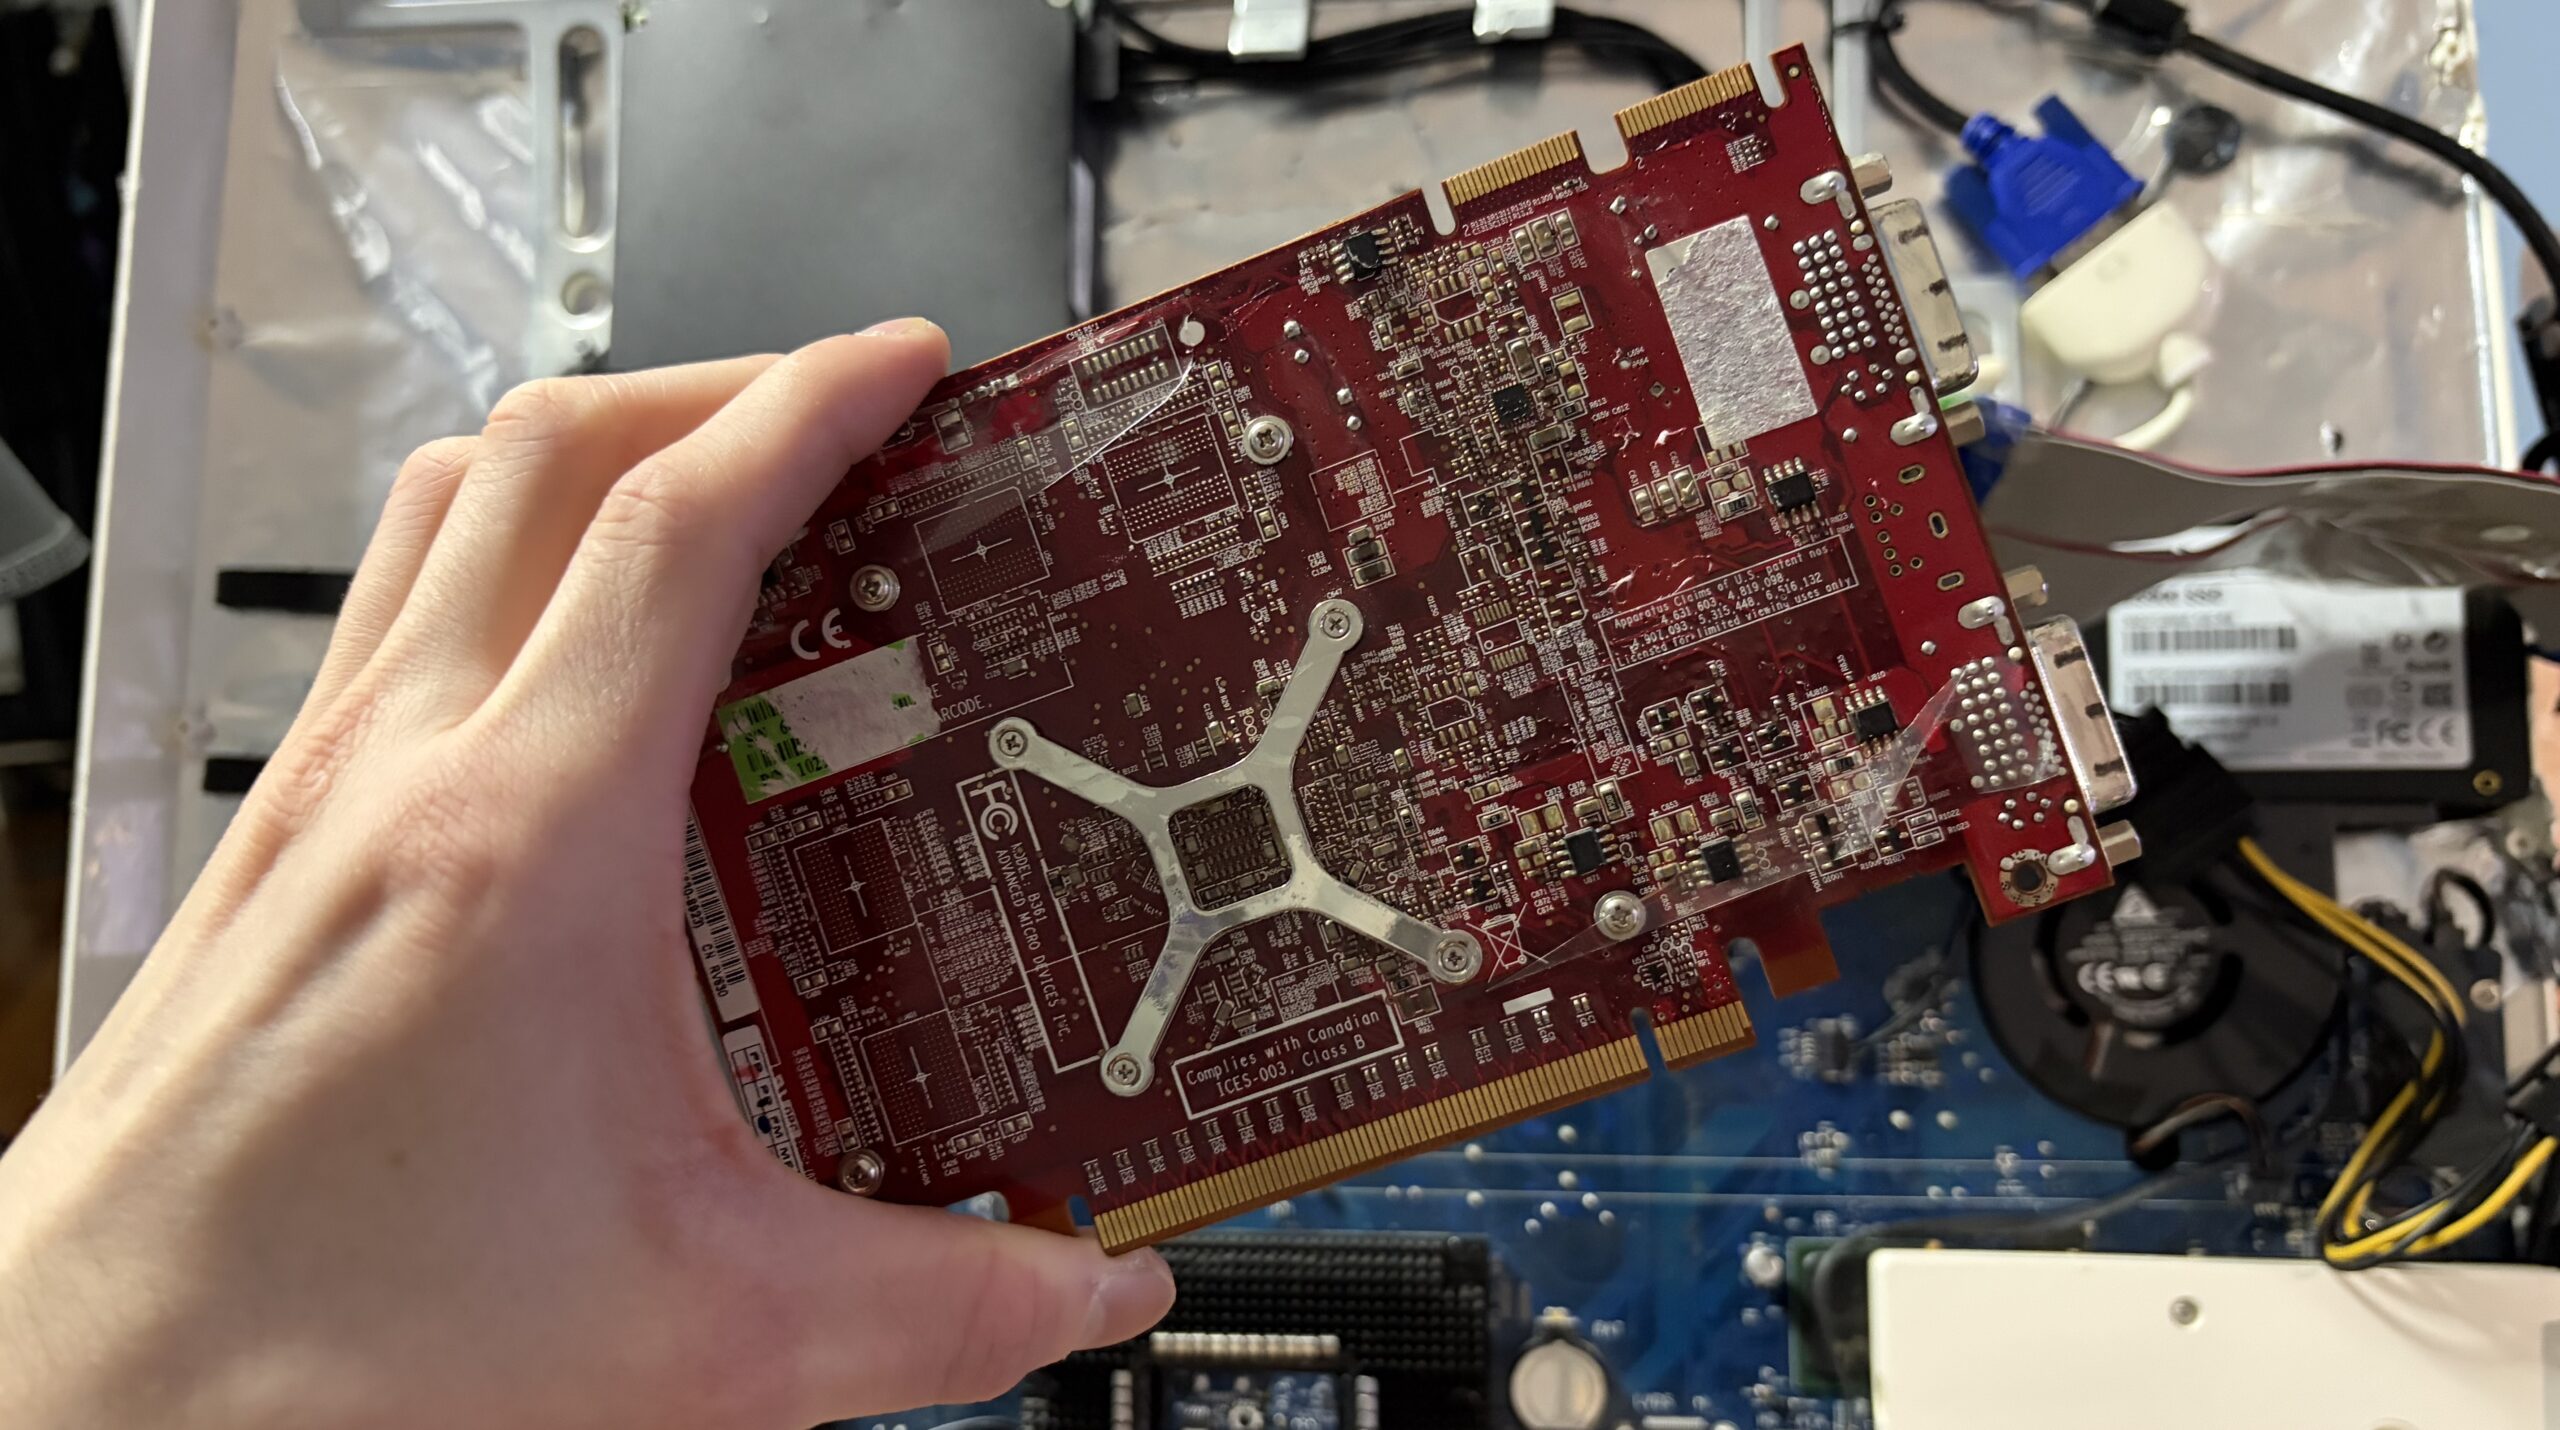
- a Mac Radeon HD 2600 XT 256 MB
- A copy of Mac OS Yosemite 10.10.5 w/Piker Alpha mod
- A 24-Inch Dell LCD display with LG L1M240M2 panel, inverter board, PSU, etc;
- Some additional power cables, tape, zip ties, superglue
How it works
What sparked the idea to revisit
Recently I had a conversation with a community member on Low End Mac who was interested in this exact same project, and it had me thinking about mine.
 |
 |
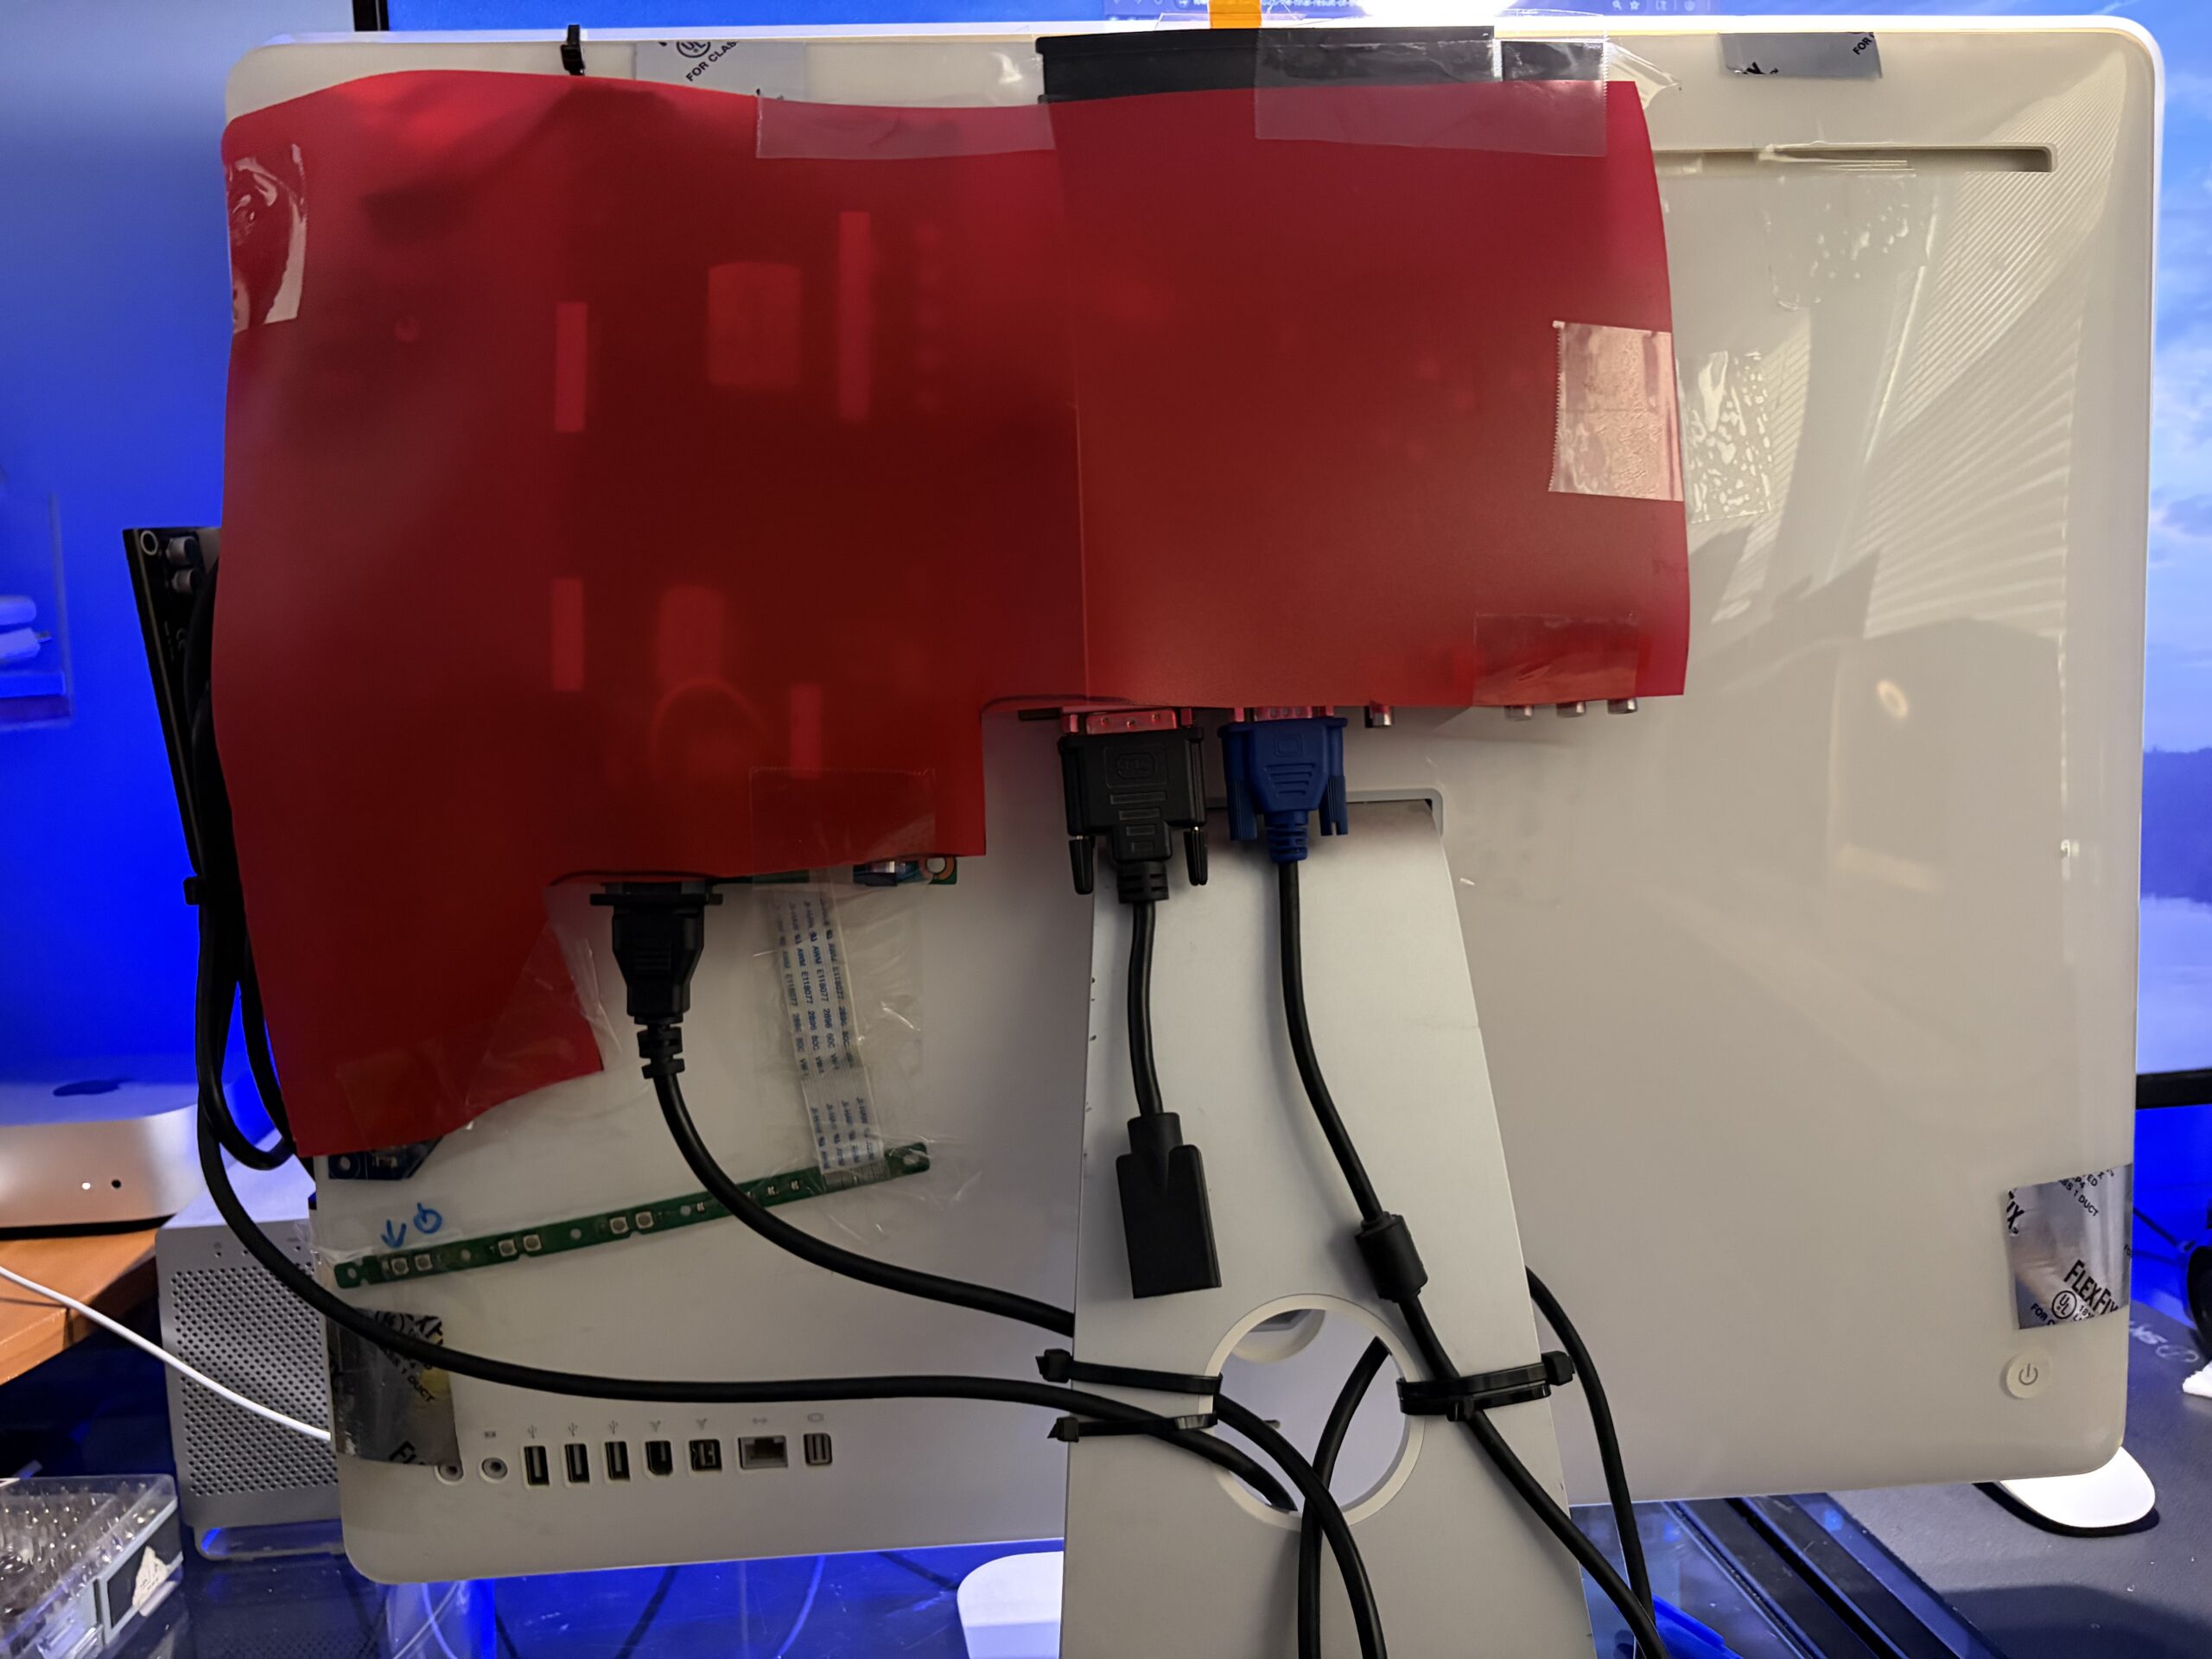
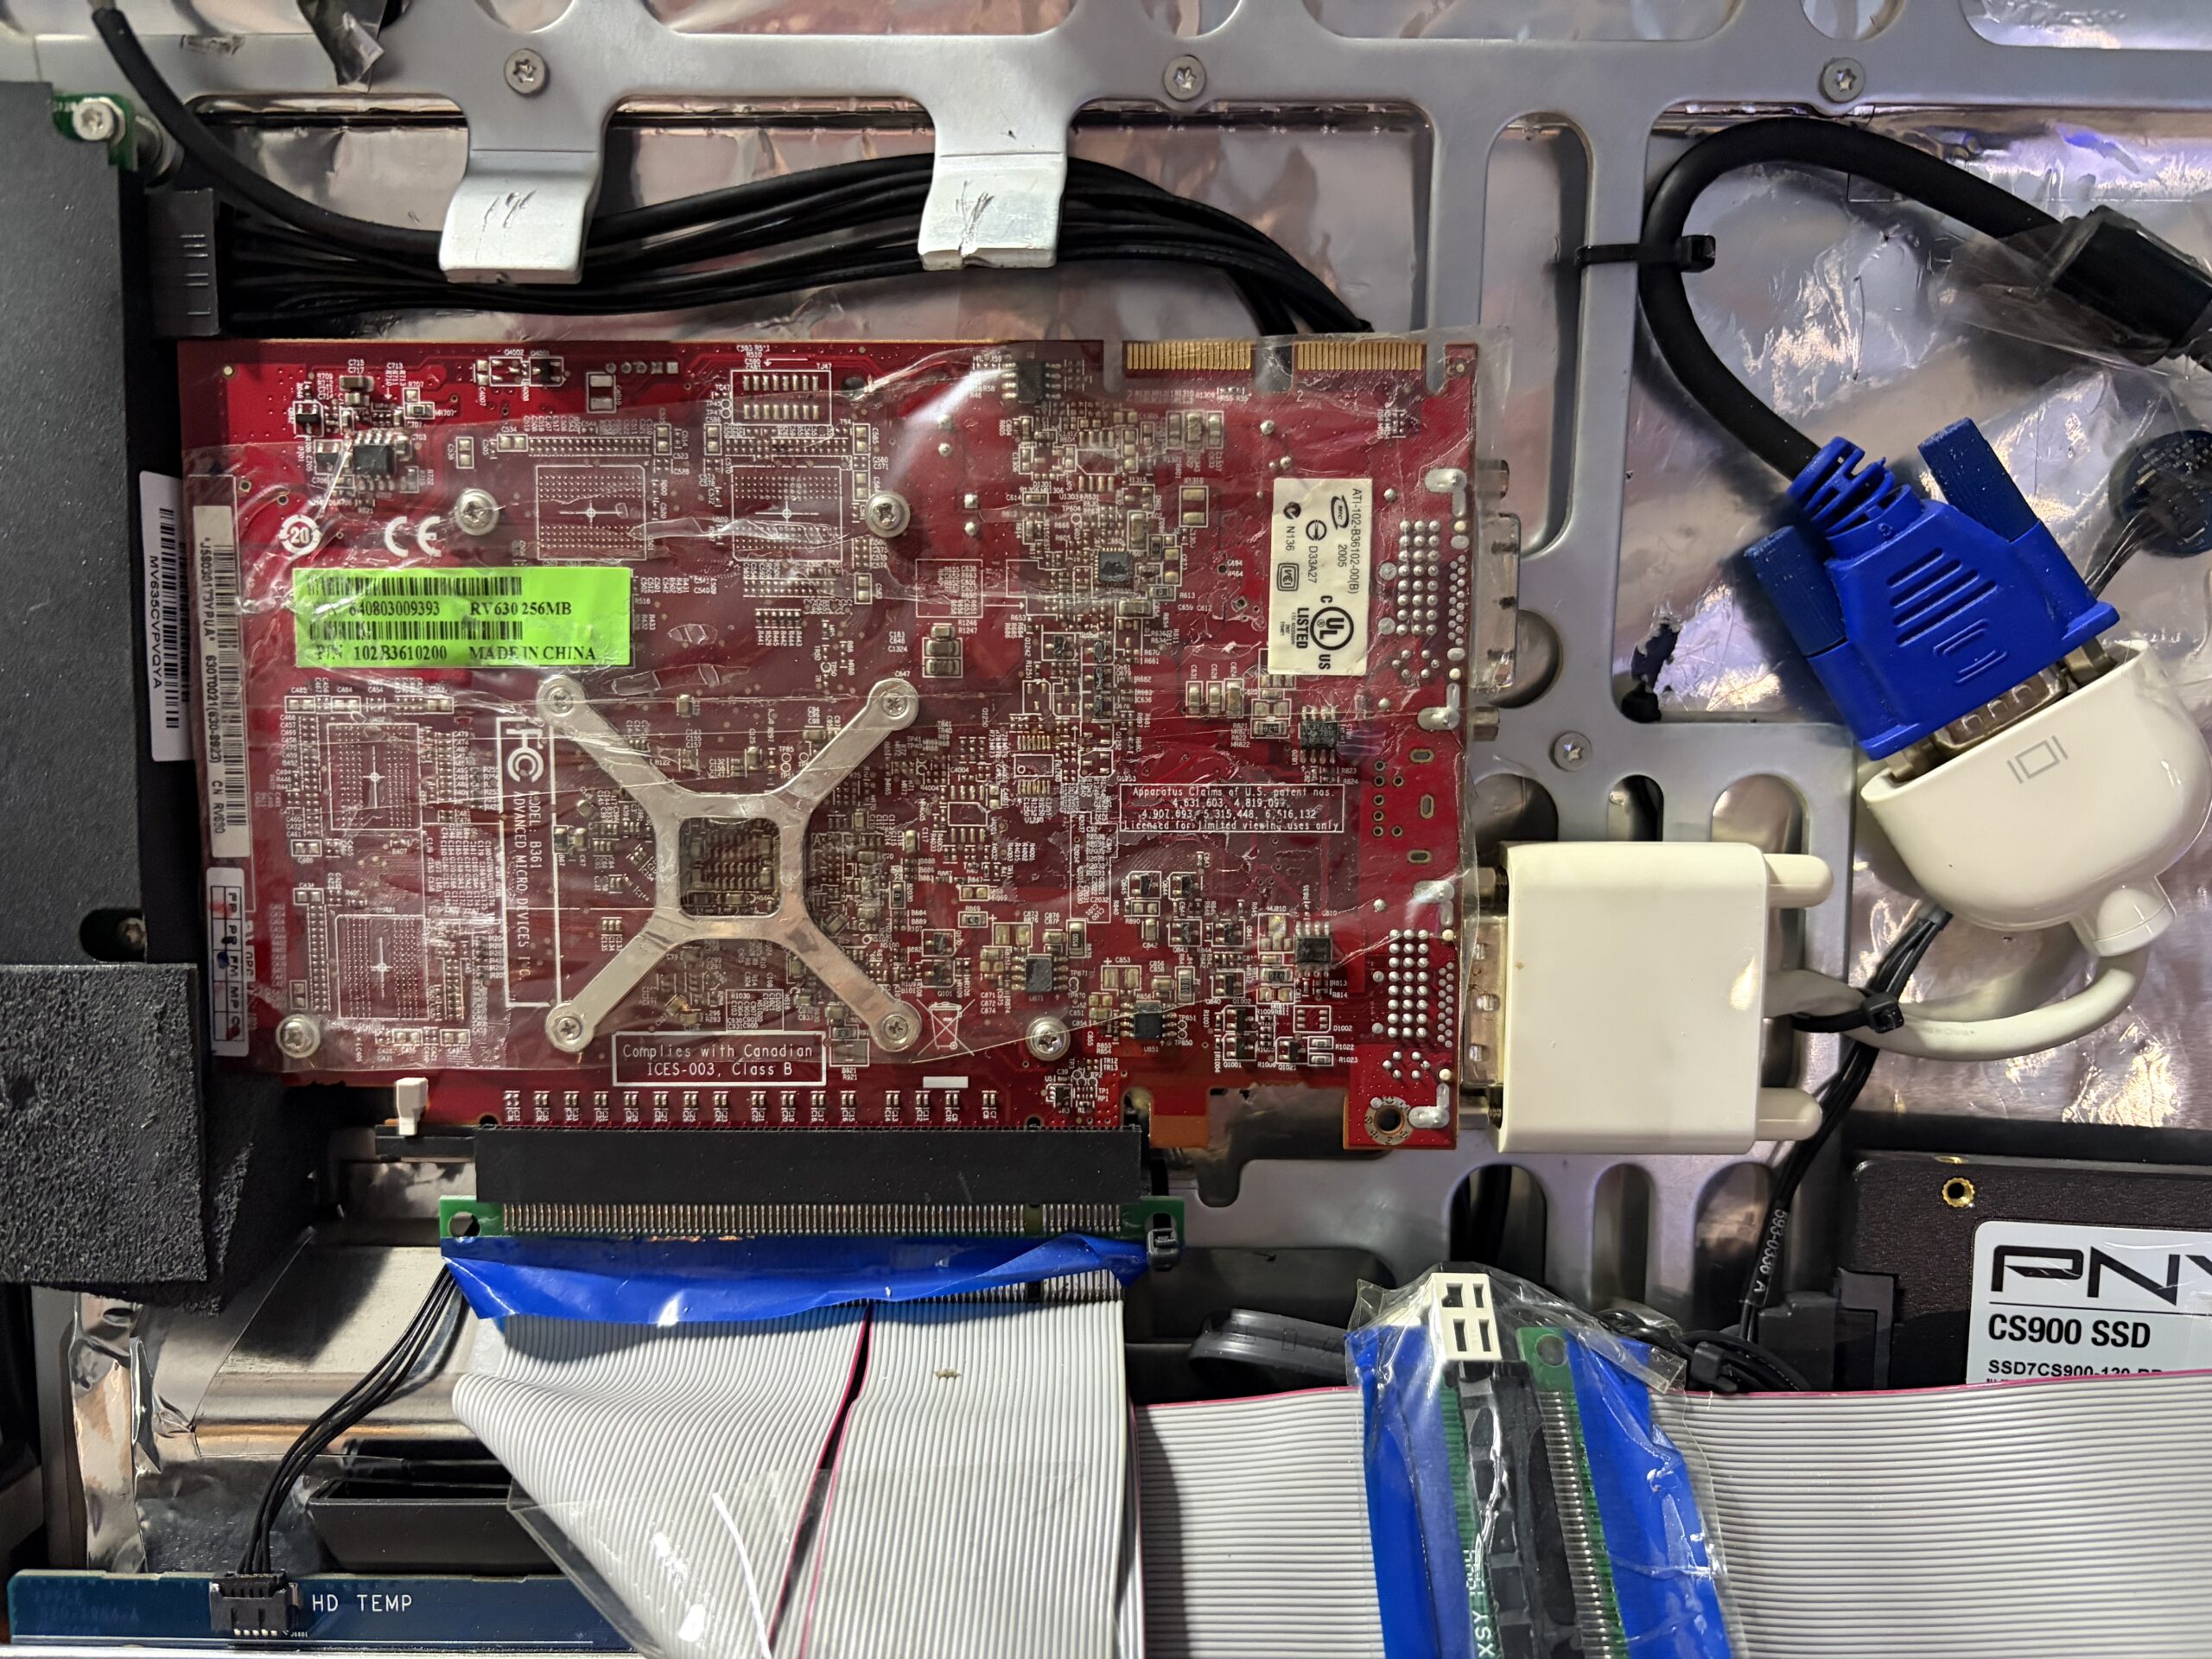
I also noticed lately the graphical UI animations have been stuttering, thinking it was about time to give the graphics card some new thermal paste, and perhaps finally cover those exposed circuit boards on the back of the iMac. It’s a piece of cutout plastic from an old folder taped over, but it works well enough.
 |
|
Some insights
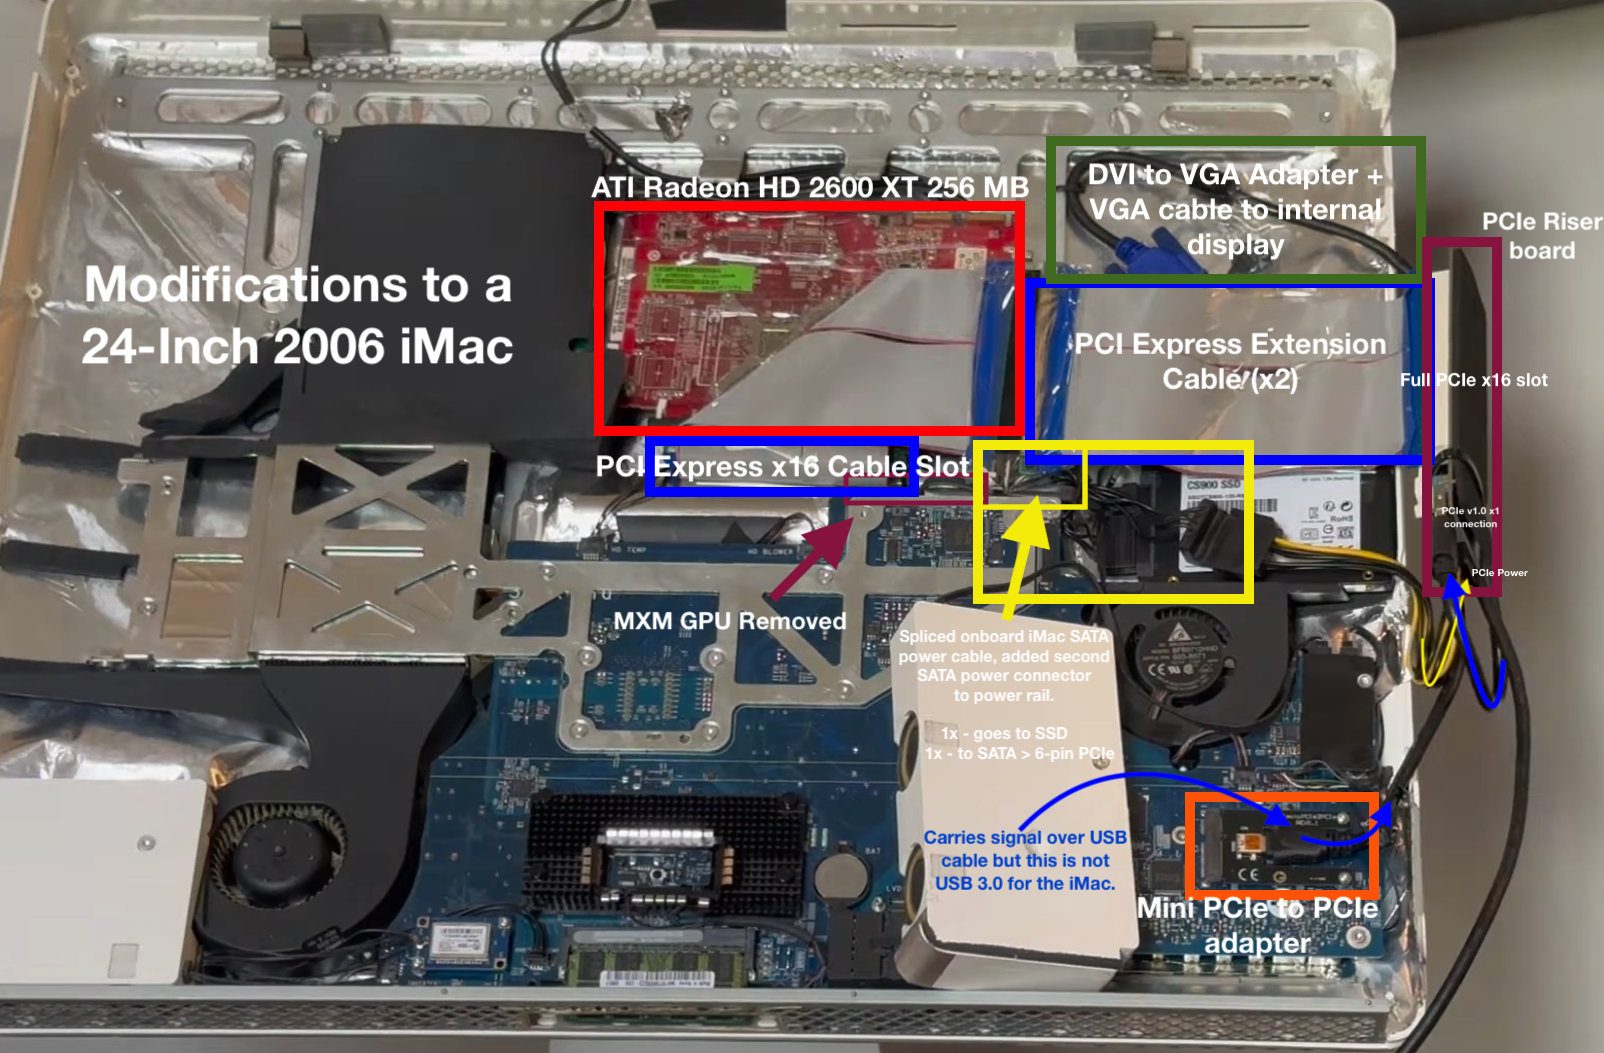
- My iMac is more or less a Frankenstein of parts meant to actually function as a regular ol’ Mac, and it doesn’t have to look this way. It’s setup to be more utilitarian – the GPU can easily be swapped out, as can the other parts.
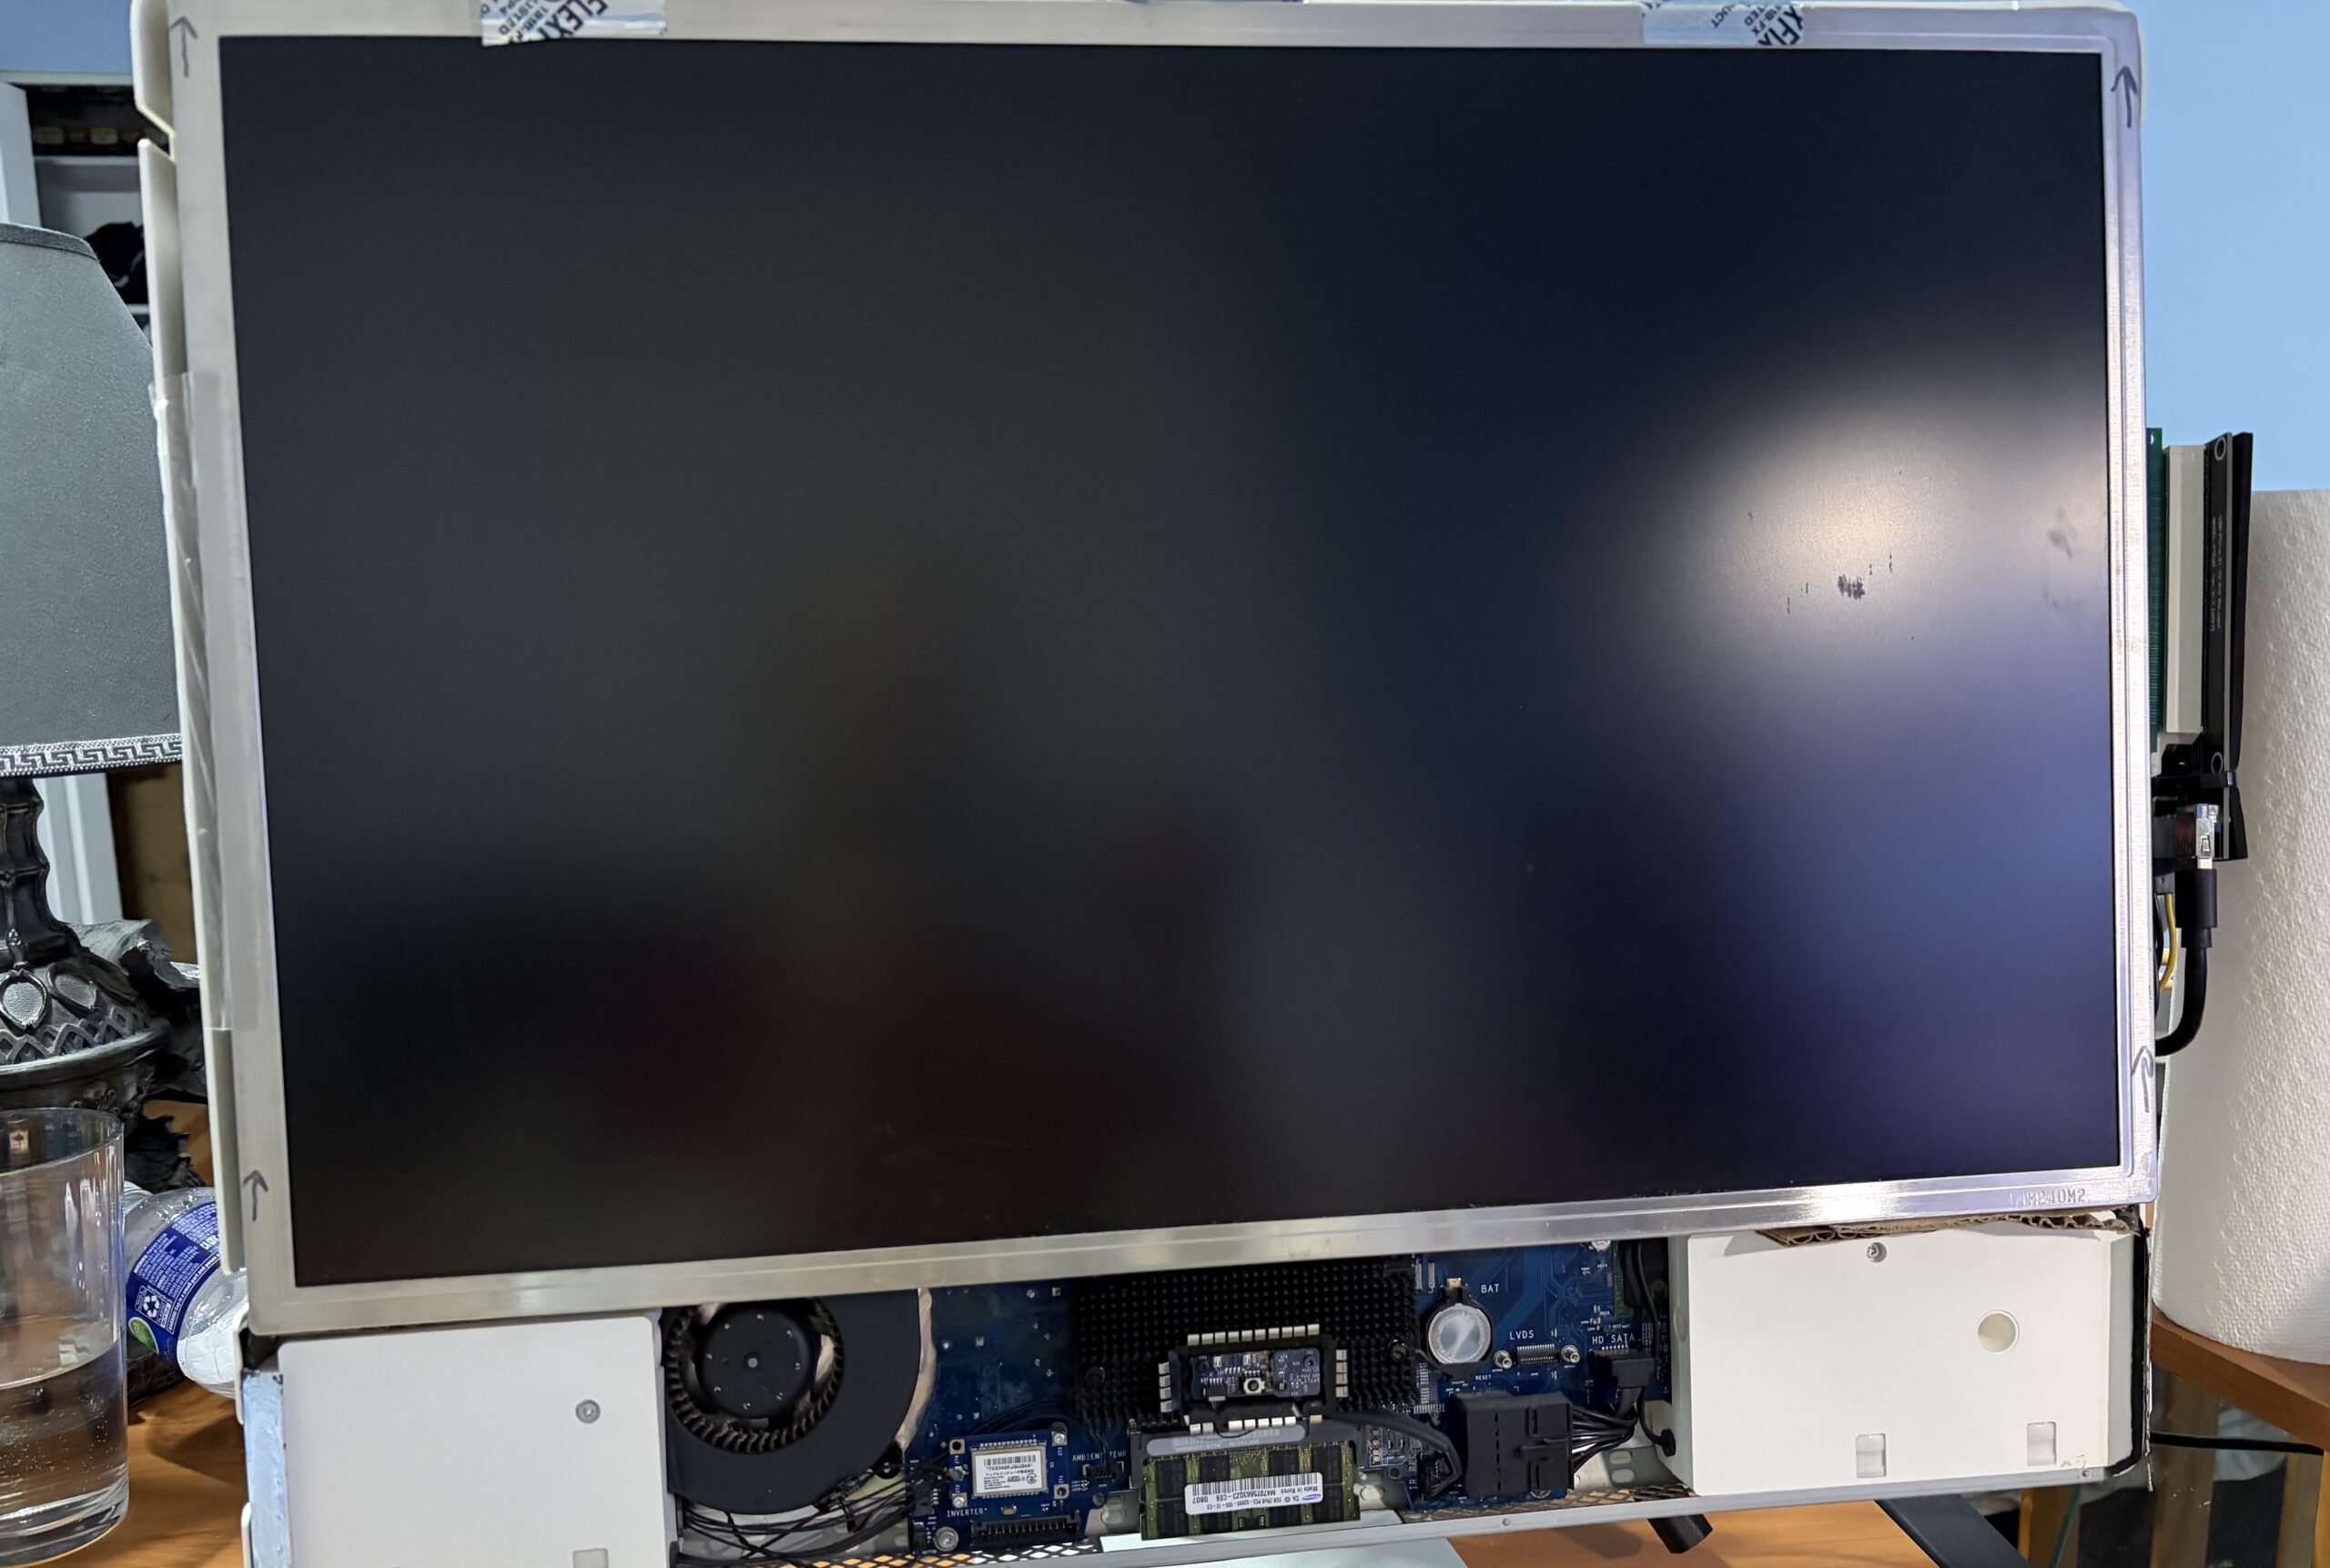
. - Adding boards/parts to the back of the iMac can be avoided. In my case, the original thin display I tried to use in the original mod stopped working and I had to use an alternative to keep the project going. If you manage to use a thinner, more modern display panel, it can add alot of internal room for the display PSU and inverter board/parts. Mine happened to be a 24-Inch Dell display from the same era as the iMac.
. - On the inside if you remove the MXM GPU and ODD, not only you reduce the strain on the original iMac PSU, but you also open up alot of room to install an entire Mac GPU.
. - The iMac seems to like Mac GPUs better than any ol’ PC GPU, even if the OS (including Nvidia web drivers) are seemingly compatible. Perhaps I should test more cards out, but that would also require an external power supply. It never liked the Nvidia GeForce GT 710 or GT 610 GPUs I tried out, nor the GTX 750, or the GTX 960.
. - Despite the compatibility issues trying newer MXM GPUs from 2007-08 iMacs, PCIe GPUs from newer Macs with 64-Bit EFIs don’t seem to be an issue. This mod successfully works with the ATI Radeon HD 5770 1 GB though would require an external power supply. You get boot screens, boot selection, target disk mode, etc;
. - By adding a PCIe slot instead of relying on the MXM protocol, we eliminate any compatibility issues with using later MXM GPUs. This technically means “if the OS can support it and you supply the right power, it’ll run it”.
. - Adding an inverter board/connection board to the internal display means this iMac now doubles as a display for the M4 mini, with DVI-In.
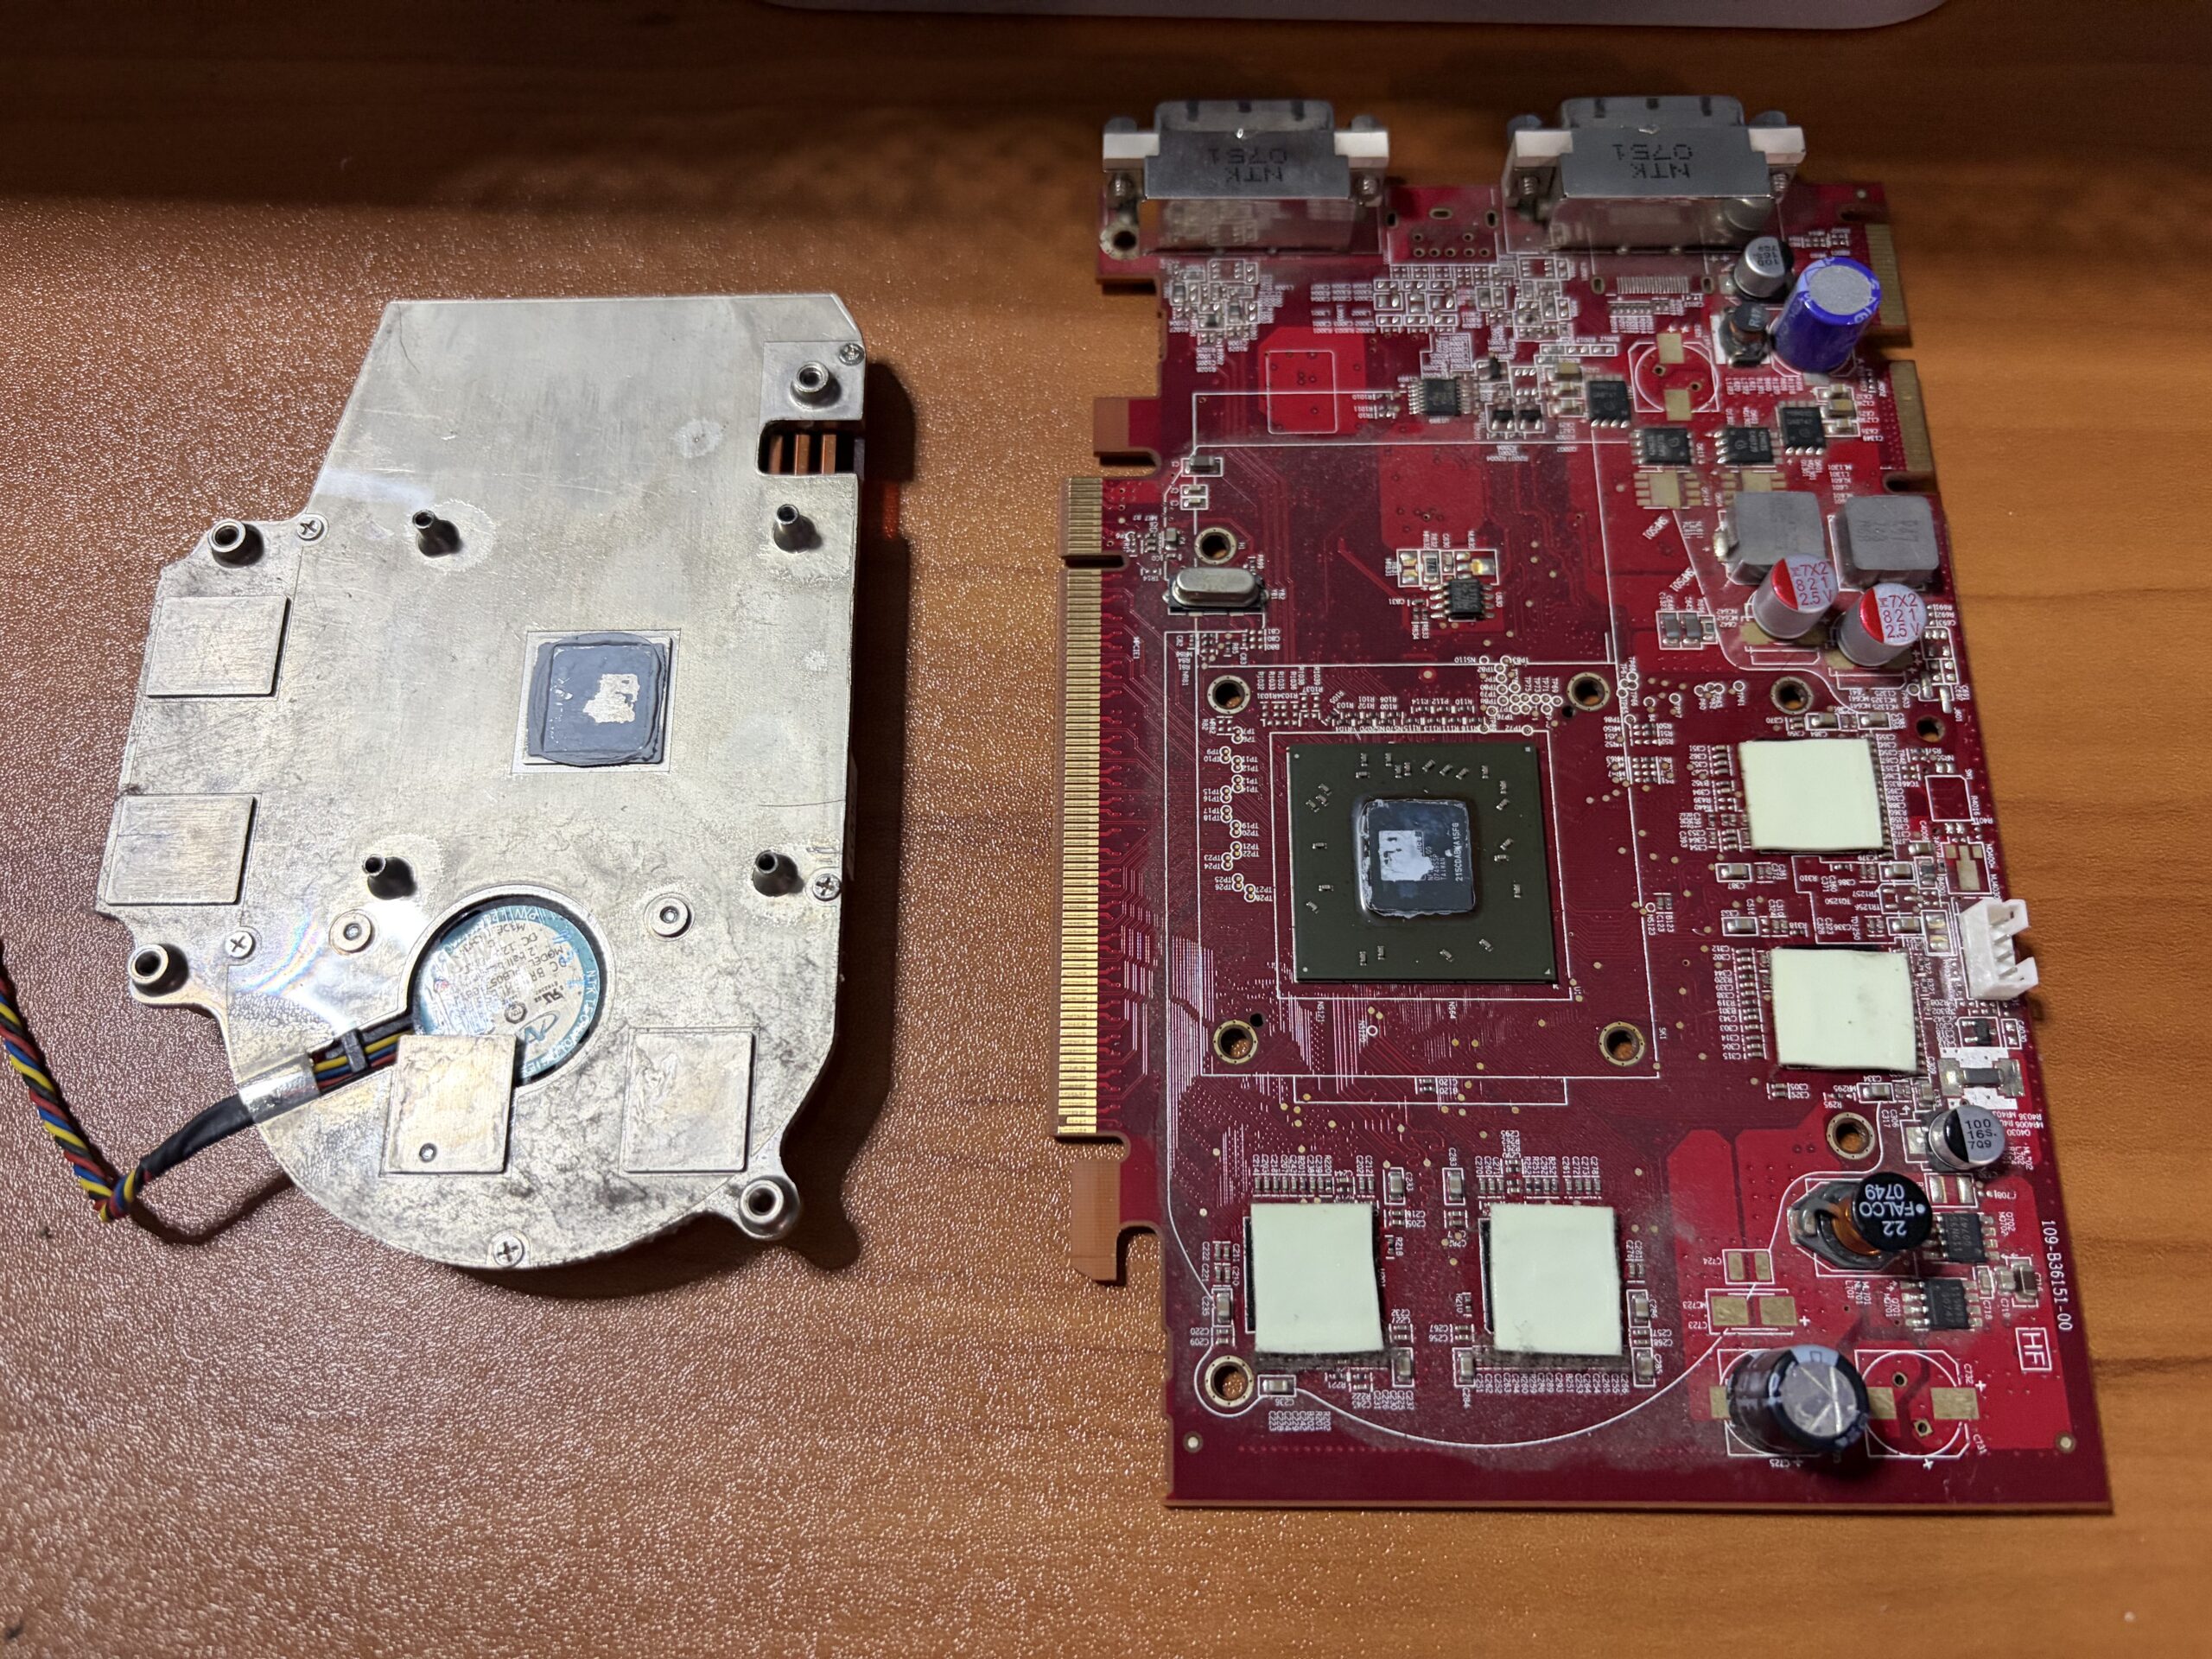
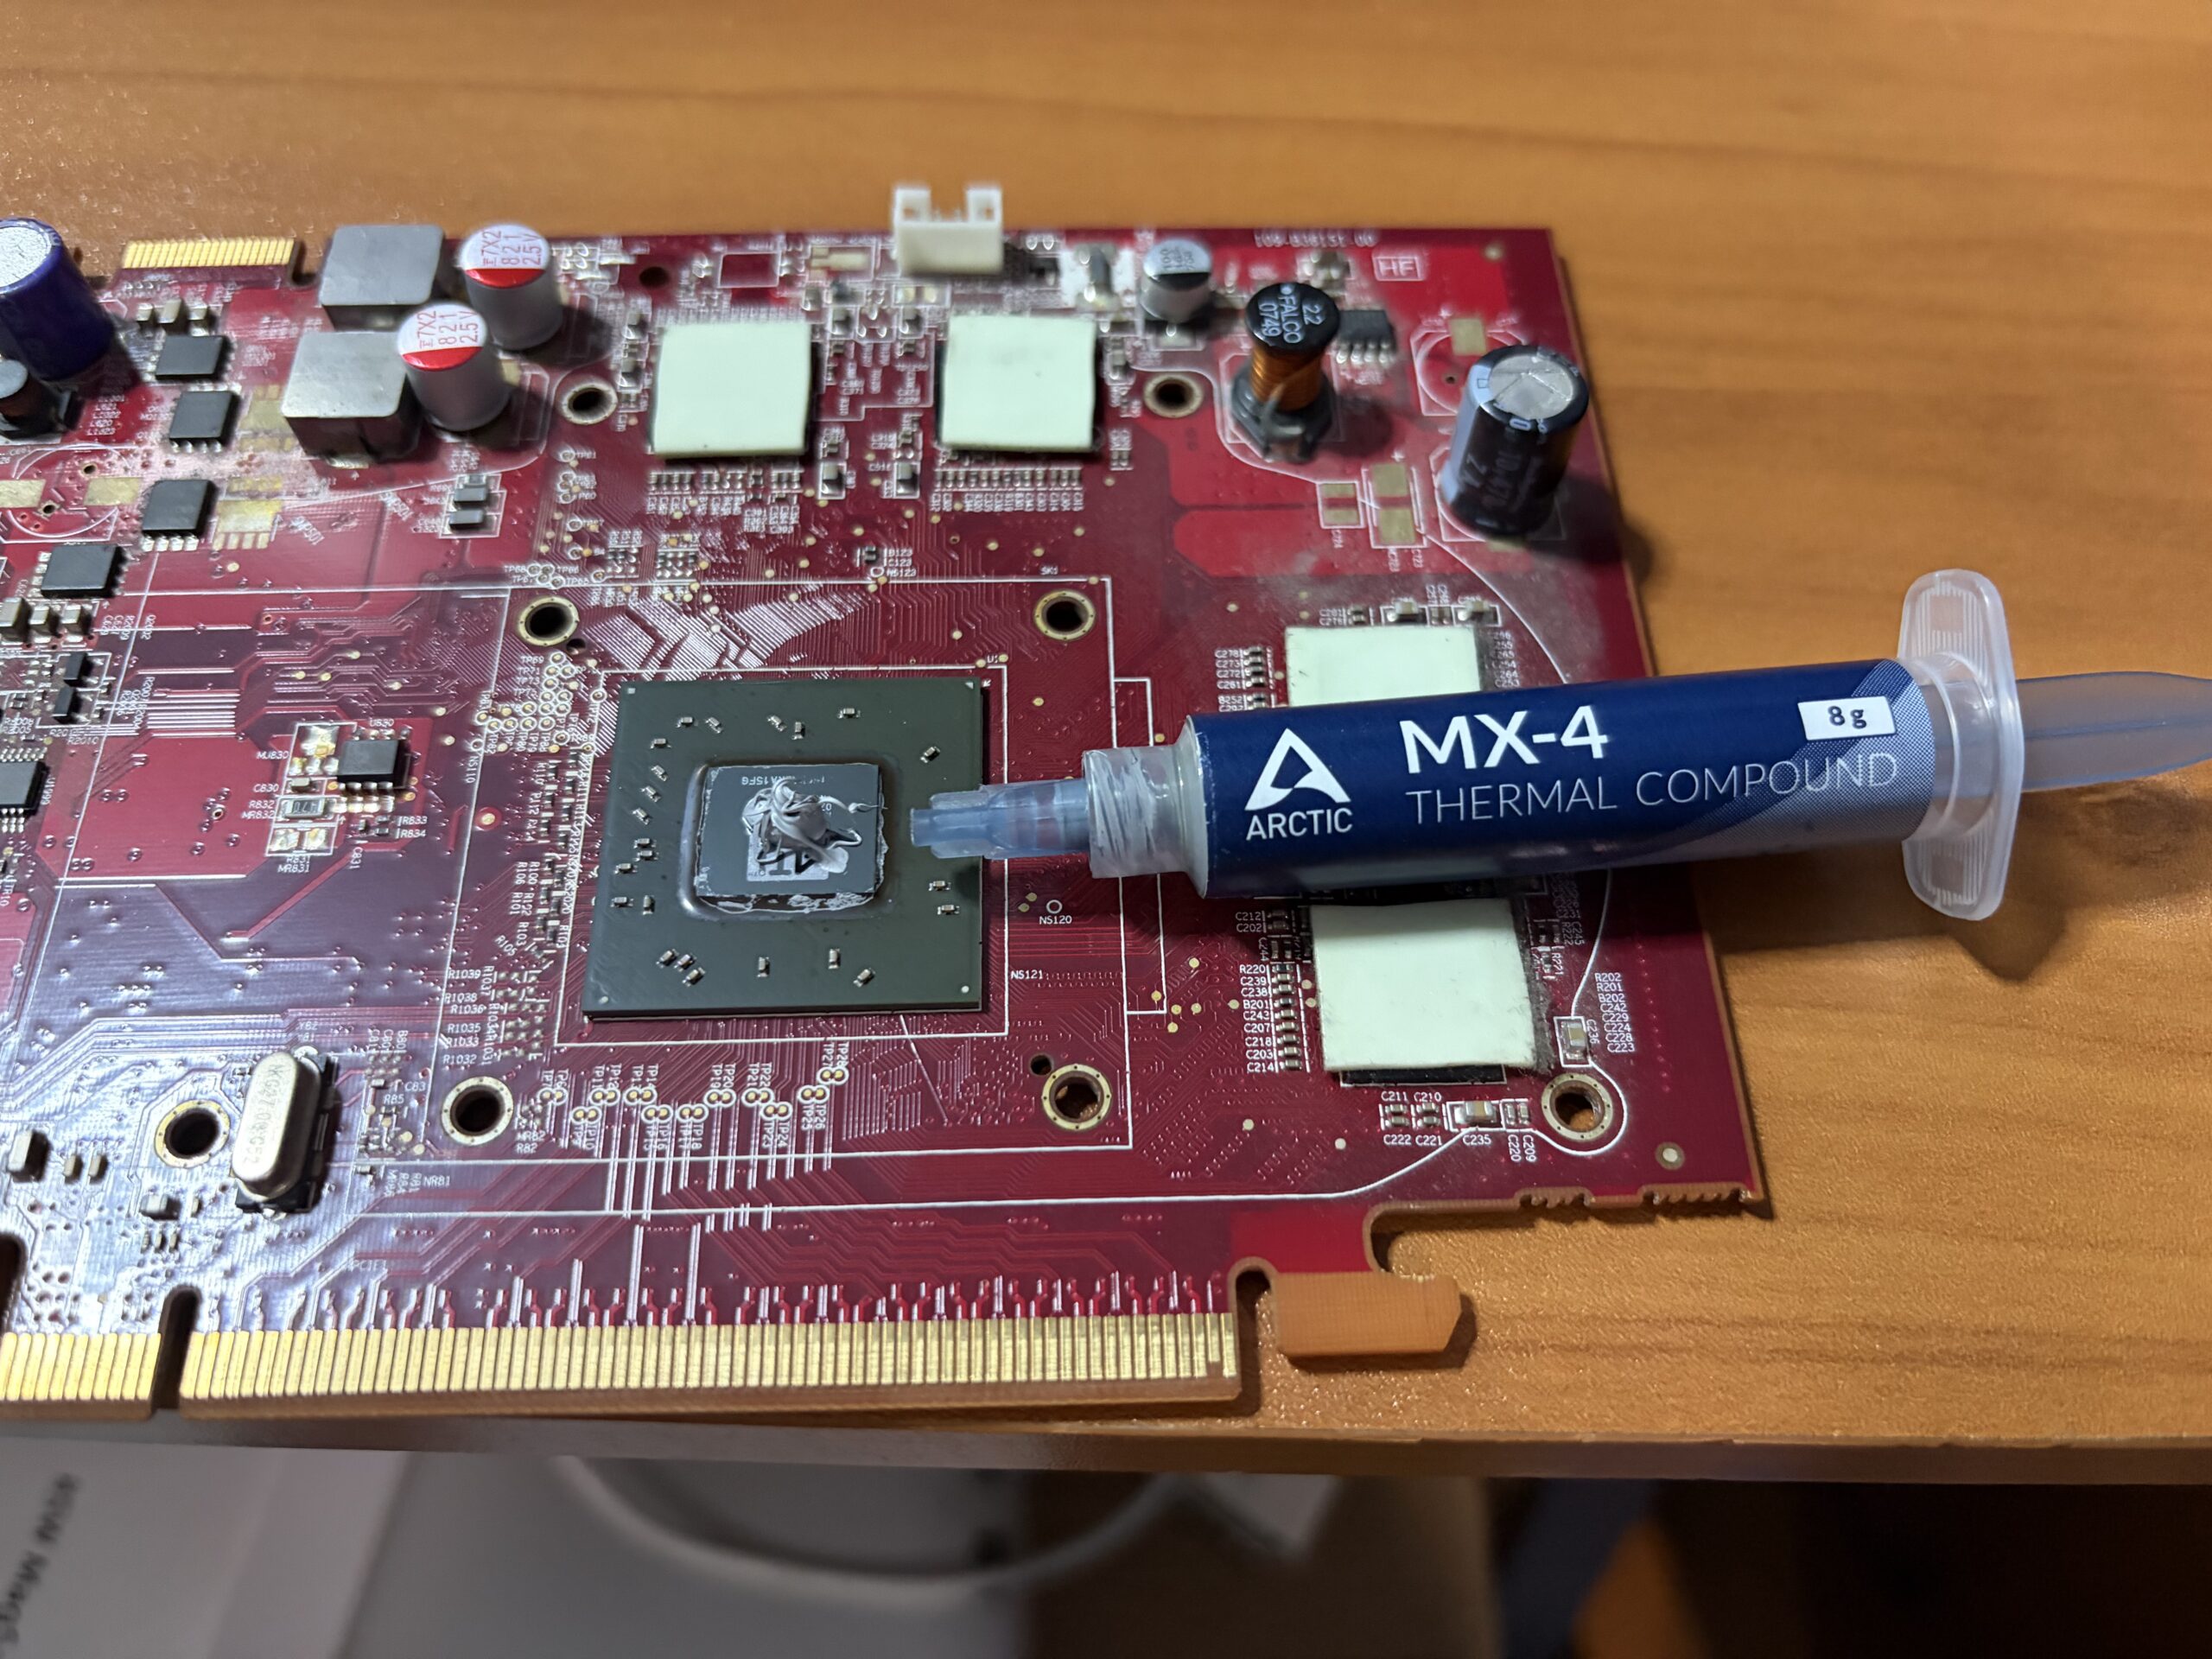
New Arctic MX-4
The old thermal paste was probably original, it was seemingly stiff as metal and I used a steel blade to scrape it off.
 |
 |
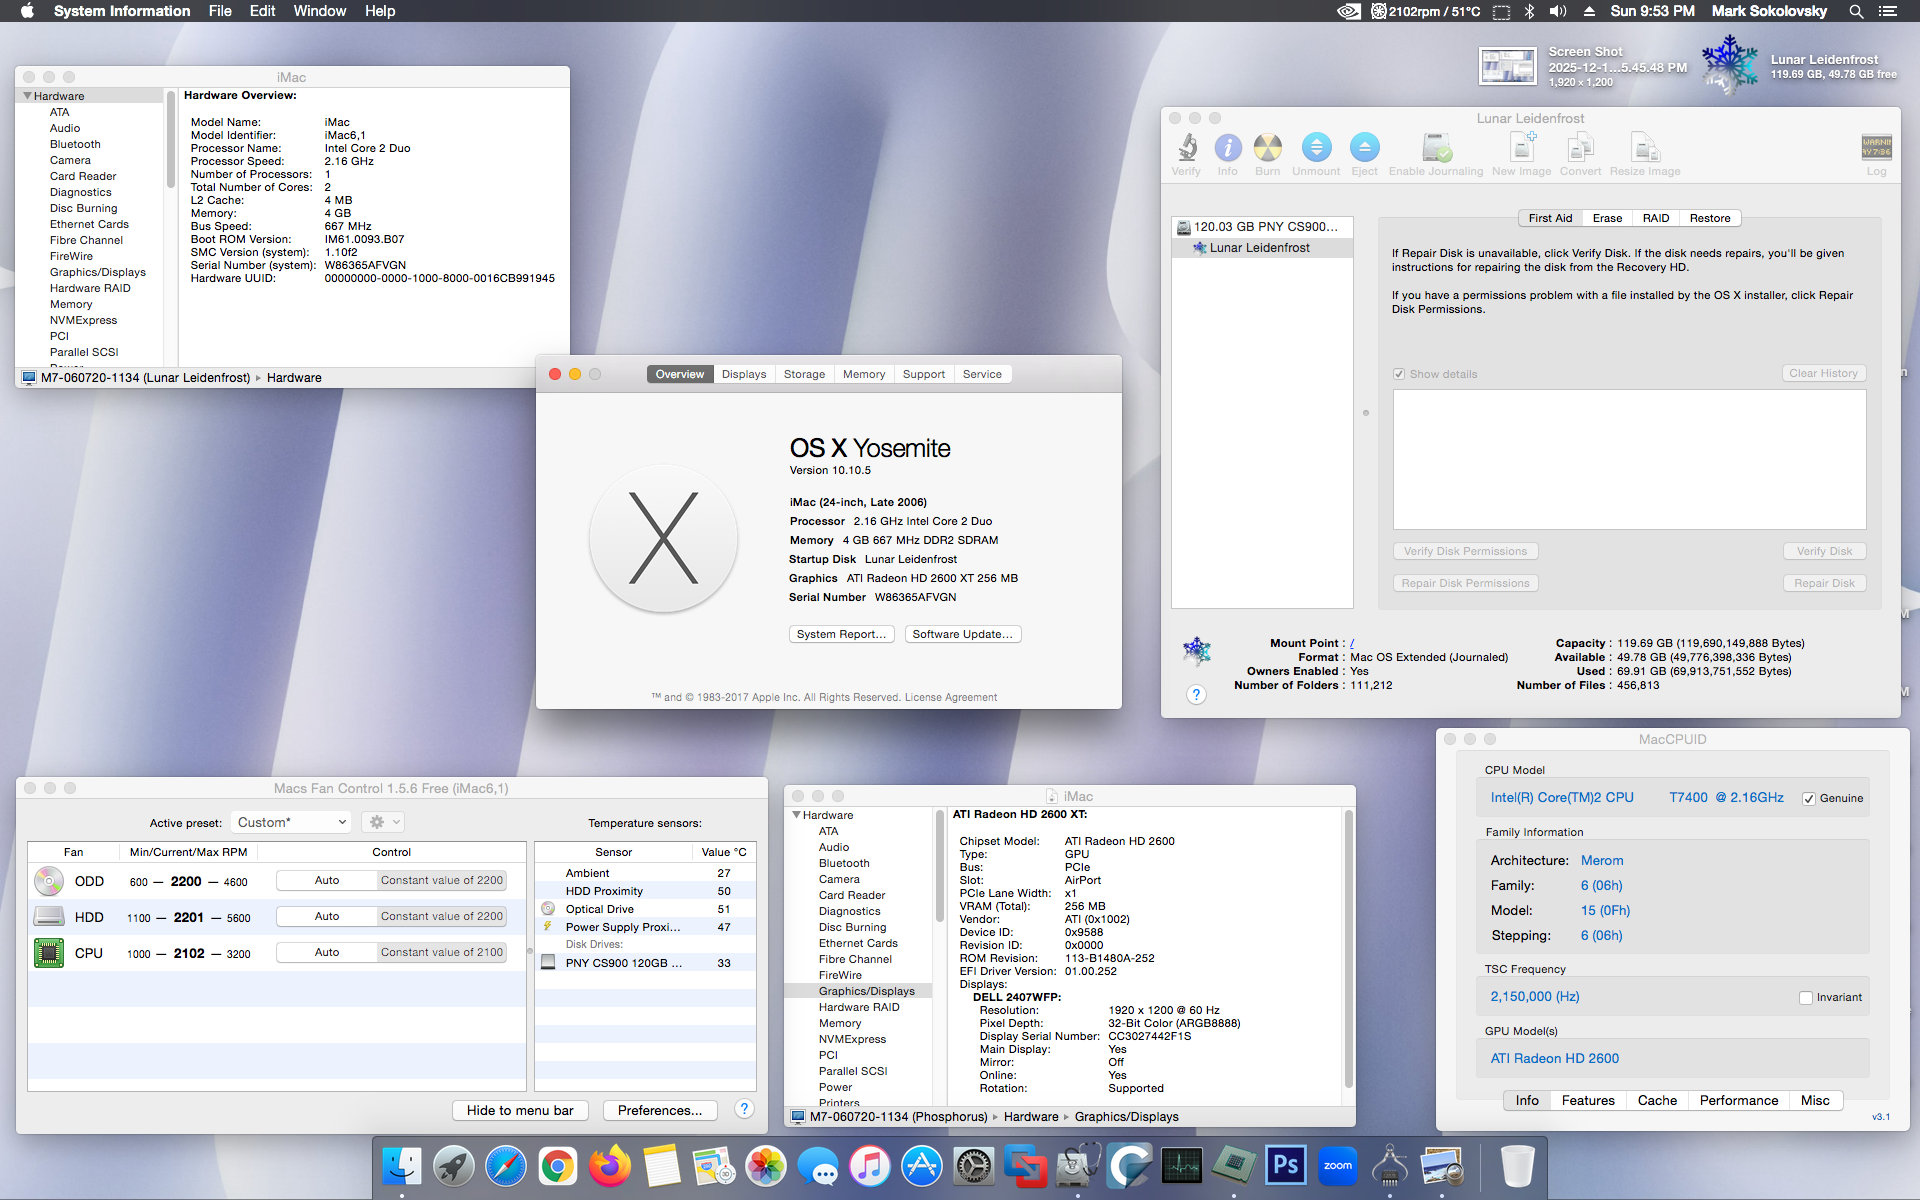
Miraculously, the iMac doesn’t run too hot. At idle, it can peak up to 52 degrees Celsius with all 3 fans hovering around 2000 rpm. When running more heavy-loaded applications like VMWare fusion, Minecraft, Google Chrome + 720p60 video streaming, etc; the system pushes into the 60s although it doesn’t get too hot. Perhaps I could reposition the card, it’s blowing the hot air into the PSU, but nothing bad happened in the last 2 years.
The way I have it taped up, it’s easy access into the system. The only tedious part are the many little power connectors on the side of the display (since it’s an older CCFL), a few of which I snaked through the PCIe connections since there was no other way. The panel itself is rather light, so packing tape is enough to hold it firmly.
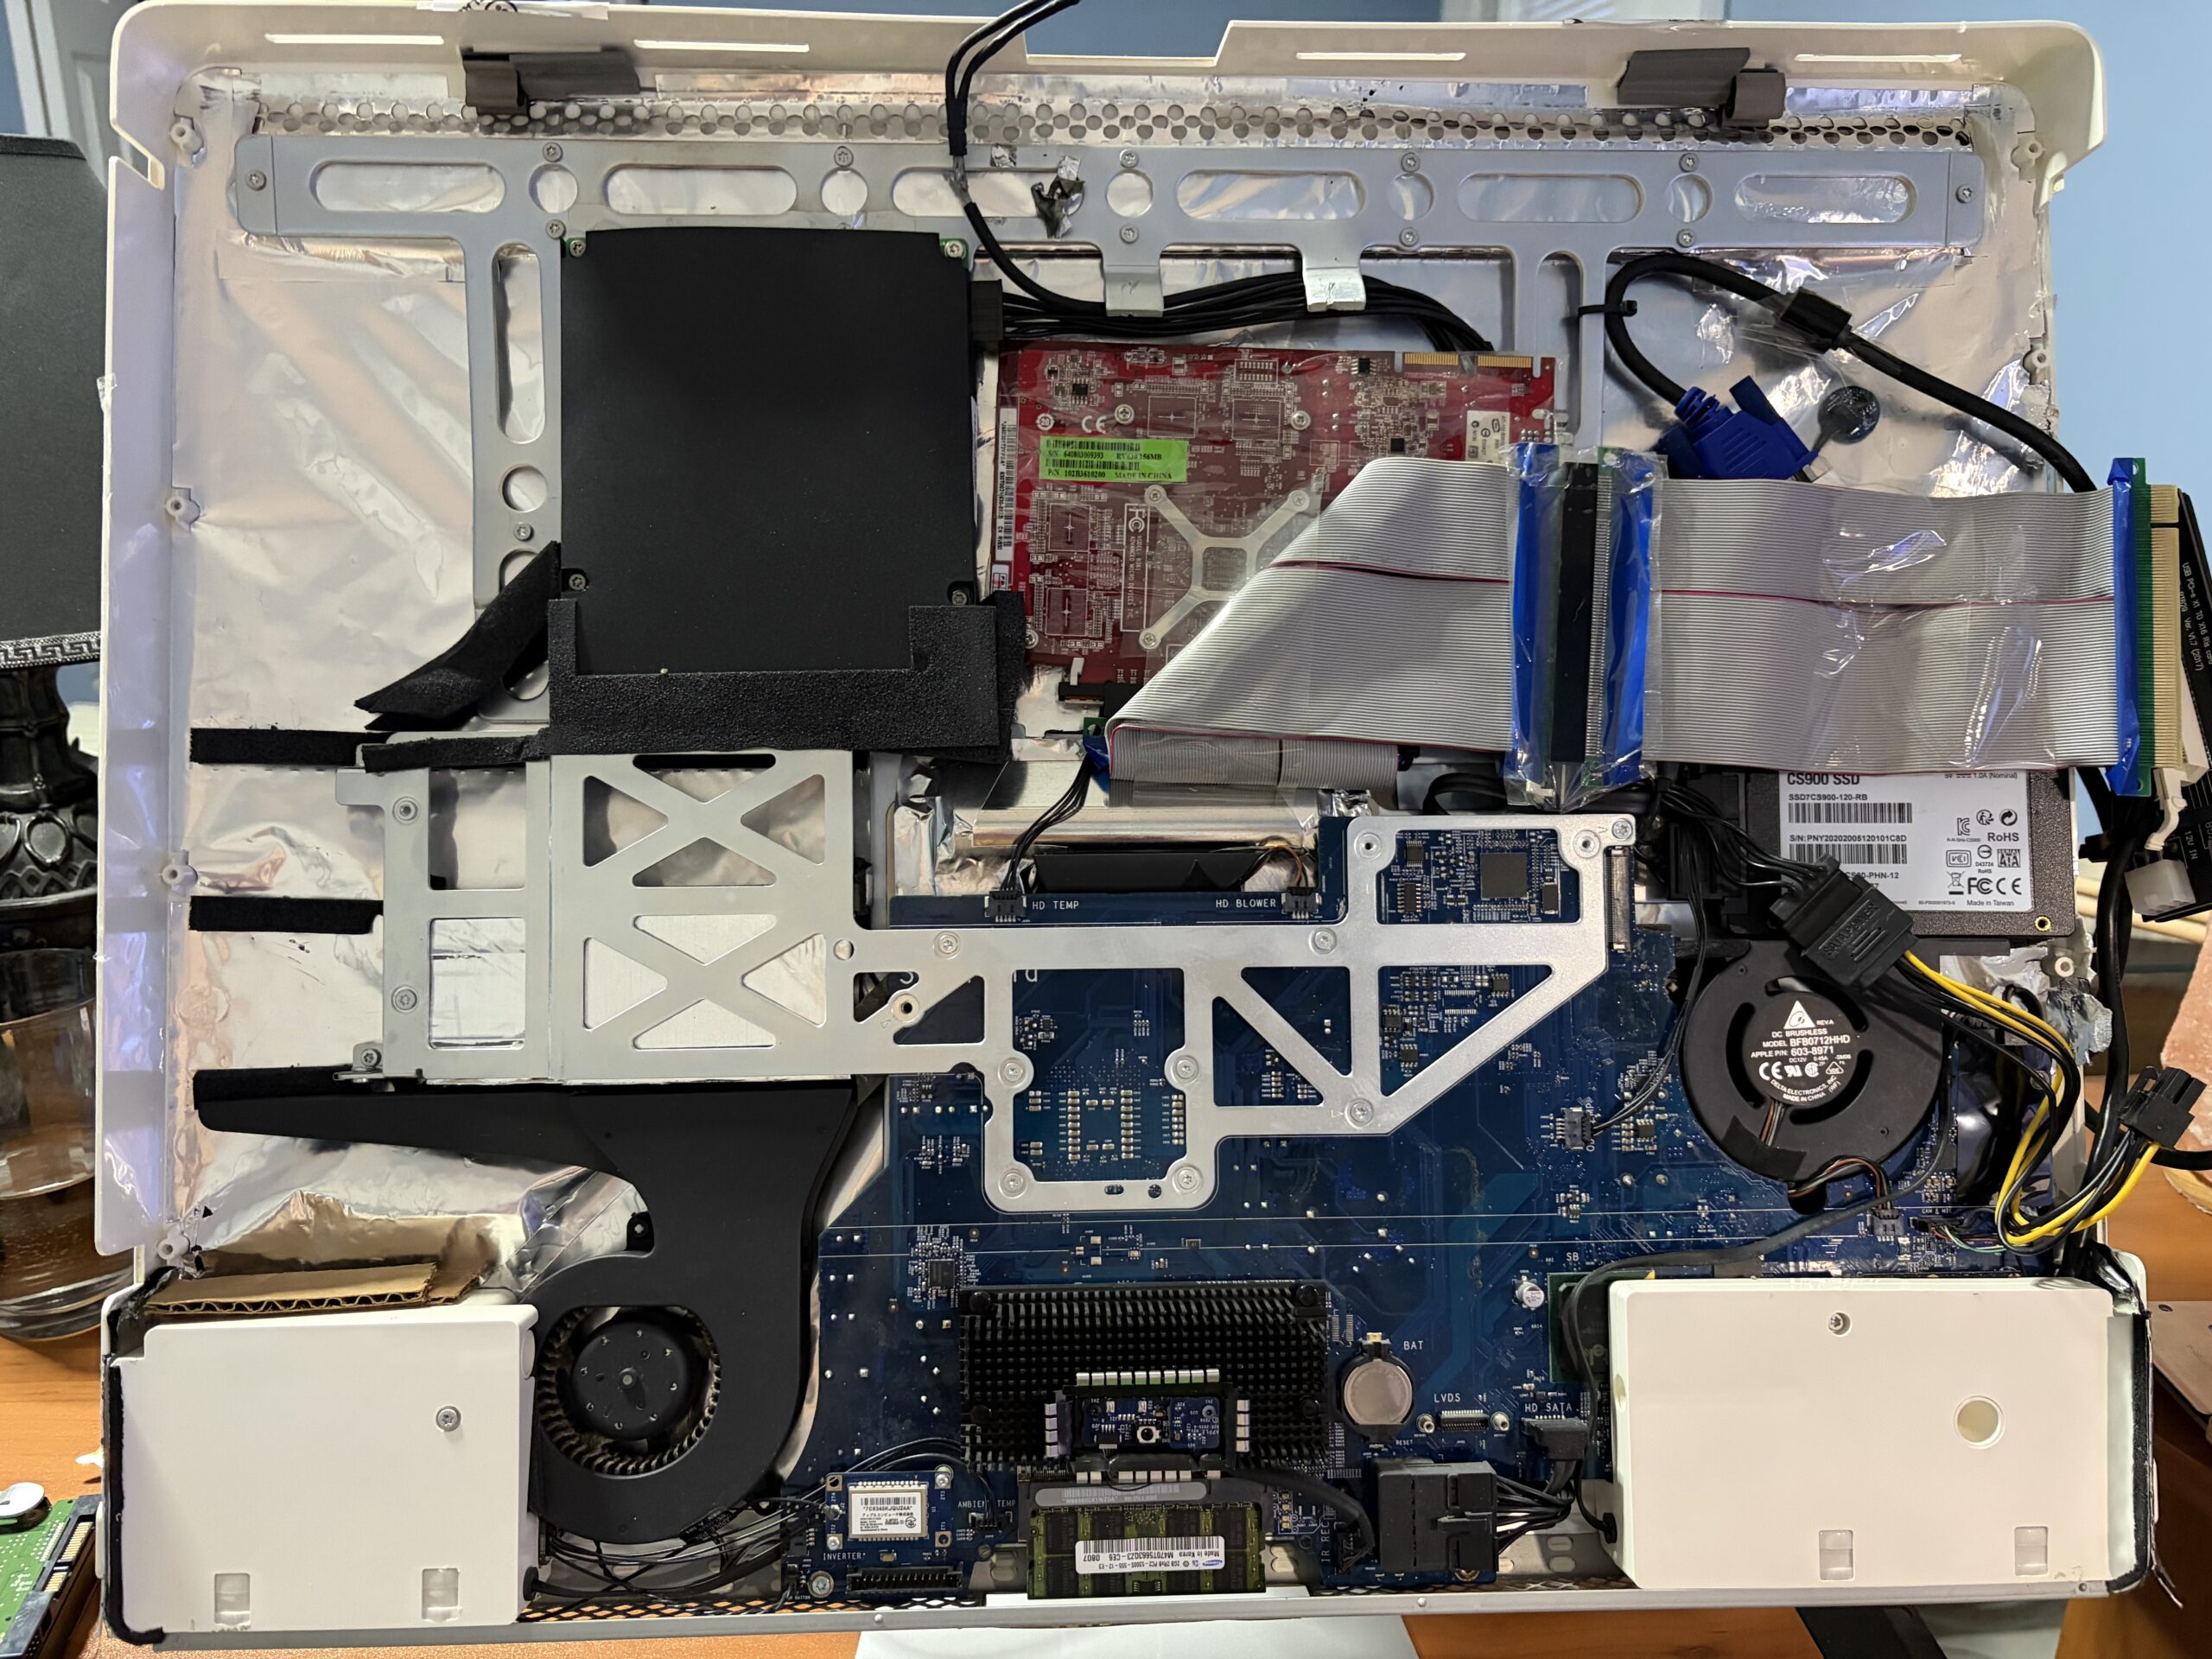
In the image above, the PCIe riser extension cables are folded over to show how the graphics card is placed inside the iMac. If you go with the iMac’s original LCD panel, it’s likely you’ll have to recess the GPU below where the LCD sits, or modify the heatsink so it doesn’t prevent the LCD from being able to sit properly inside the iMac.
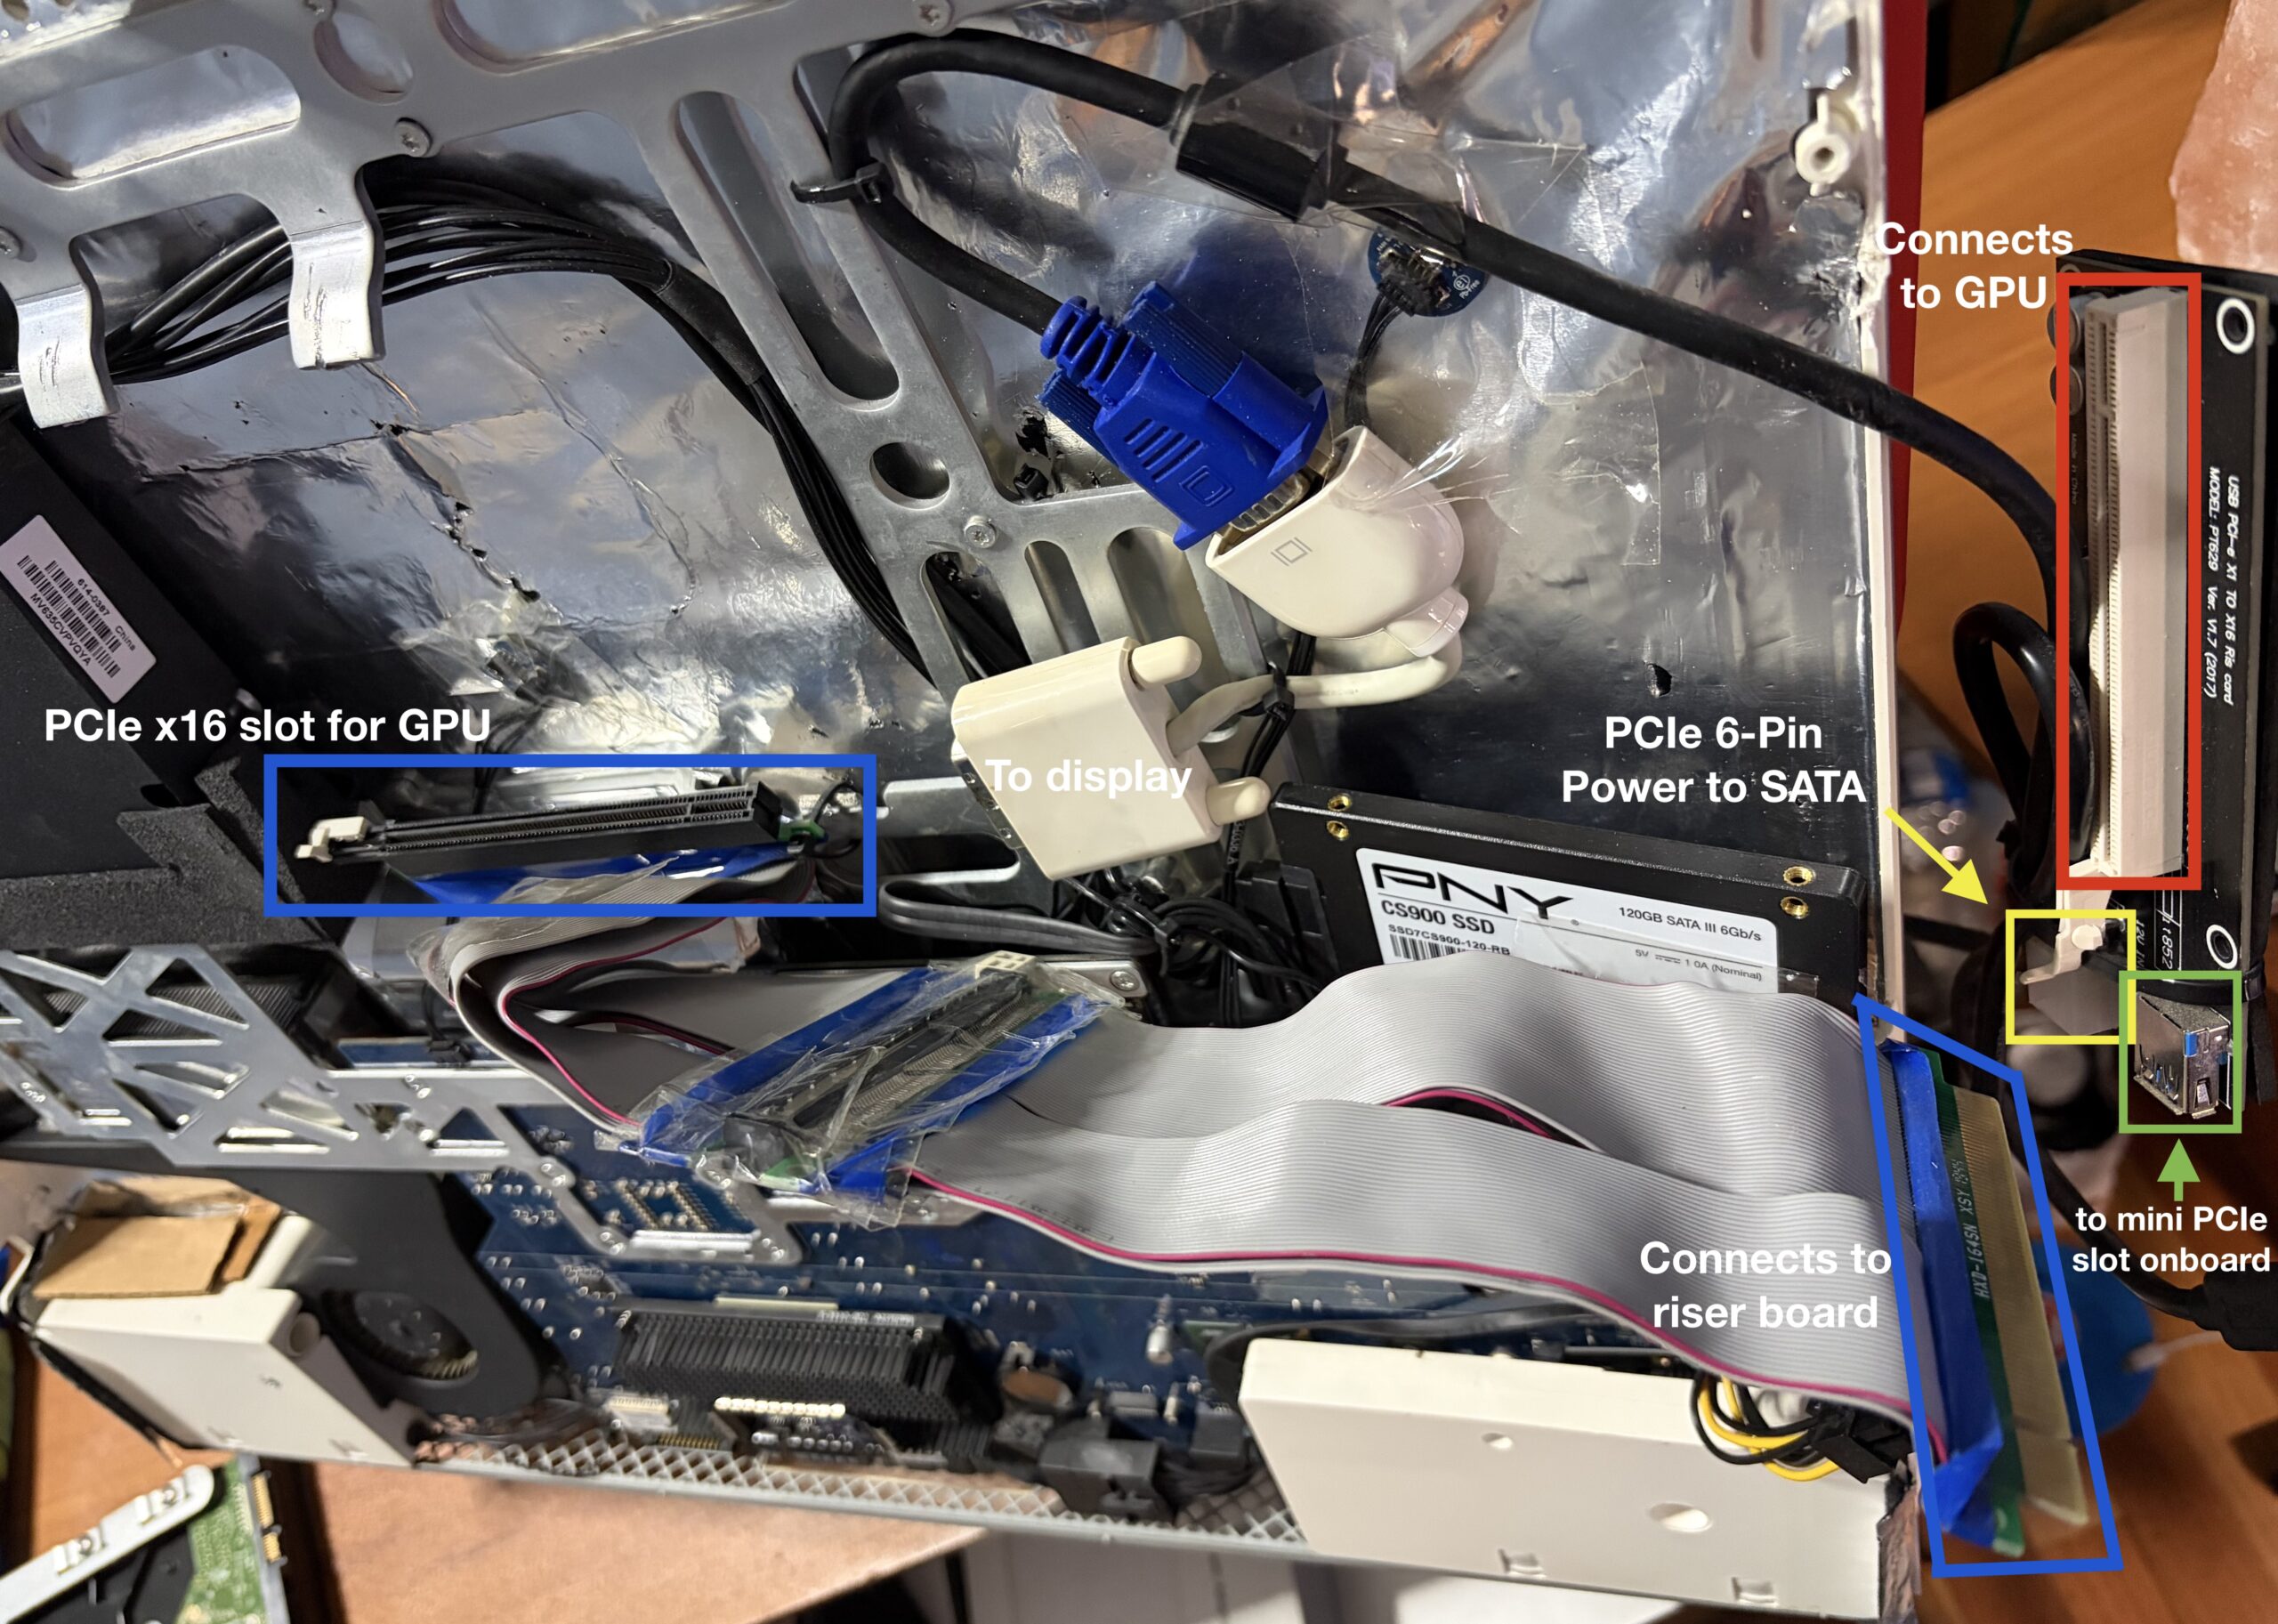
Going with a thin, modern 16:10 24-Inch panel will give you far more height clearance and more of an ability to utilize the ODD area for the GPU. It’s more difficult than expected to fit a slim-profile Mac Pro GPU inside an iMac.
Splicing the SATA cable
The reality is, we need power for both the SSD and GPU. I’m banking the assumption of power delivery stability on the fact the iMac PSU isn’t at all driving multiple power hungry components any longer. The CCFL LCD is gone, the optical drive too, a power efficient SSD in place of the HDD, and that the PCIe x1 and would constrain the bandwidth so much, it couldn’t possibly overload the PSU since it can’t possibly saturate the GPU enough.
Regardless, the aim wasn’t raw performance, the goal was just graphical hardware acceleration, usability, reliability. After 2 years of use, everything seems to be a-ok!
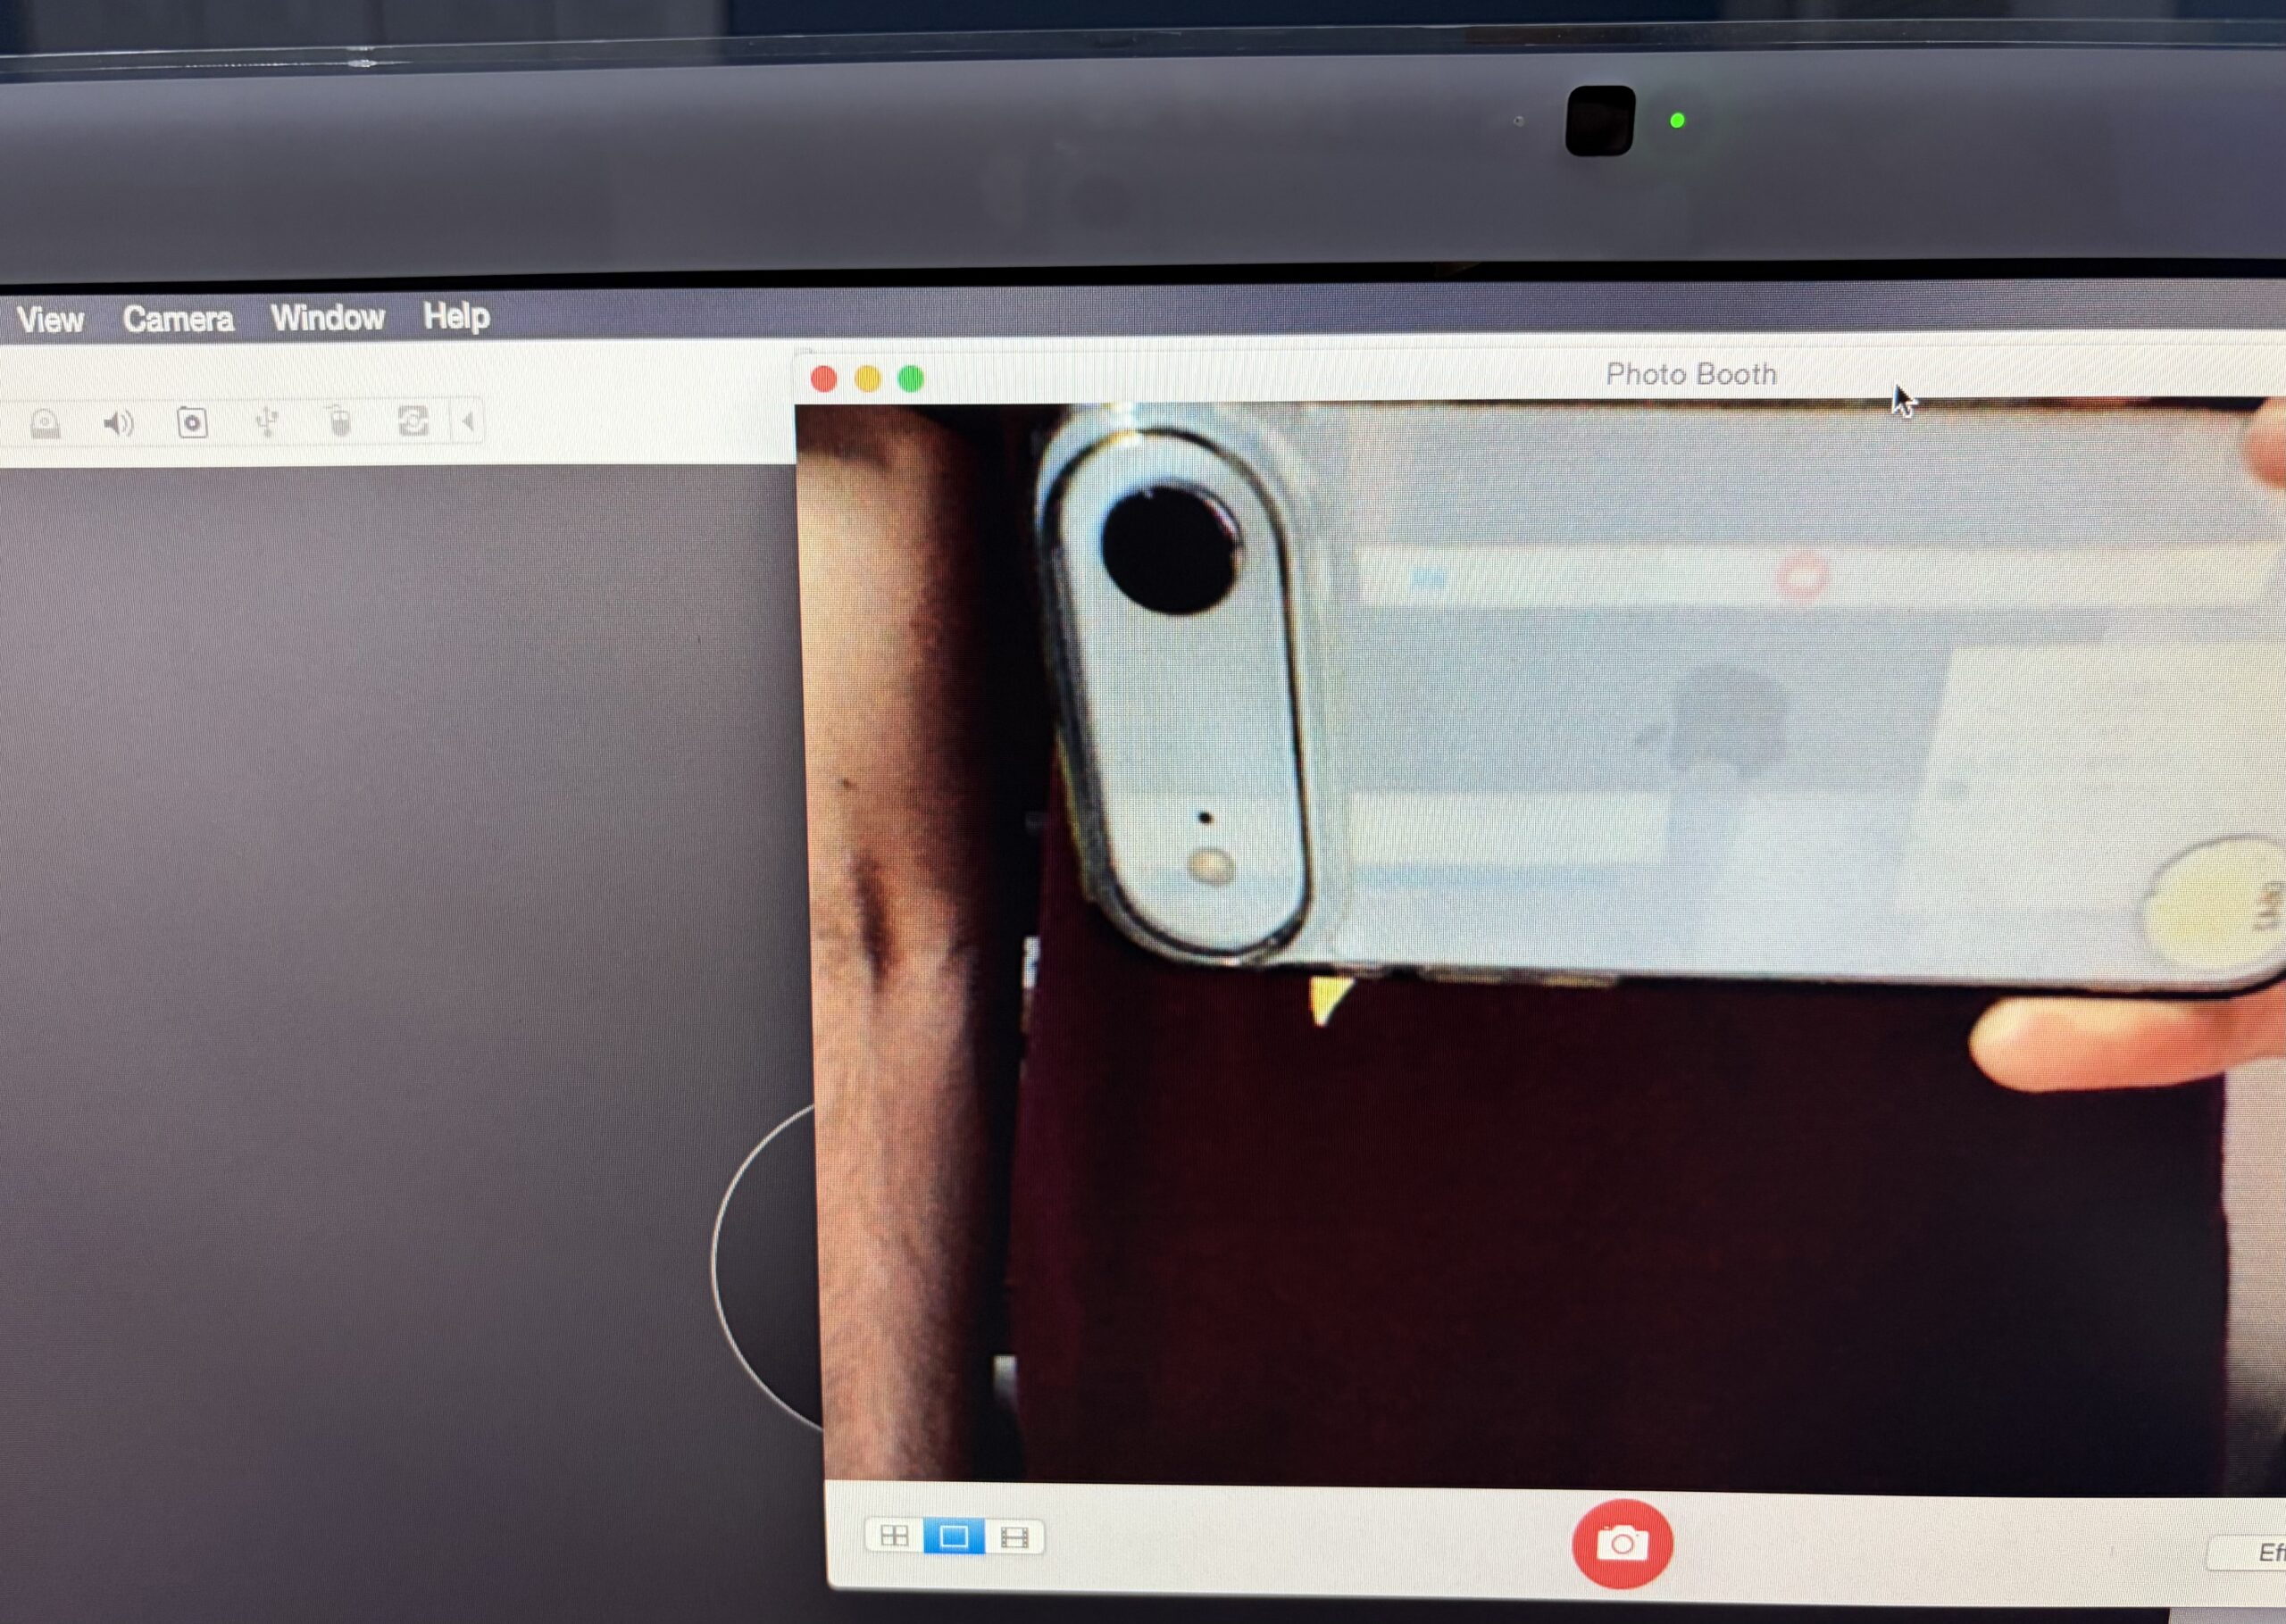
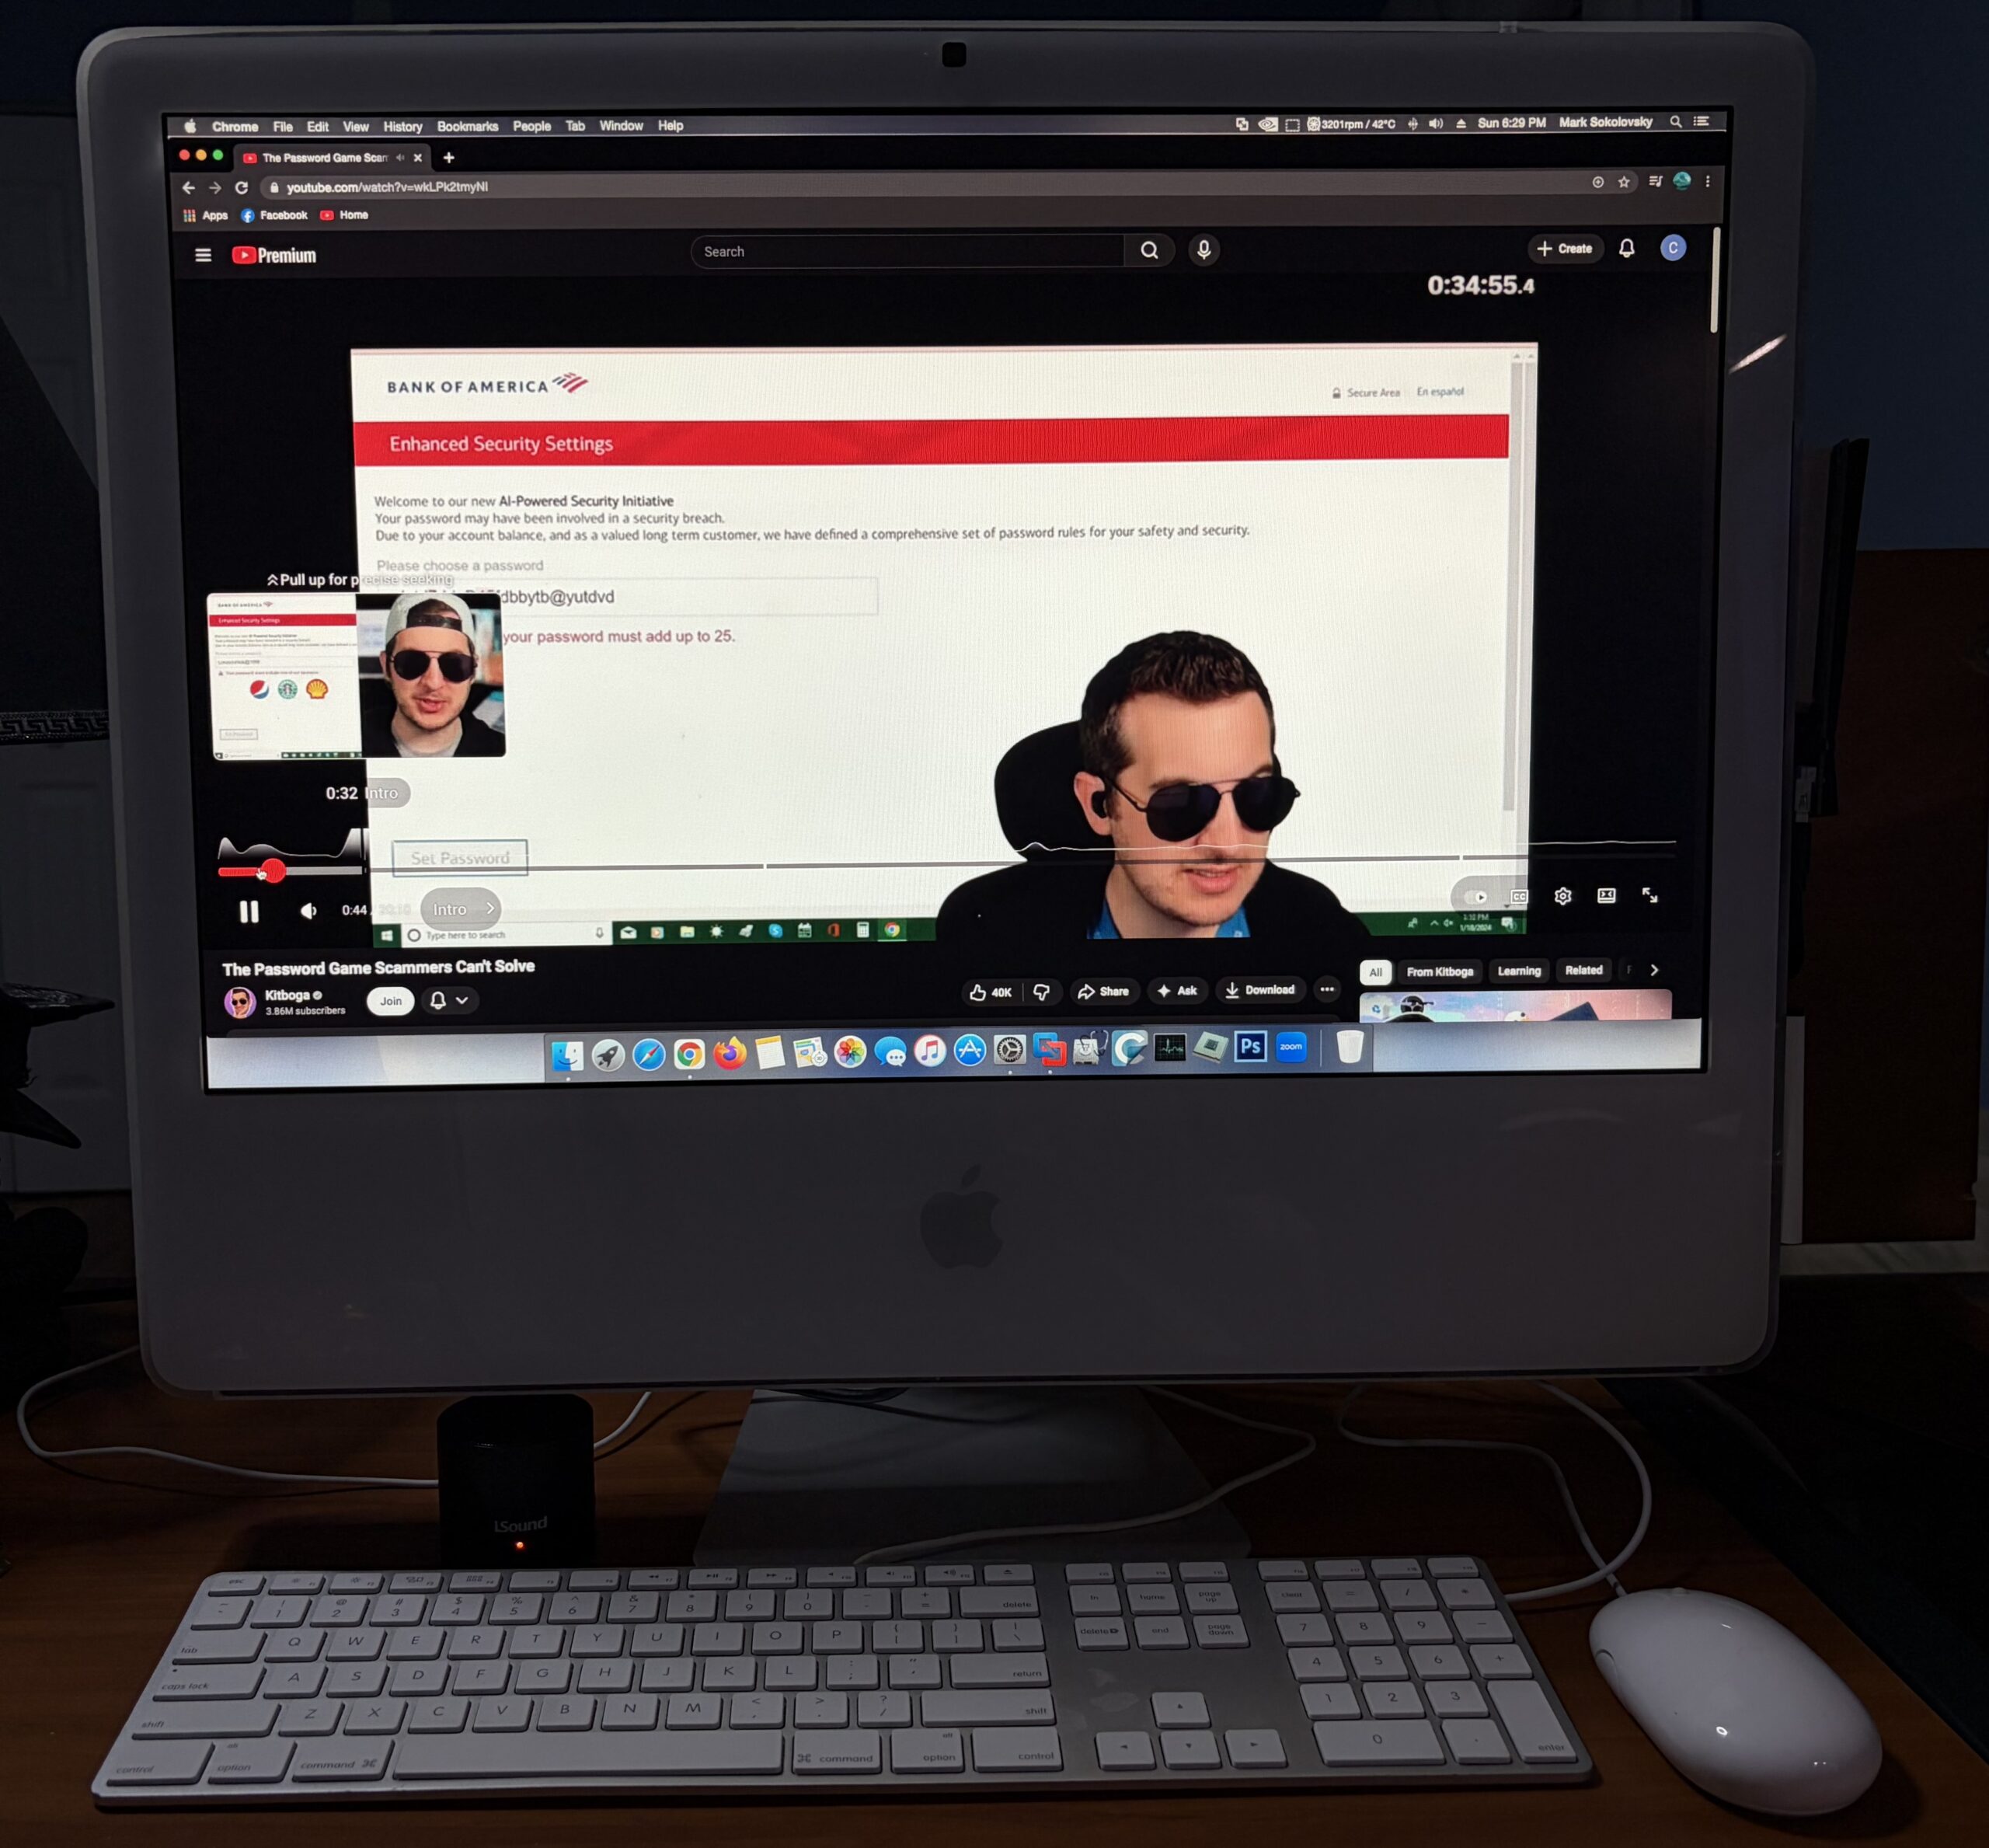
The Camera and remote still work in Yosemite
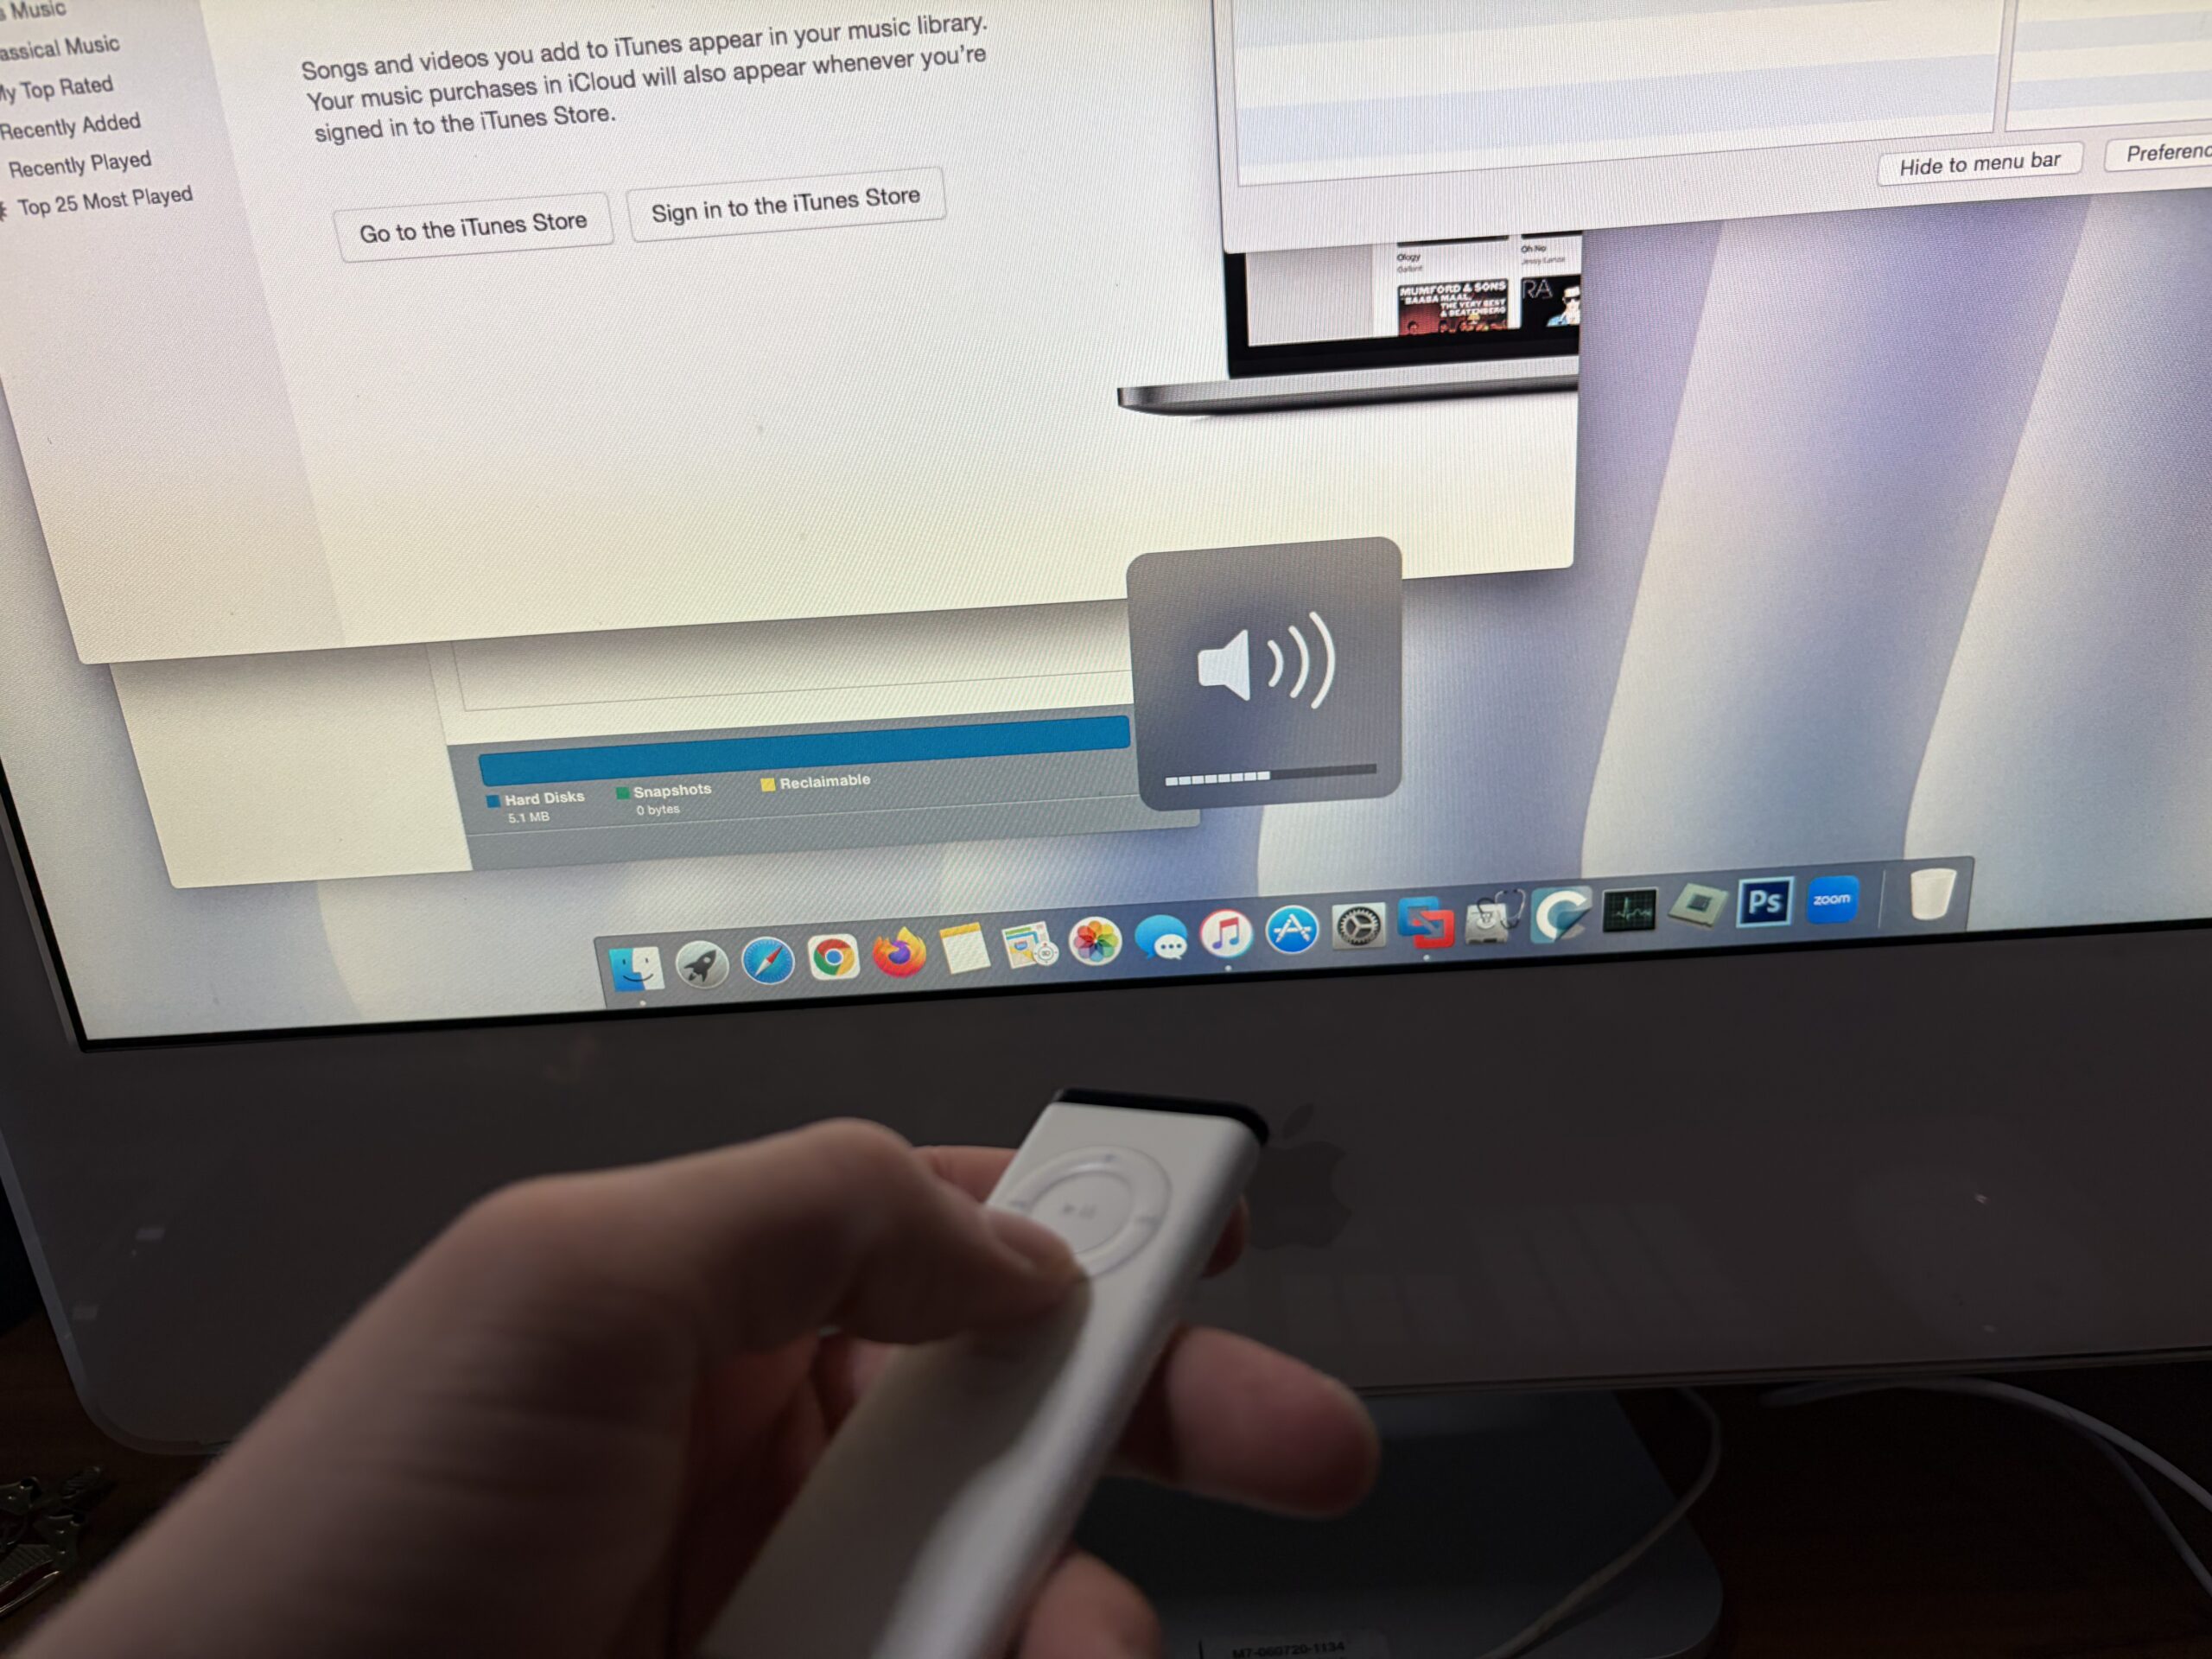
When using the Piker Alpha version of Yosemite, it doesn’t look like you need any extra kext installations to get the Camera and remote working – they still do. Although I can’t exactly pause/play YouTube videos yet, it still launches iTunes by default and can raise/lower the system volume.
 |
 |
I did recently attempt using a kext patching tool to get certain features of this iMac working with Yosemite; specifically sound. I don’t believe it affected the internal camera/remote functionality at all, this was working before.
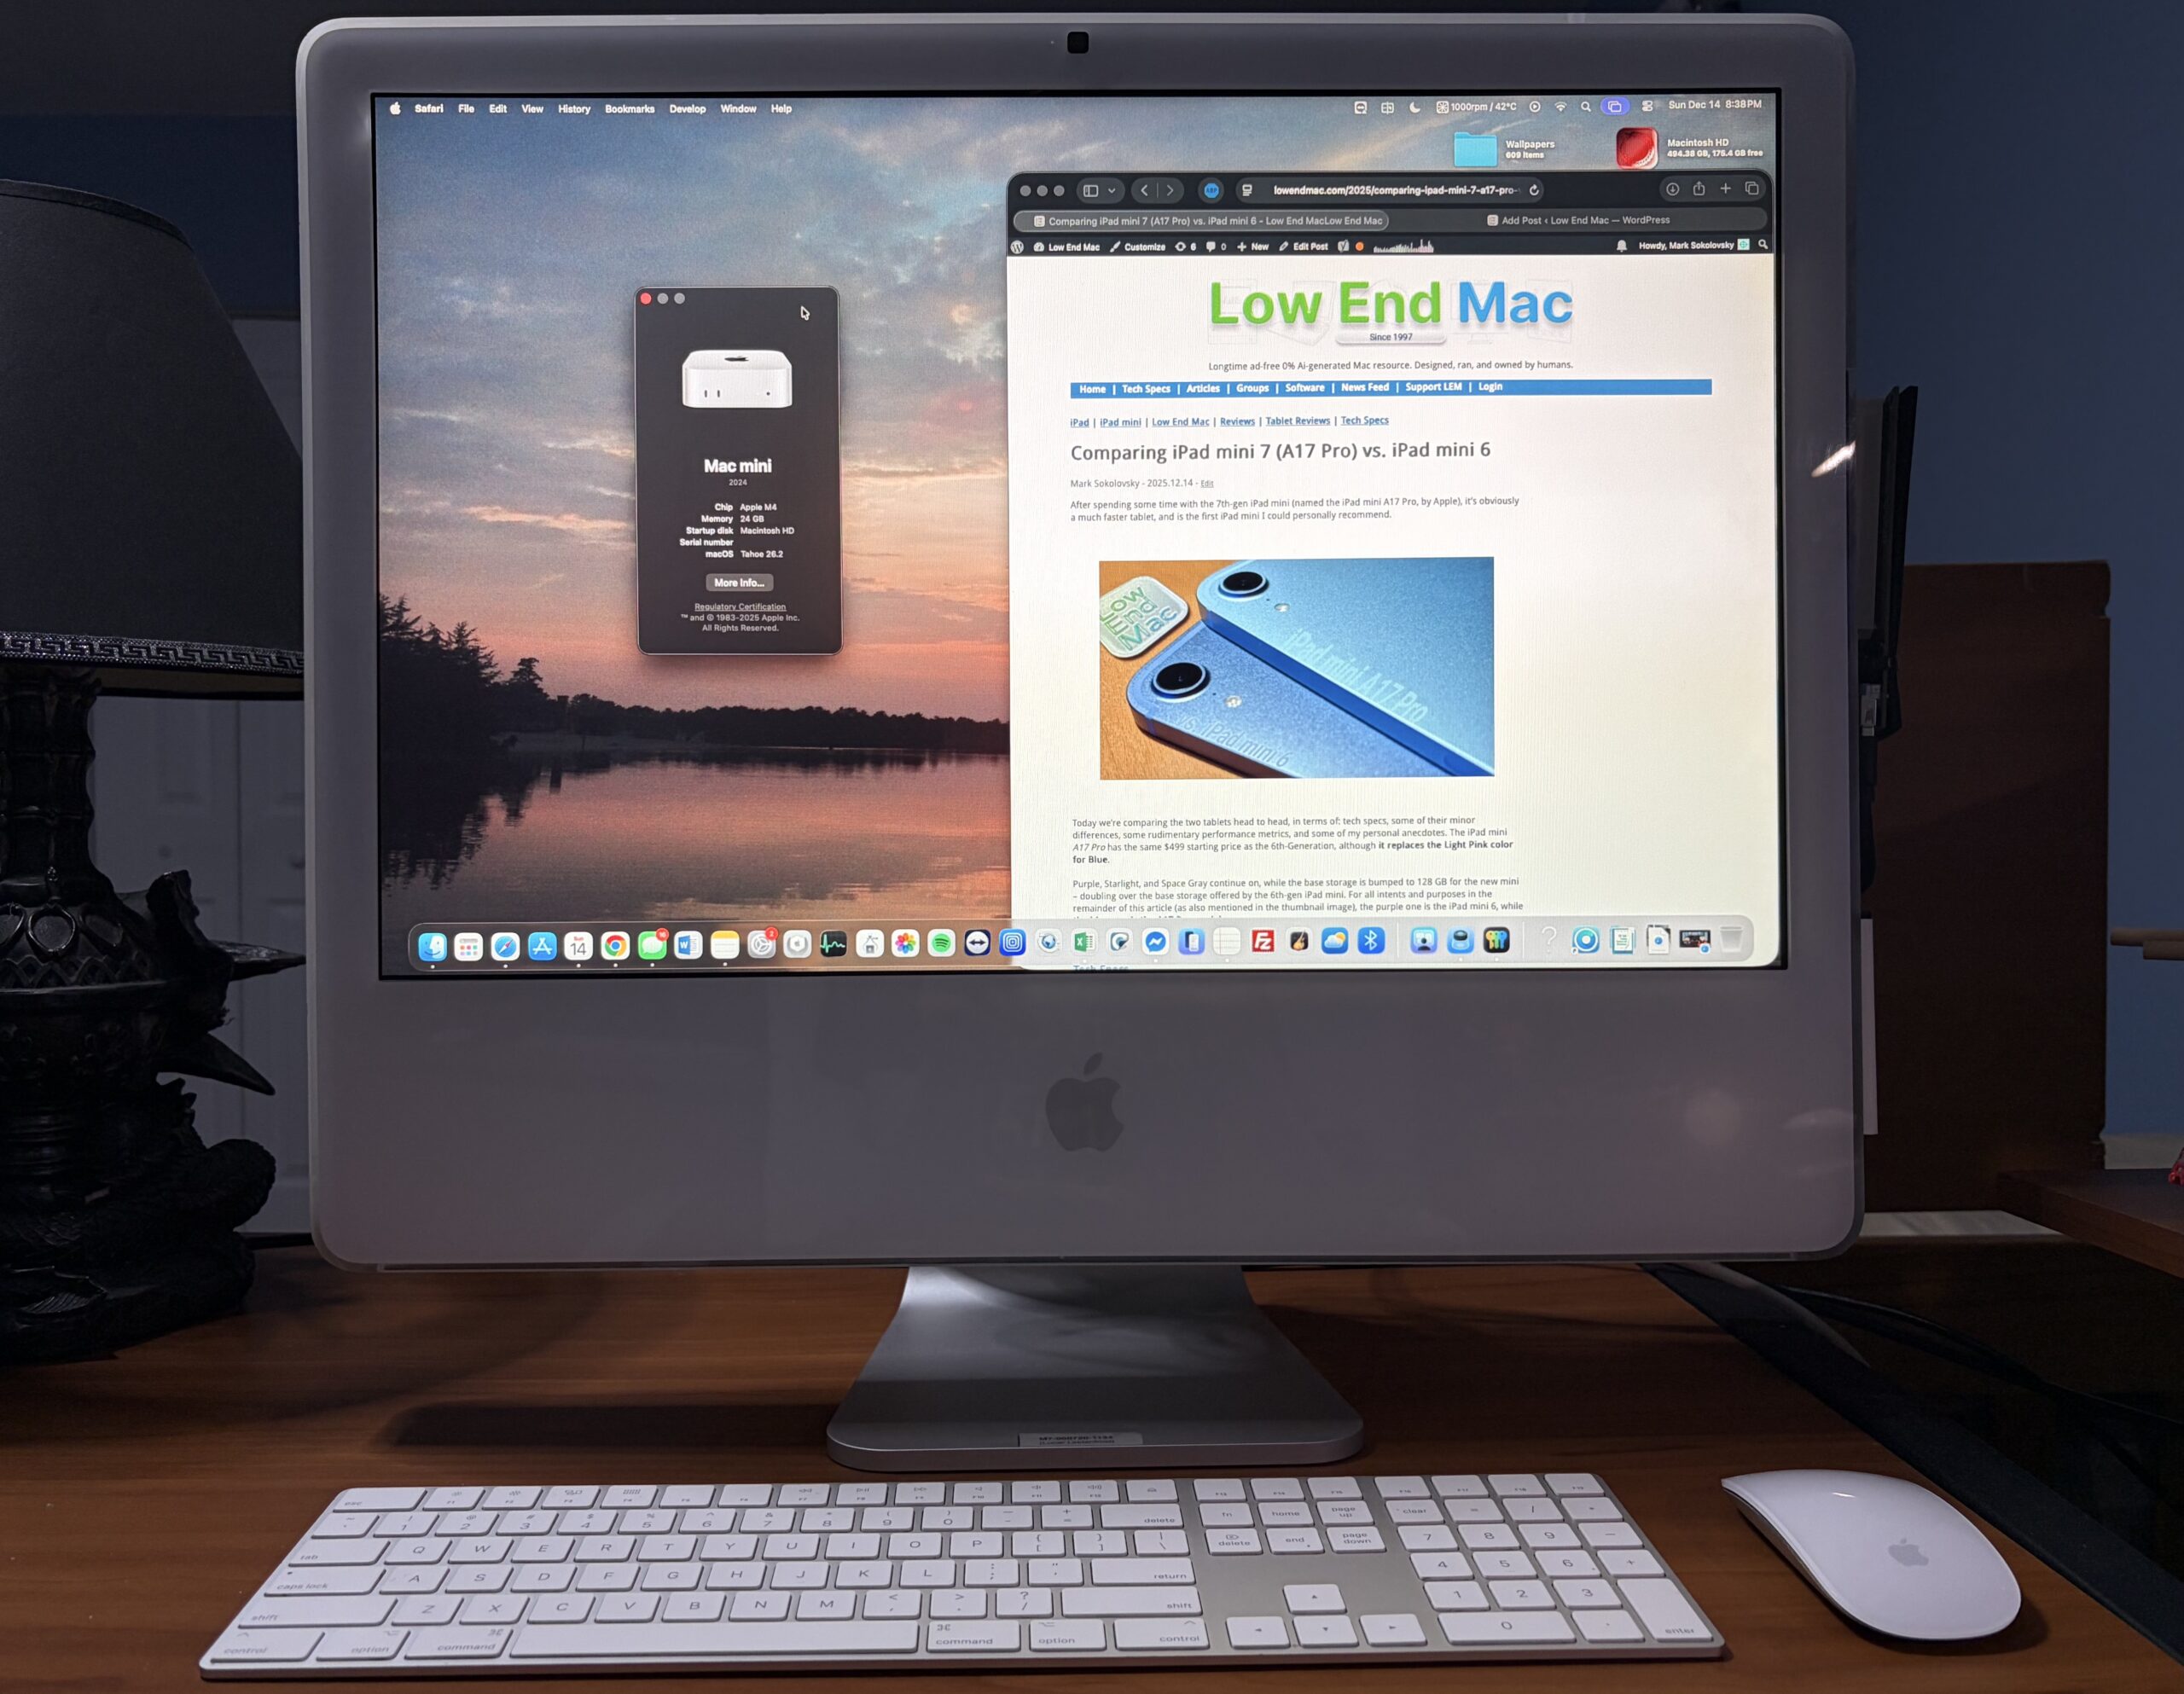
Using it as an external display
Having multiple display inputs makes this possible. It’s very usable as an external display for the M4 Mac mini. DVI > HDMI > USB-C, via Thunderbolt port on back of mini. Just move the KB+Mouse over and.. bam! The 1920 x 1200 resolution reminds me why I switched to a 43-Inch 4K Hisense TV for productivity, but still provides a nice focused view with the right settings.
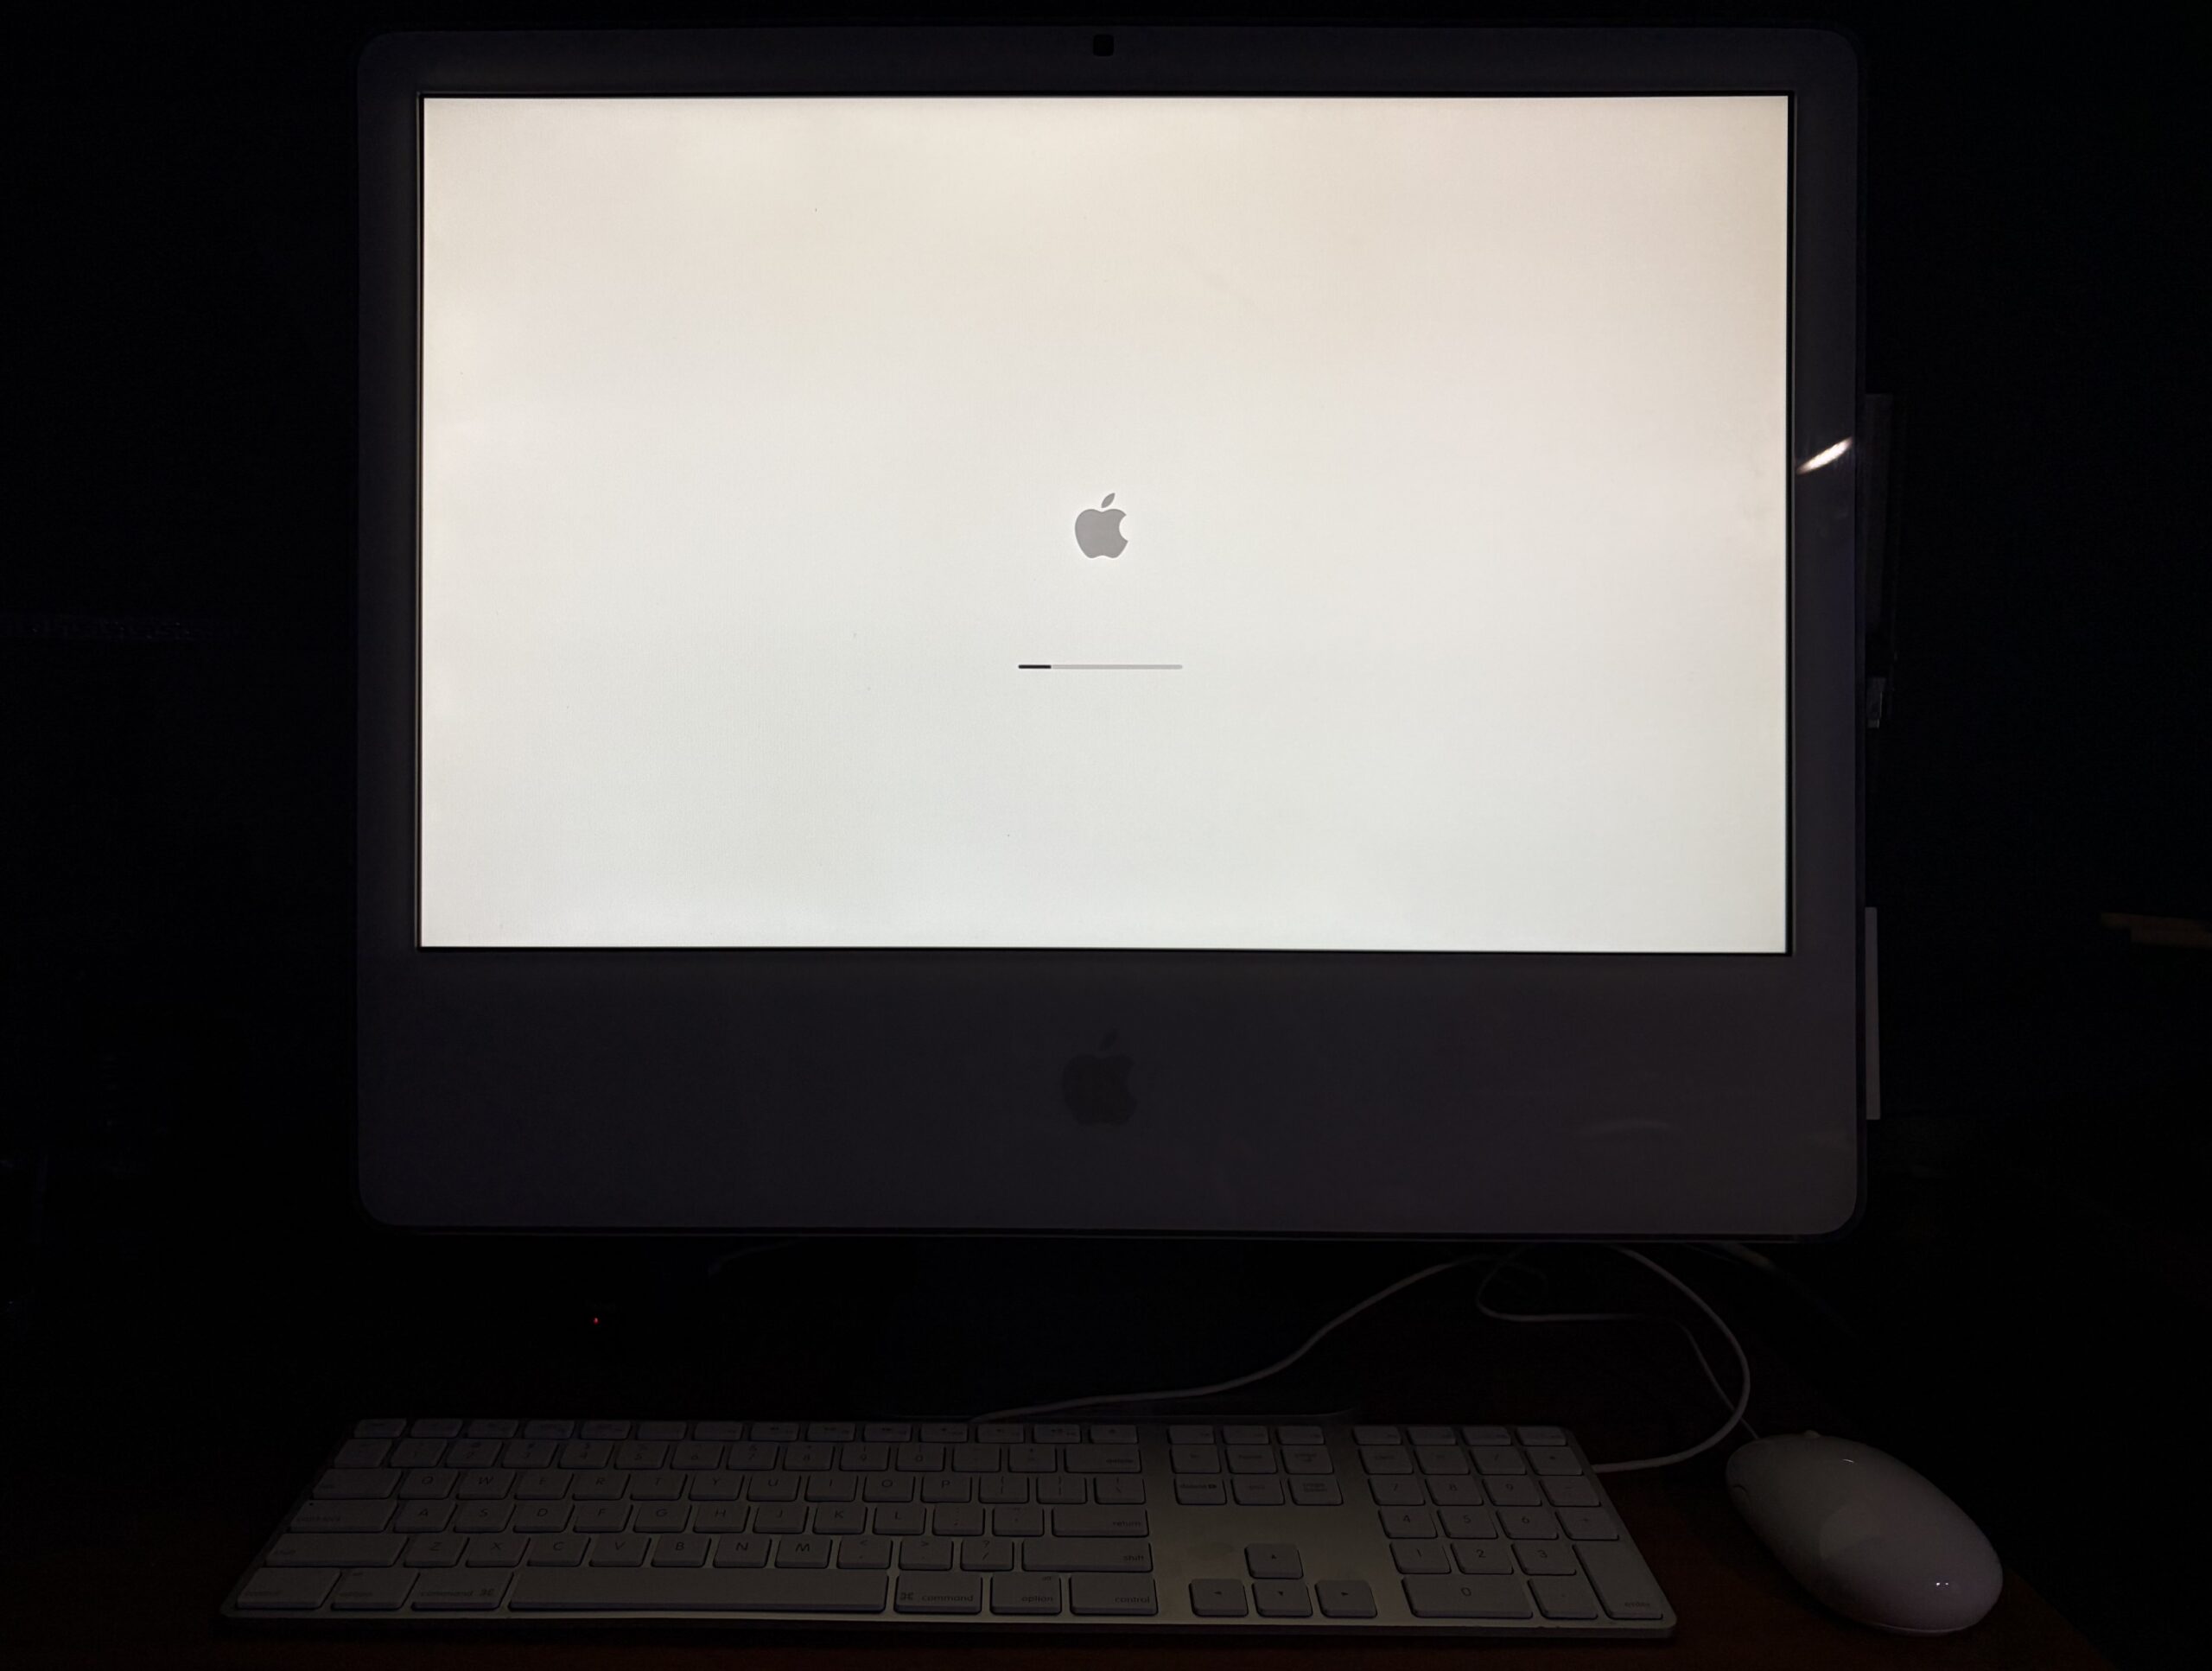
Yes, it has a boot screen.
This isn’t the result of some OpenCore trickery or some hack, this is solely because it’s a real Mac with a real Mac GPU which happens to be compatible. The chime goes through the internal speakers when booting up, although the speakers won’t work in Yosemite until I change out the sound kext. Boot selection still works (holding down option key).
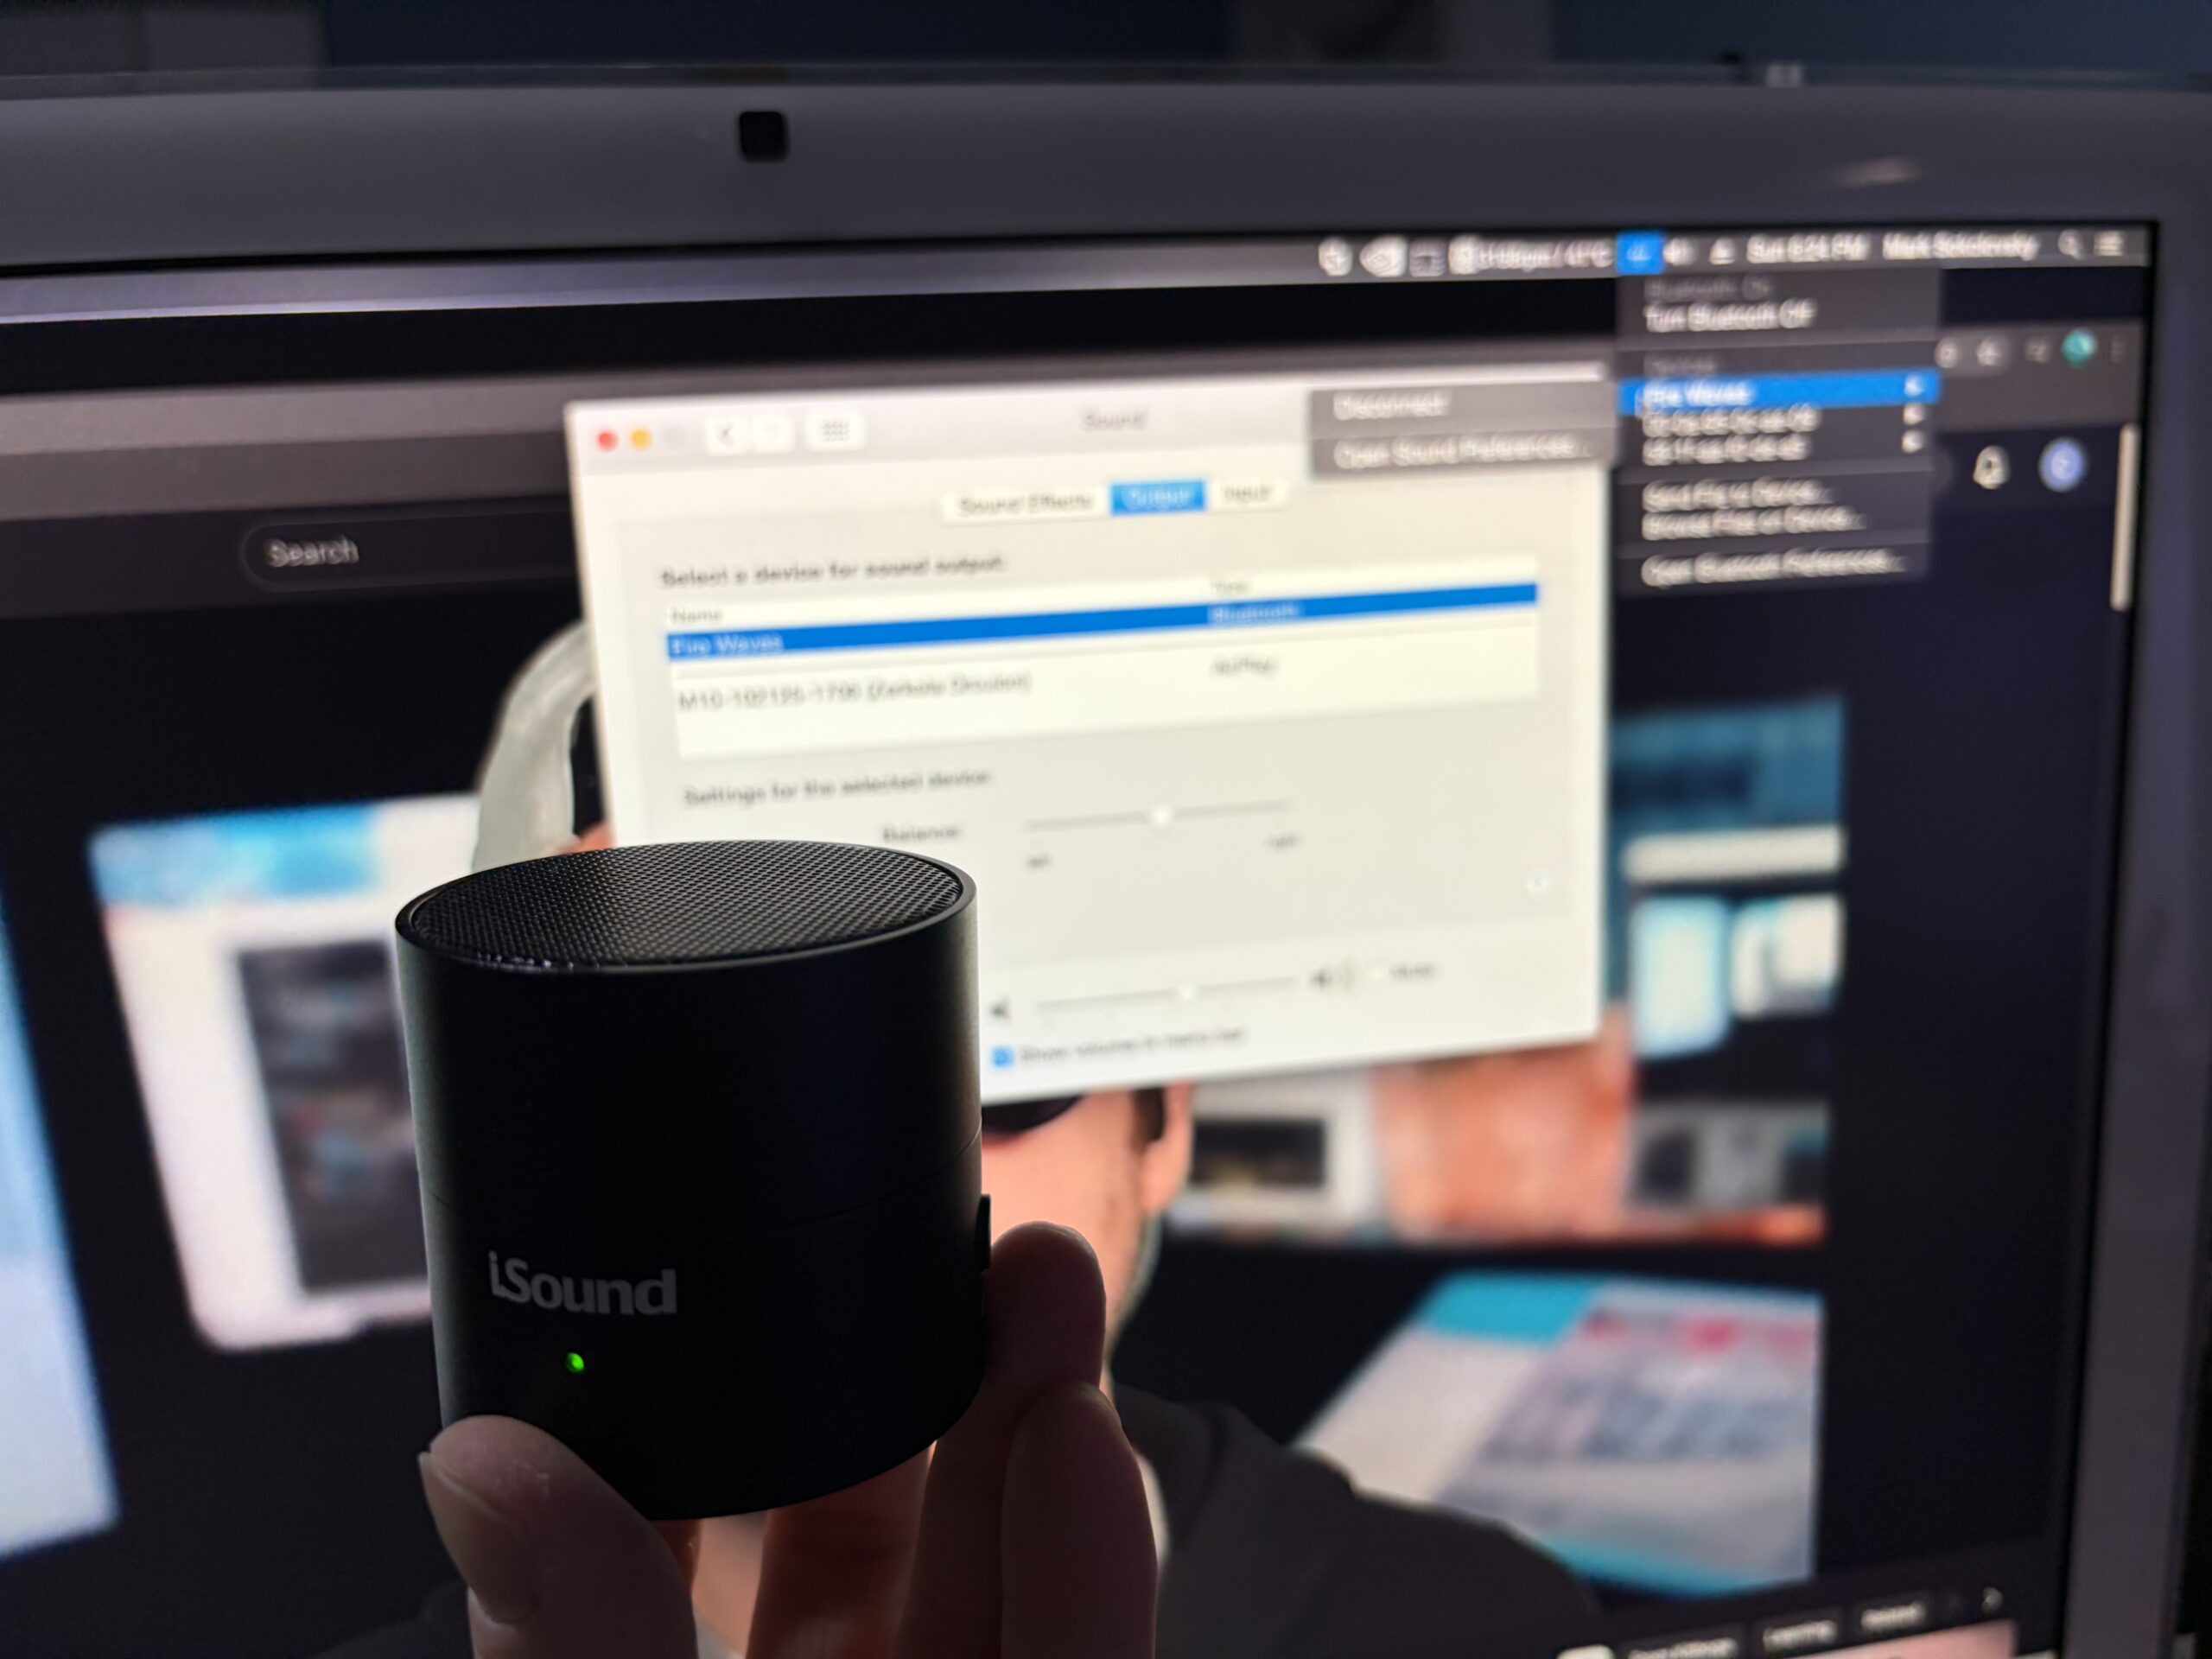
Bluetooth still works, too.
I kept the original bluetooth module in the iMac, and it handles the bluetooth speaker for when I watch YouTube videos or just need sound on the iMac. It’s the workaround I use for now.
 |
 |
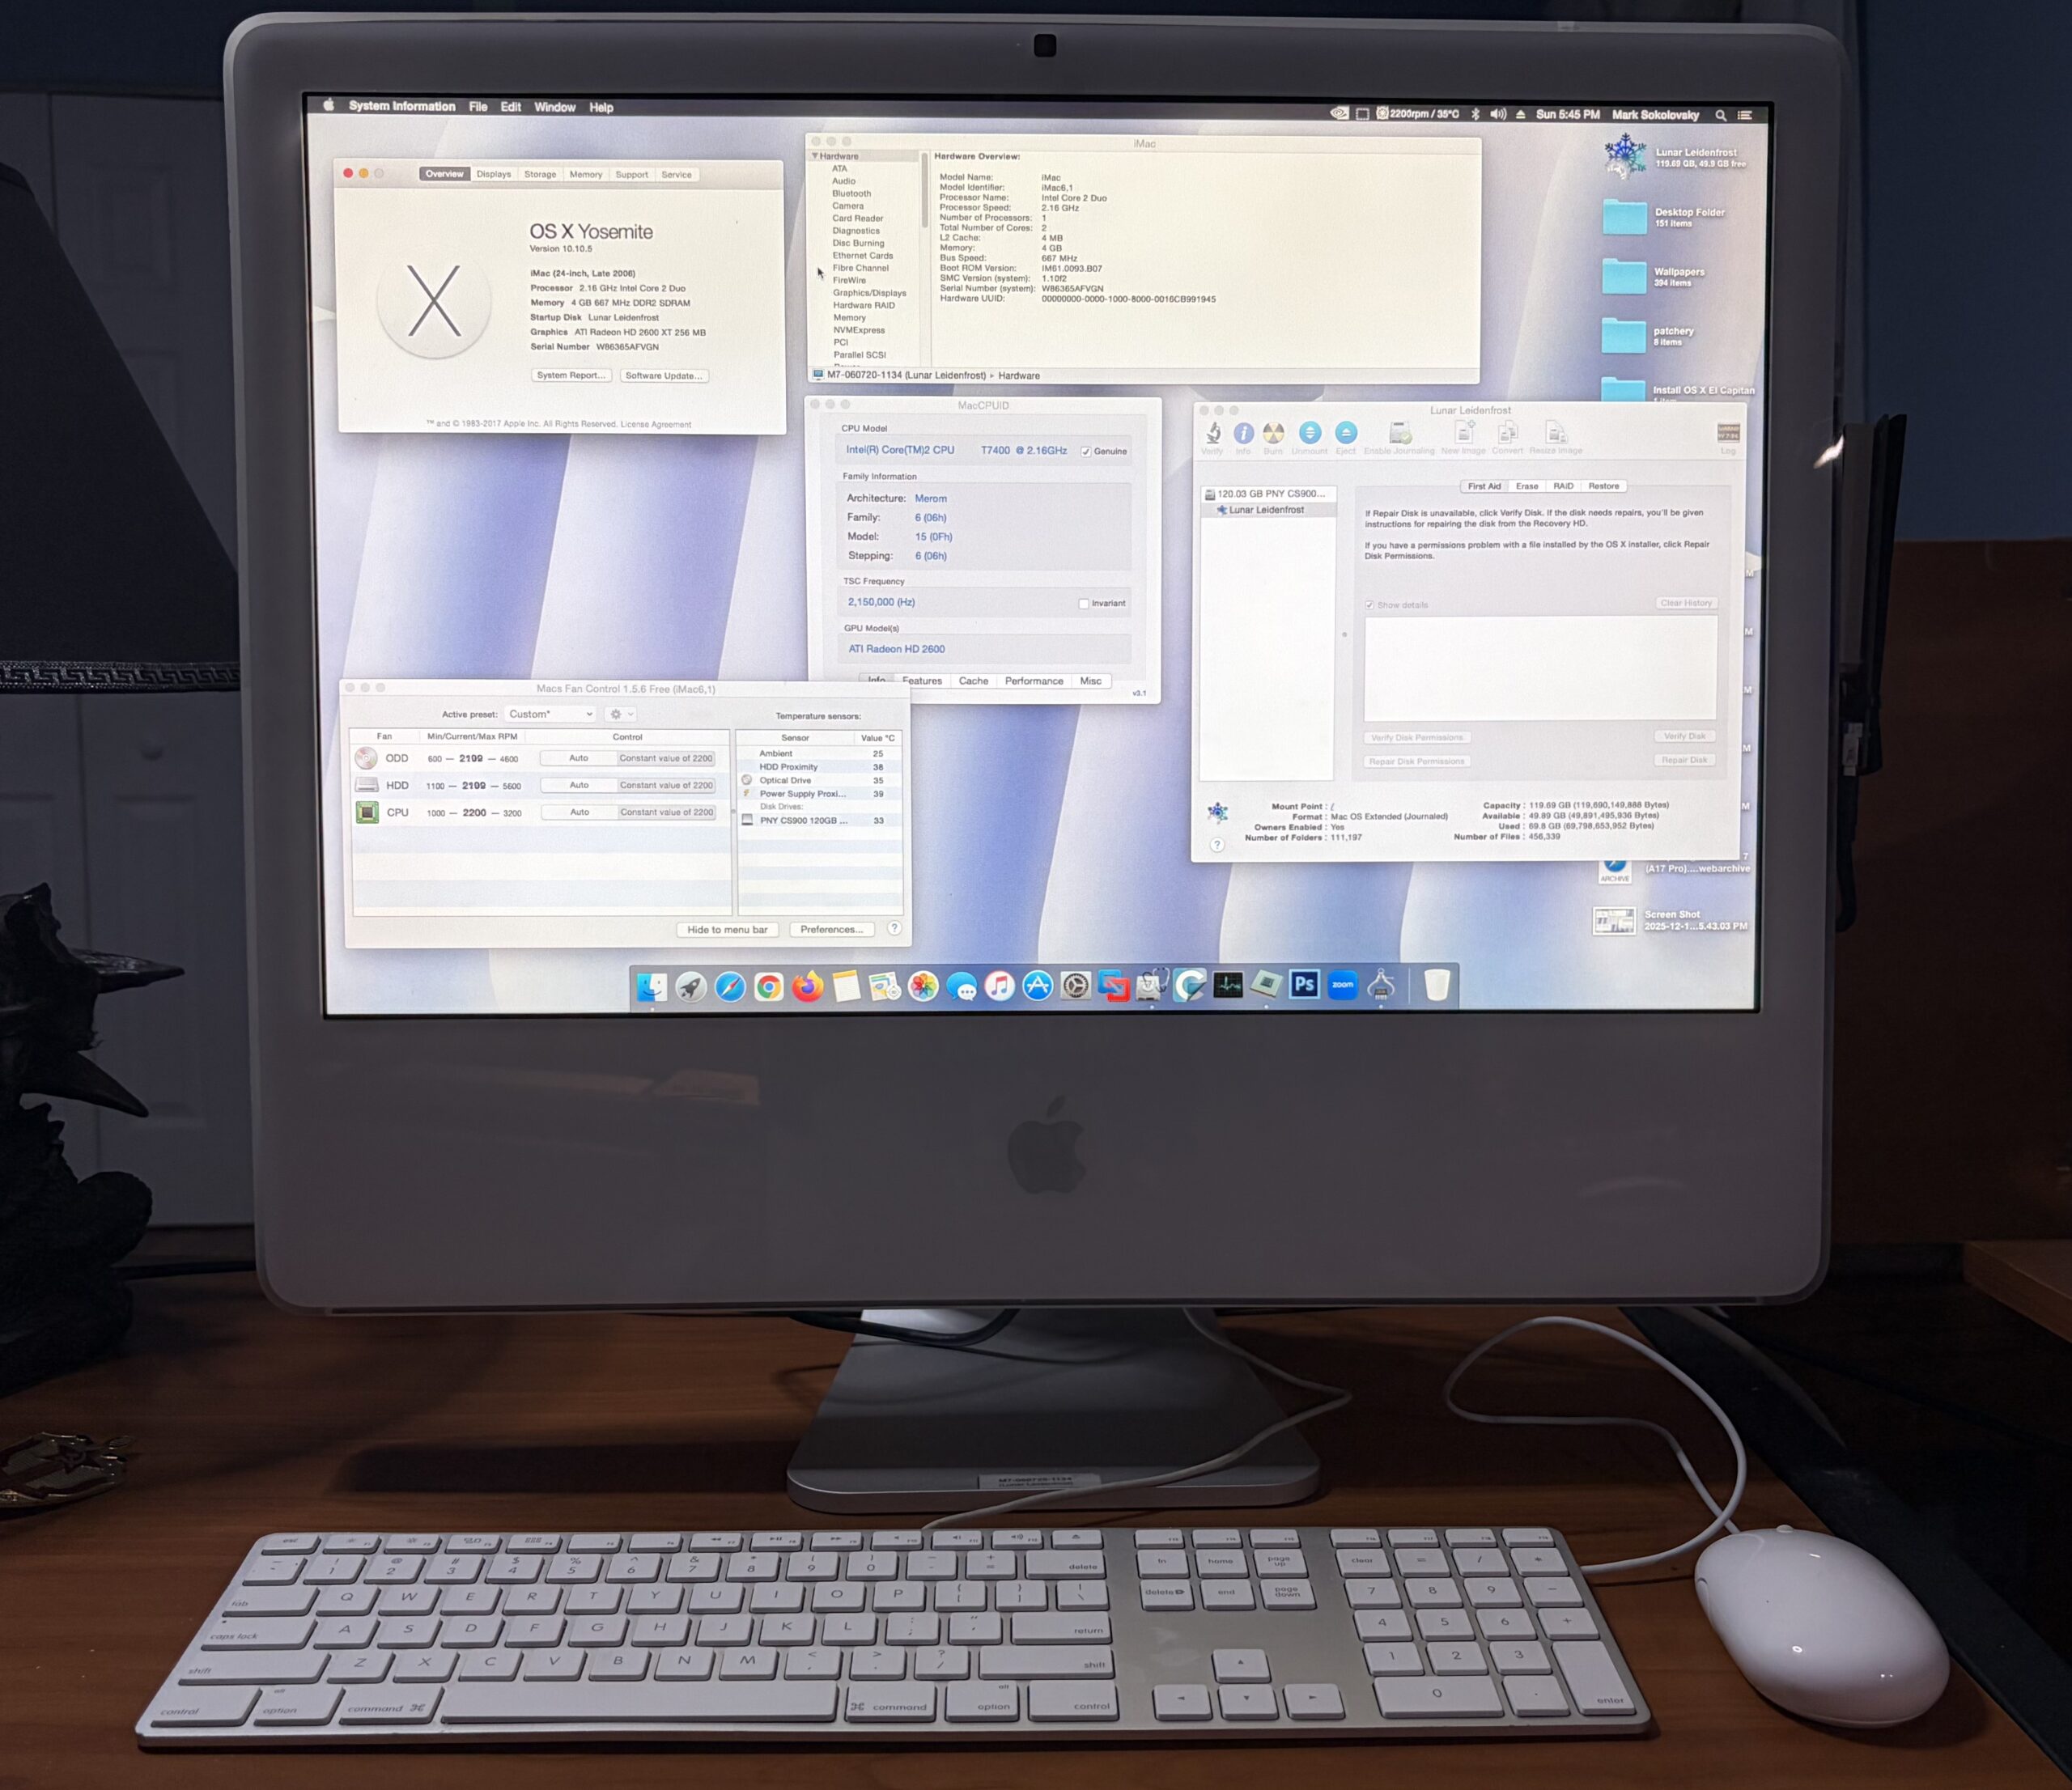
The desktop
It runs relatively fast enough, and runs about as fast as you would expect an iMac from this era would, with an SSD.
It’s not ferociously fast, but it’s not slow, but at least through all this trouble there’s now graphical hardware acceleration – which makes the iMac far more usable.
Using the Piker Alpha mod with El Capitan presents a memory leak issue. Back in the day when I had a Mac Pro 2,1 with 64 GB RAM I’d never run into any problems. El Capitan kernel panics after a few minutes using the Piker Alpha mod on this iMac, so an alternative patching method has to be used (and I think I found one). In the meantime, I’ve stuck to Yosemite for slightly better compatibility.
In conclusion
With all these modifications, it’s almost like making a 2007 iMac out of a 2006 iMac. It runs, acts, breathes, and swims like one – and can even run the same operating systems effectively now, as well. Since it has an Intel Core 2 Duo T7400 CPU 64-Bit CPU, it can still hang on for a little while longer despite being from the mid-2000s. With an SSD and an upgraded GPU, it breathes a little life back into the iMac.
Instead of being stuck to OS X Lion, it can now run up to 10.11 El Capitan with the proper patches, run Windows 10 a little better (or way better with a modern low-power GPU), perhaps be patched to run Windows 11, or maybe could be a nice Linux box. I was thinking about putting pearOS NiceC0re on here, perhaps that’s an idea for a new article.
Individually, the parts used to make this project aren’t all that unique or special. But through the combined modifications, we can upgrade 2006 iMacs well beyond what they were originally capable of.
