Most Mac users who need to run Windows are aware that with the
switch to Intel processors, the Mac now has a variety of options. Apple
has provided Boot Camp, offering the option for Leopard-users to choose
Windows or Mac OS X at startup. And commercial virtualizers Parallels
Desktop and VMWare Fusion let Intel Mac users install a wide range of
PC operating systems and run them - or a Boot Camp Windows installation
- in a virtualized session as a program within OS X.
There's a free virtualization alternative, VirtualBox, which is available for Mac
OS X as well as for a range of PC operating systems. But when I
looked at it last year, it was a
work in progress - with the then-current Mac version offering fewer
features than the Windows version. The Mac version lacked support for
networking, for instance, meaning no Internet access (among other
things). In the end, while it ran Windows and other PC operating
systems, the lack of networking and Internet support was a deal-breaker
for me; it just couldn't do what I would want from a PC running
(virtually) on my Mac.
One Year Better
But a year can make a big difference in software development. Over
that time, the VirtualBox project gained the support of Sun
Microsystems, and a new version (1.6) was released in May 2008,
promising - among other enhancements - "new Mac support". So it's time
for another look.
VirtualBox is available in standard binary versions (for Mac
OS X, Windows, a variety of Linux distributions, and
Solaris/OpenSolaris) and in source code form in an open source
VirtualBox Open Source Edition. The binary versions come ready to
install and includes "closed source" proprietary code for a number of
functions including the virtual USB controllers and remote desktop
protocol. These versions are free for home and personal use. Note that
version 1.6 is the first Mac version to be described as out of beta;
the current 1.6.2 Mac version is a 28 MB download.
Like commercial virtualizers, Parallels Desktop and VMWare Fusion,
and like Apple's Boot Camp, VirtualBox is only usable on Intel Macs;
owners of older PowerPC Macs will have to use slower emulation software
like GuestPC if they need to run
Windows on their Macs.
Installing VirtualBox on Your Mac
Installation takes up some 56 MB in your Mac's Applications folder -
of course, drive space needed will skyrocket once you start creating
virtual hard drives. Start it up and click the New toolbar
button. You'll be walked through the process of creating a virtual PC
on your Mac. I was going to install Ubuntu Linux 8.04.
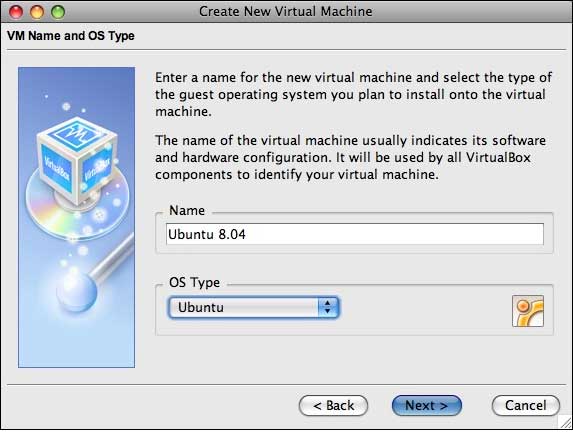
I was first asked to give my new system a name and select its type
from a fairly comprehensive dropdown list that includes Windows
versions from 3.1 through Vista and Windows Server 2008, OS/2 (various
versions), many Linux distributions (and generic Linux kernel
versions), BSD, Solaris, and even plain old DOS.
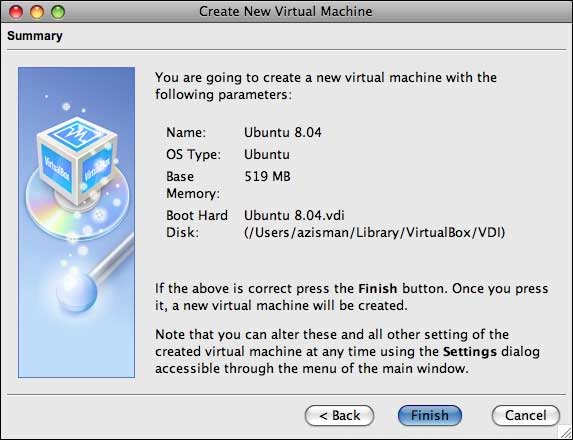
Pick an amount of RAM to dedicate; the default for Ubuntu is 256 MB
- I increased that to 519 MB. Then create a virtual hard drive. There
are a few steps to this - I went with the default of creating a
dynamically expanding image, which saves space by only requiring as
much space on your Mac's hard drive as is actually used at any given
moment, up to a maximum that you set. I also accepted the default
8 GB dynamic image; but at the moment, it's only actually using
about 3.5 GB of drive space.
Once you've made those choices, you're ready to click Start and
install your virtual PC's operating system.
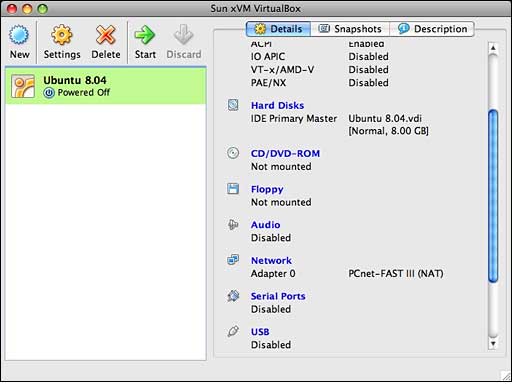
But wait! Before starting it up (and installing your operating
system), you probably should poke around the default settings of your
new virtual system. You can do that either by clicking the Settings
button or by scrolling through the Details listed in the right-hand
pane in the VirtualBox window, and clicking on individual items.
To start with, check the CD/DVD-ROM item; if you are planning to
install from a CD or DVD, make sure the Mount CD/DVD Drive item
is checked and is pointing to your optical drive. Alternatively, if
you've downloaded an image file, for instance, for a Linux
distribution, you can select the ISO Image File item, pointing
it to your image file's name and location.

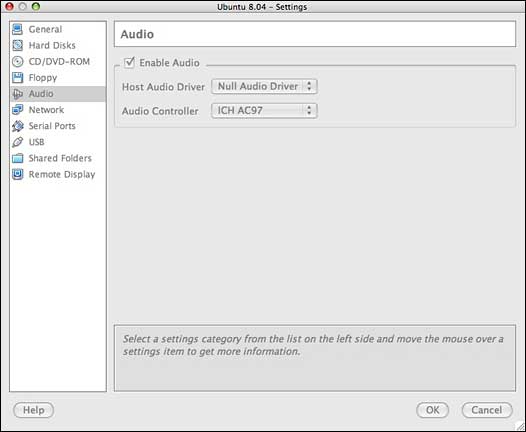
Some of the other defaults are worth a look, as well. The Audio
default enables audio, by default virtualizing an AC97 sound card; you
can switch that to a Sound Blaster card if you prefer - or if your OS
lacks AC97 drivers, like Windows 2000. The defaults also use a "null
audio driver" - the result is that your virtualized PC operating system
detects audio hardware but doesn't actually make any sounds. Maybe you
want that. If not, switch from the null audio driver to the option
labeled "Core Audio".
The network adapter is enabled by default; you can choose between
several network adapter models, again handy if your operating system
lacks built-in support for the default model. Some trial and error may
be required - you can always change it after installing your operating
system, though your virtual PC needs to be shut down to make any
changes.
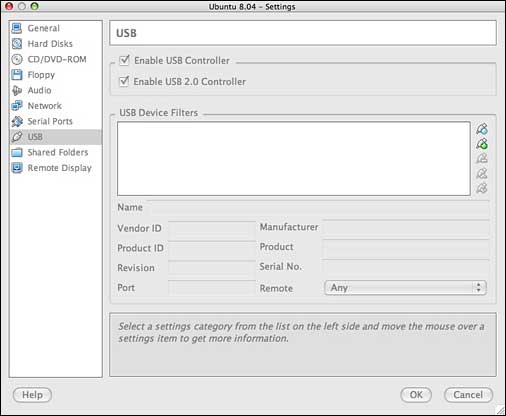
USB Is Off by Default
USB controllers are disabled by default; I turned on the USB and USB
2.0 controllers. With USB enabled, you still need to click on the
Devices menu - after starting up your virtual session - then click on
USB Devices to enable specific hardware like printers.
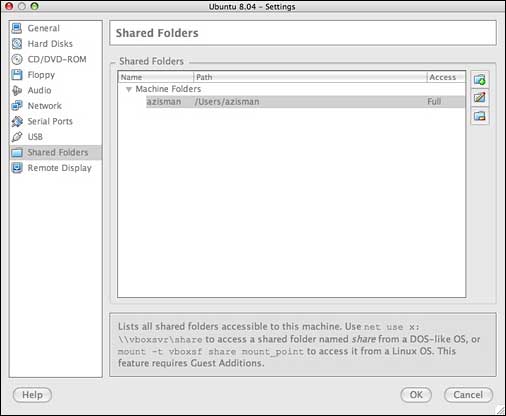
I also set a shared folder, browsing to my home folder on my Mac.
When you choose a folder to be shared, a note appears pointing out that
this feature requires Guest Additions to be installed (post
OS-installation) and telling you how to make use of the shared folder
in Windows and Linux installations. In fact, I lacked the Linux-smarts
required to actually make this feature work in my Ubuntu
installation.
Installing Your Guest Operating System
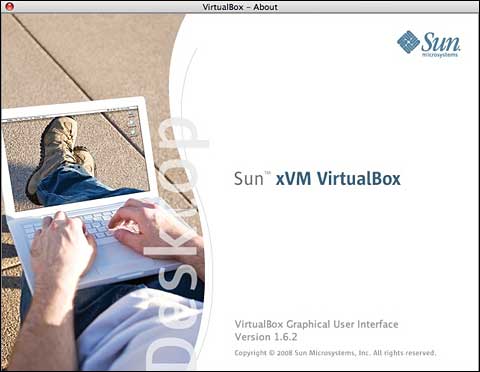
Whew! Finally, it was time to insert my Ubuntu installation CD and
click on the green Start arrow. A Sun splash screen popped up as my new
virtual PC started its boot process.
Within a few seconds, it started reading the Ubuntu CD to begin
installation.
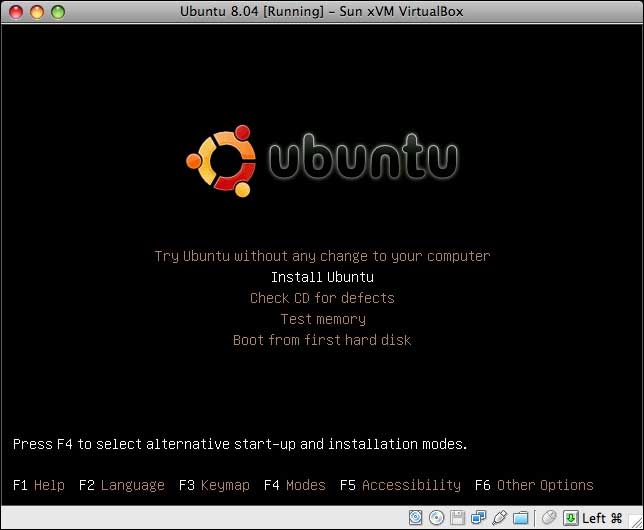
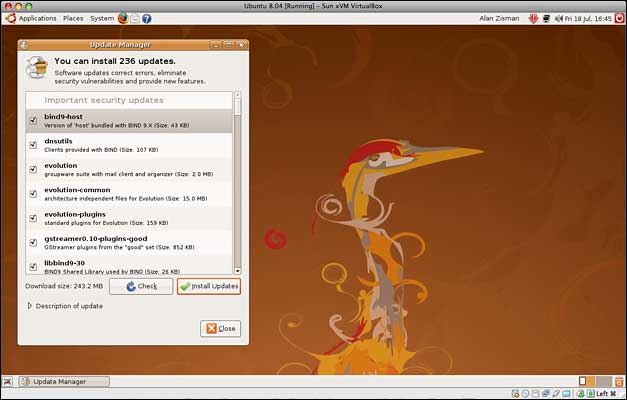
A half hour or so later, I had a working Ubuntu Linux session.
Unlike last year's VirtualBox version, networking worked, meaning I had
Internet access right out of the (virtual) box. As well, that meant
that moments after startup, Ubuntu informed me that there were 236
updates that it wanted to install.
The Importance of Guest Additions
But there was one task I wanted to do first; like commercial
virtualizers Parallels and Fusion - and like older Virtual PC or Guest
PC - VirtualBox includes Additions, software to integrate the
virtualized operating system with its host and to provide
better-than-standard video and other functions.
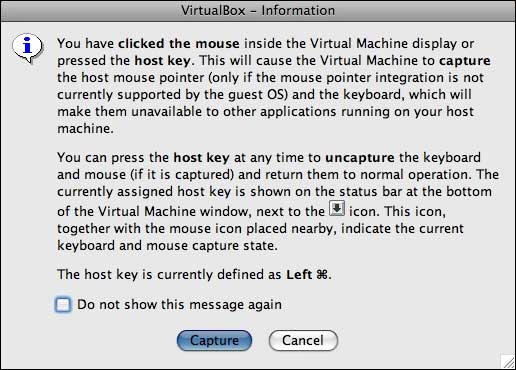
For instance, prior to installing these Guest Additions, when you're
working in the virtual session, your mouse and keyboard are captured by
that session and not readily available if you want to click in another
program window - or even to access the VirtualBox menus. You need to
press a key - by default the left Cmd key - to pass control back to the
host system.
Installing the Additions starts off easily; just click on the
Devices menu (after pressing the left Cmd key so you can move the mouse
there!) and choose Install Guest Additions. This opens a window to a
pre-made virtual CD disc, containing software for Windows and Linux.
There's even an OS/2 version. Installing the Windows version seems
straightforward, though I didn't try it. Software installations in
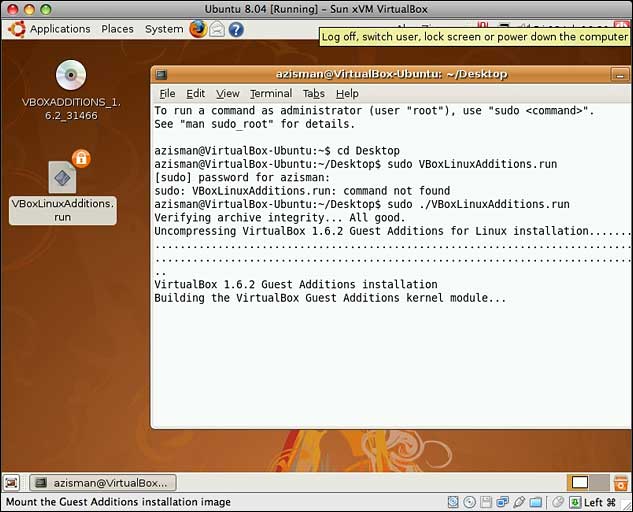
Linux can be trickier. Here's what I did:
- I dragged the VBoxLinuxAdditions.run file to the desktop
- I opened a Terminal window and typed: CD \Desktop to go to
the desktop
- In order to run the Additions file, I typed: sudo
./VBoxLinuxAdditions.run
That worked - sudo is needed in Ubuntu to run as an
administrator; you'll be asked for your password. (Other Linux systems
may require root access; in Ubuntu, you use your personal password
instead.) And the ./ is needed to make the command work,
though I don't really understand why. Just trust me!
With that, the additions started installing. Afterwards, a restart
was required.
Post-restart, I could seamlessly move the mouse between the guest
operating system window and the rest of the Mac without problem. And
enhanced video drivers allowed my Ubuntu session to support a higher
screen resolution - up to 1280 x 800 (though I ran it at 1280 x 768,
which fit better on my 17" iMac desktop).
After clicking on the program's Devices menu's USB Devices item and
enabling the printer plugged into my Mac, I was able to set Ubuntu to
print to that printer without problem; it was also able to locate and
print to the printer shared by a Windows system on my home network.
I lack the Linux smarts to mount the shared folder on my Mac,
despite the hints given in the Settings dialogue. Since I have file
sharing enabled on the Mac, however, I was able to connect to the same
location using Ubuntu's standard Connect to Server option. That's handy
since, unlike Parallels or Fusion, you can't just drag files between
the Mac and guest desktops (even after installing the Guest Additions);
this way, I can move files between the Mac and Ubuntu session.
Some Limitations
You can run your guest operating system in a window or full-screen;
after installing the Guest Additions, Windows guest OS's can also run
in a "Seamless Mode" that apparently displays running programs in the
Dock (I didn't have Windows installed and hence lacked the opportunity
to test this).
Unlike Parallels or VMWare Fusion, VirtualBox does not allow you to
access a Boot Camp installation in a virtual session - it needs
dedicated virtual hard drives. And its seamless mode isn't as
sophisticated as Parallel's Coherence Mode or Fusion's Unity feature,
both of which make the operating system window seem to disappear,
leaving free-floating application windows (this only works with
Windows). And while both Parallels and Fusion offer limited DirectX
support, allowing users to run some (but not all) 3D Windows games,
VirtualBox lacks DirectX support entirely.
But VirtualBox for Mac has grown up; while it doesn't have every feature
available in its commercial virtualizer competitors, it offers good
performance, networking, and USB support. It should give many users the
ability to get work done in Windows, Linux, or other PC operating
systems without having to leave the comfort of OS X.
For free. 

