Welcome back to Classic Restorations! After a three week absence,
I'm feeling well again and ready to chat.
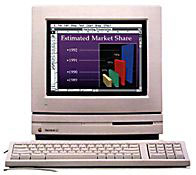
Today I'd like to discuss a new use for one of my favorite Macs, the
Macintosh LC. We'll be outfitting
the LC today to serve as a webcam host. For this purpose the Mac LC is
ideal - it's small (just 3" tall), quiet, and has low power
consumption. Any of its LC cousins would serve equally well for this
project: the LC II, LC III, or the 400-series
Performas.
Welcome to Macintosh LC
 The Macintosh LC was
introduced on October 15, 1990 with a price of US$2,400. When it was
introduced, it was the cheapest color Mac ever - a title it retained
until the introduction of the LC II 17 months later. LCs were snapped
up by schools, together with a cutesy 12" 512 x 384 color monitor and
an Apple II
compatibility card.
The most basic Mac LC contained 2 MB of RAM, 256 KB VRAM
(displaying 256 colors at 512 x 384 on the 12" monitor or 16 colors
at 640 x 480 on Apple's 13" display), a 16 MHz Motorola MC68020
CPU, one 1.44 MB SuperDrive floppy drive, and a 20 MB internal SCSI
hard drive. Dual floppies could be special-ordered to reduce cost
to the education market, and approximately 5% shipped this way.
Externally, the LC can be expanded in much the same way as any
other Macintosh of its age: SCSI, ADB, serial, and sound
input/output ports are all provided. (Sound input was new to the
Mac in October 1990.)
Expandability
Internal expansion options include a 16-bit Processor Direct
Slot (PDS), two 30-pin SIMM slots for memory upgrade (10 MB max),
and the ability to upgrade to 512 KB of VRAM to display 256
colors on a 13" 640 x 480 monitor and 16-bit video on Apple's new
12" 512 x 384 display.
The 68020 CPU has no PMMU, so virtual memory is not possible
except with a CPU upgrade. Since the internal hard drive is SCSI,
it can be upgraded to a fairly modern hard drive with no practical
size limit. Utilization of large hard drives will vary depending
upon what System software is used.
Several different cards are available to expand the Mac LC's
capabilities using the PDS connector. SuperMac Technology offered the
Video
Spigot LC video digitizer. Media Vision's Pro Audio
Spectrum 16 offers CD-quality sound and a PC-style game port.
Video cards were made by Envisio,
Focus, Radius, RasterOps, and others.
Apple, Asante, Sonic Systems, and others produced ethernet cards
to get the LC on a modern network. Apple also offered the
aforementioned Apple II compatibility card.
Accelerators to increase the computing power of the LC were
available from Applied Engineering, DayStar, Formac, MicroMac, and
Sonnet Technology.
Though I am often loathe to recommend any Sonnet accelerators due to
compatibility problems I have experienced, one Sonnet product stands
out. Sonnet's
Presto Plus card seems to solve the "accelerator PDS conundrum" by
offering 32 MB of RAM, a 33 MHz 68040 CPU, and ethernet all on one
card. Furthermore, this is the only Mac LC accelerator still available
retail. While $99 seems pretty steep (about the price of a used
Beige G3), it could be
well worth it to a dedicated LC fanatic.
Building the Webcam LC
The small size and low power consumption of the Mac LC will make it
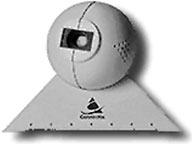
ideal for use as a webcam host. A Mac LC and a serial Mac-compatible
webcam, such as the Connectix QuickCam or Color
QuickCam, will be necessary. (eBay
is always a good place to start, followed by Low End Mac's Swap List.)
 Even a
stock LC can serve this purpose; extensive upgrades will not be
required.
If you would like to connect your LC to the Internet via ethernet,
an ethernet card is necessary. Alternately, the LC can connect to
another computer on your ethernet network serving as a MacIP or PPP gateway through the serial
port.
Expansive storage is not required, either. Any old hard drive will
suffice. If the stock hard drive in your LC is still working, you're
all set on the storage front.
At least 4 MB of RAM is required. This means adding a pair of 1, 2,
or 4 MB SIMMs in addition to the LC's built-in 2 MB. The LC II and
later models already come with 4 MB of RAM.
Begin with an updated installation of System 7.0.1. (see System 7: Bigger, Better, More Expandable, and a
Bit Slower than System 6). At a minimum, QuickTime 2.5 (or earlier,
if you prefer) and MacTCP are necessary. If your ethernet card requires
drivers, don't forget to install them! If you'll be connecting by PPP,
add FreePPP to your System Folder. (You can download both MacTCP and FreePPP from Low
End Mac's Dropbox account.)
Many have written about getting these old Macs on the Web. Look
at Internet
Access for Classic Macs on Jag's House for more
information.
Install the appropriate drivers for your QuickCam and find a
suitable subject to photograph. Now you should be able to launch
the QuickPICT application and take pictures with the QuickCam.
Verify QuickCam operation before proceeding to...

Get Your Serve On
Once the QuickCam is working, let's get the Mac LC up and
running as a web server. NetPresentz (free)
uses File Sharing permissions to control Web access, so File
Sharing must be enabled.
 Using the Sharing Setup control panel, name your LC and
enable File Sharing. Open Users and Groups, double-click on
"Guest", and enable Guest access. Create a new folder on the LC's
hard drive and name it "Web Documents" (or some other suitable
name). Share this folder with guest-read permission by selecting
it, choosing "Sharing..." from the File menu, and setting the
appropriate options.


Now that your "Web Documents" folder is shared, we can put it on
the Internet using NetPresentz. Launch NetPresentz setup, tick the
"I Registered" checkbox in the FTP tab, and set the appropriate
settings in the WWW tab. Fire up NetPresentz, and you're ready to
start writing HTML.
Putting It All Together
Next, decide how often you want your webcam image to update.
Using your favorite method, author the web page you'd like the
webcam image to appear on. Add this tag to the beginning, after the
<head> tag and before the </head> tag:
<META HTTP-EQUIV="Refresh"
CONTENT="XXX;URL=http://your.url.here/">
Replace the XXX in the example with the number of seconds you
want between updates - for example, 14. Make sure to include the
webcam image itself in the web page, using code similar to
this:
<IMG SRC=webcam.jpg>
Save the HTML file in your "Web Documents" folder. Unless you
have some reason to choose a different name, index.html is a good
name for your page.
To start capturing images, launch QuickPICT. From the Settings
menu, choose Capture Mode: Auto Capture. A window will pop up. Fill
in appropriate options. Make sure to use JPEG format and to save
the file in your "Web Documents" folder with the same name used in
the HTML file (webcam.jpg in our example).
Now here's the trick - tell QuickPICT to take a new picture with
about three-quarters the delay you chose for the web page. For
example, if you filled in a 14-second HTML refresh, tell QuickPICT
to take pictures every 10 seconds. This will greatly reduce the
chance of catching the LC while it's in the process of taking a new
picture. Click "Begin Capture" to start the fun.
Start picture-taking, point your browser at your LC, and enjoy
the show! When you wish to stop taking pictures, simply click "End
Capture" in QuickPICT. To restart, follow the above directions
again.
Congratulations, you've given a great old Mac a new lease on
life and a new job! 
Further Reading

 The Macintosh LC was
introduced on October 15, 1990 with a price of US$2,400. When it was
introduced, it was the cheapest color Mac ever - a title it retained
until the introduction of the LC II 17 months later. LCs were snapped
up by schools, together with a cutesy 12" 512 x 384 color monitor and
an
  Even a
stock LC can serve this purpose; extensive upgrades will not be
required.
 Using the Sharing Setup control panel, name your LC and
enable File Sharing. Open Users and Groups, double-click on
"Guest", and enable Guest access. Create a new folder on the LC's
hard drive and name it "Web Documents" (or some other suitable
name). Share this folder with guest-read permission by selecting
it, choosing "Sharing..." from the File menu, and setting the
appropriate options.


